STAMPlorations has a new product line called Colorables. I would like to show you some projects using the Colorables Color me Blooms Spring Florals and the Colorables Color me Blooms A2 Card Front that I created together with my daughter Emily (11).
- color one of the STAMPlorations Colorables Color me Blooms Spring Florals with Spectrum Noir Triblend Markers and add extra shading with Faber-Castell Polychromos pencils
- adhere the florals to a white panel and add black and white splatters
- the sentiment is from the CUTplorations Skinny Sentiments set cut from vellum and black cardstock
- stamp the sentiment from the STAMPlorations Softly set with Versamark onto one of the STAMPlorations Colorables Color me Blooms A2 Card Fronts and heat-emboss it with Ranger Liquid Platinum embossing powder
- add some stamping using the STAMPlorations Mixed Media Grunge, STAMPlorations Mixed Media Elements and the STAMPlorations Art Marks sets and Altenew Crisp Ink (Aqualicious, Teal Cave, Galactic Stream) and Versafine Clair Nocturne
- add a strip of black cardstock and a strip of patterned paper to the left side of the panel before adhering it to a cardbase
- stamp the sentiment from the STAMPlorations Softly set with Versamark onto one of the STAMPlorations Colorables Color me Blooms A2 Card Fronts and heat-emboss it with WOW! Metallic Gold Rich Super Fine embossing powder
- add some stamping using the STAMPlorations Mixed Media Grunge, STAMPlorations Mixed Media Elements sets and Altenew Crisp Ink (Wisteria, Hydrangea, Andromeda) and Versafine Clair Nocturne
- add a strip of black cardstock and a strip of patterned paper to the left side of the panel before adhering it to a cardbase
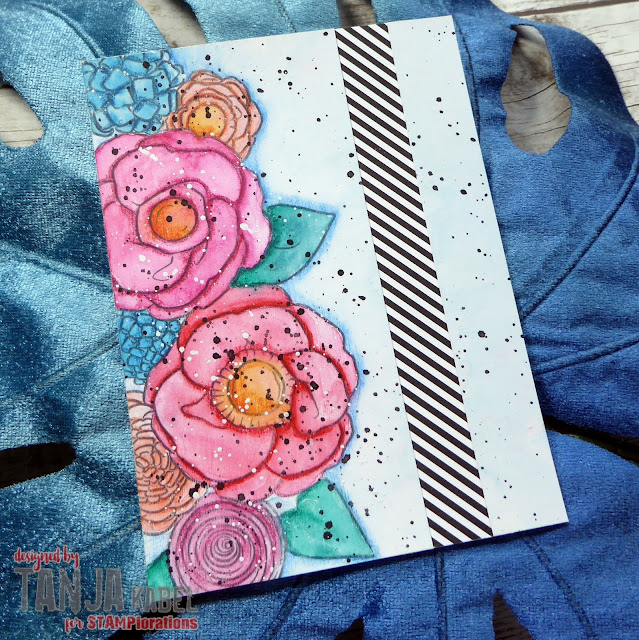
- cover one of the STAMPlorations Colorables Color me Blooms A2 Card Fronts with two layers of Schmincke Watercolor Ground and let it dry thoroughly
- color the image with Derwent Inktense Pencils and a damp watercolor brush
- add black and white splatters
- add a strip of patterned paper into the middle of the panel before adhering it to a cardbase
- cover one of the STAMPlorations Colorables Color me Blooms Spring Florals with two layers of Schmincke Watercolor Ground and let it dry thoroughly
- color the image with Derwent Inktense Pencils and a damp watercolor brush
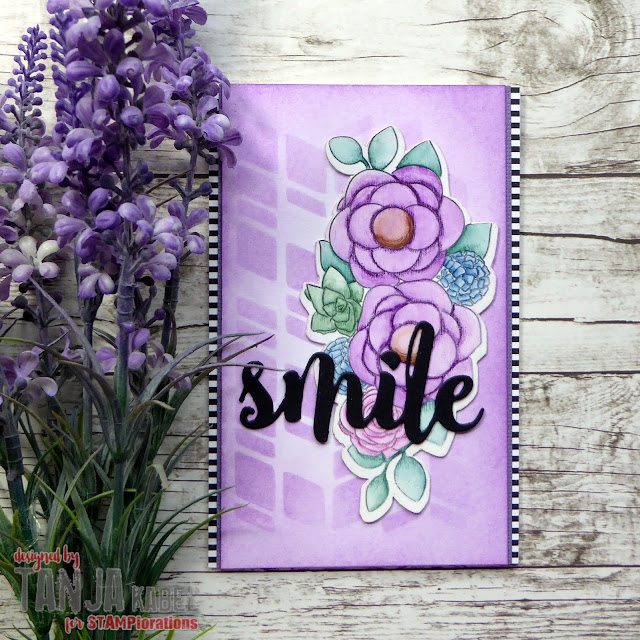
- create a background on a panel of smooth white cardstock using the ARTplorations Shutters Mini stencil, Distress Oxide Ink Dusty Concord and a Blending Brush
- cut the CUTplorations Smile sentiment from black cardstock
- add strips of lilac cardstock and patterned paper to the left and right side of the panel before adhering it to a cardbase
- color one of the STAMPlorations Colorables Color me Blooms Spring Florals with Spectrum Noir Triblend Markers and add extra shading with Faber-Castell Polychromos pencils
- adhere the florals to a white panel and add black and white splatters
- the sentiment is from the CUTplorations Skinny Sentiments set cut from vellum and lilac cardstock
- adhere the panel to a lilac cardbase
- ink up the edges with Distress Oxide Ink Dusty Concord and a Blending Brush
Hugs,


No comments:
Post a Comment
Thank you for visiting my blog. Your comments brighten my day.
In line with the new EU General Data Protection Regulation (GDPR) by commenting you do so in the knowledge that your name and comment are visible to all who visit this blog and thereby consent to the use of that personal information for that specific purpose. For more information read my data privacy statement/Datenschutzerklärung.