Showing posts with label Fadeout Ink. Show all posts

Thursday, February 20, 2025

Tropical Vacation

Hi there,

Í used the My Favorite Things Tropical Toucans stamp set to create this colorful tropical card for Mennys Bastelshop:

  • stamp a scene using the My Favorite Things Tropical Toucans stamp set and Ink on 3 Fadeout Ink - use the masking technique
  • color the images with Derwent Inktense Pencils and a waterbrush
  • add highlights with a white gel pen
  • add some watered-down splatters with Distress Ink Tumbled Glass and ink up the edges of the panel with that same ink
  • stamp the sentiment from the same set with Distress Oxide Ink Tumbled Glass
  • add strips of patterned paper to the top and bottom of the panel before adhering it to a cardbase

Have a wonderful day.

Hugs,


Thursday, May 16, 2024

Birthday Dino-Corn

Hi there,

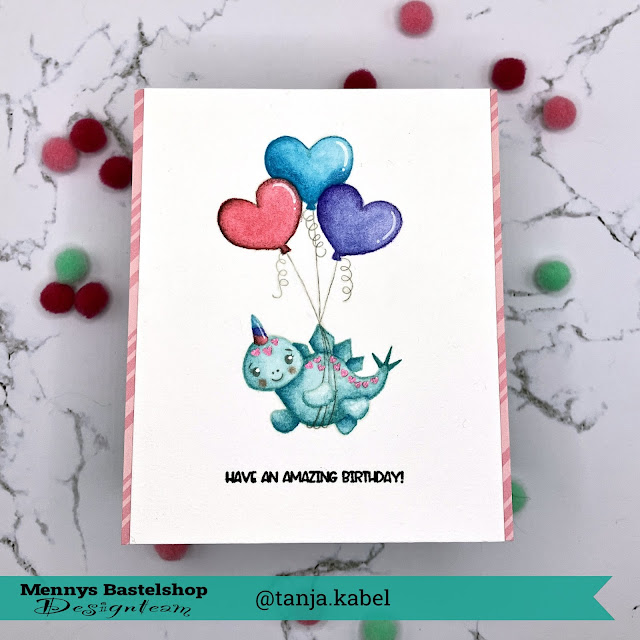
I created this sweet Birthday Card using the Streamside Studios Dino-Corns stamp set for Mennys Bastelshop:

  • stamp one of the adorable dino-corns from the Streamside Studios Dino-Corns set with InkOn3 Fadeout Ink for a no-line coloring look
  • stamp the sentiment from the same set with Versafine Onyx Black
  • color the image with watercolors
  • add highlights with a white gel pen and color over the hearts with the Karin Decogel Milky Way Pink pen
  • add strips of patterned paper to the left and right side of the watercolor panel before adhering it to a cardbase

Have a wonderful day.

Hugs,


Monday, March 18, 2024

Wish

Hi there,

I created this watercolor card using the Karten-Kunst Delicate Plants stamp set:

  • stamp the Karten-Kunst Delicate Plants with InkOn3 Fadeout Ink
  • color the image with watercolors and add extra-shading with Faber-Castell Polychromos pencils
  • add splatters with green and pink watercolors and details with a white gel pen
  • stamp the sentiment from the Karten-Kunst Schriftzug-Set Wünsch Dir was with Versamark onto a torn strip of vellum and heat-emboss it with WOW! Polished Silver embossing powder
  • adhere the panel to a grey cardbase


Thanks for stopping by.

Hugs,


Sunday, December 24, 2023

Merry Christmas Santa

Hi there,

I created this vintage Christmas Card using one of the adorable Anjas Basteltraum Weihnachtsmänner:

  • cut out a circle from watercolor cardstock
  • stamp one of the Anjas Basteltraum Weihnachtsmänner with InkOn3 Fadeout Ink 
  • color the image with watercolors and add extra shading with Faber-Castell Polychromos pencils
  • cut out the Sunny Studio Stamps Mini Mat 2 from patterned paper
  • create a background on Neenah Desert Storm kraft cardstock using snowflakes from the Anjas Basteltraum Weihnachtssprüche set, white pigment ink, white gouache and Distress Ink Walnut Stain
  • cut out a poinsettia and some leaves from the Spellbinders Christmas Bird Poinsettia die set and add extra shading with Distress Ink (Forest Moss, Aged Mahogany)
Have a wonderful Christmas Time.

Hugs,


Saturday, February 11, 2023

Watercolor Greetings

Hi there,

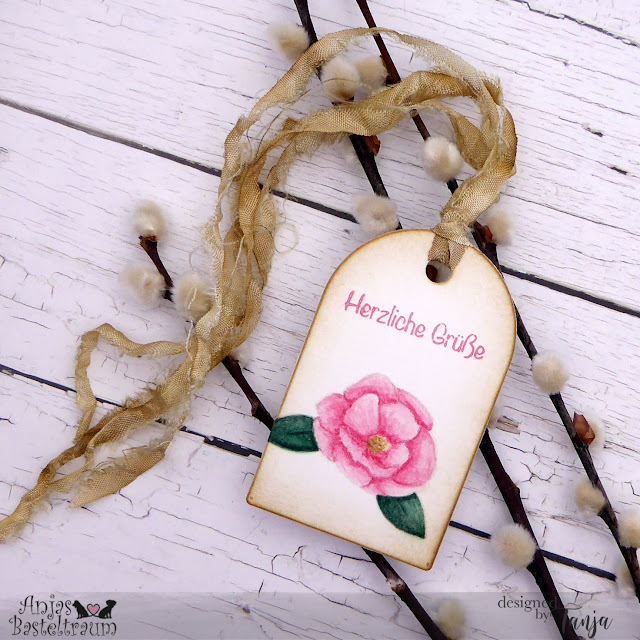
I created this no-line coloring watercolor tag using the new Anjas bastelraum Blumengrüße set:


  • cut out a Clearly Besotted Stamps Rounded Tag from watercolor paper
  • use the Ink on 3 Fadeout Ink and the Masking Technique two stamp a flower and two leaves from the Anjas Basteltraum Blumengrüße set
  • color the image with watercolors
  • stamp the sentiment from the Anjas Basteltraum Kleine Sprüche Blumengruß set with Distress Oxide Ink Worn Lipstick
  • ink up the edges of the tag with Distress Ink Frayed Burlap
  • dye a piece of torn seam biding with that same watered-down ink and thread it through the hole of the tag


Have a wonderful day.

Hugs,


Sunday, February 23, 2020

In you is a Dragon

Hi there,

today I would like to show you this sweet dragon bookmark:

  • stamp some cute dragons from the Clearly Besotted Stamps Hot Stuff set with Ink on 3 Fadeout Ink and color the images with Faber-Castell Polychromos Pencils
  • add highlights with a white gel pen and color their faces back in with a black fineliner
  • stamp the sentiment from the Mama Elephant Dragon Wishes set with Versafine Onyx Black
  • dye a piece of torn seam binding with Distress Stain Salty Ocean and thread it through the hole of the tag


Have a colorful day.

Hugs,


Friday, December 13, 2019

Joy

Hi there,

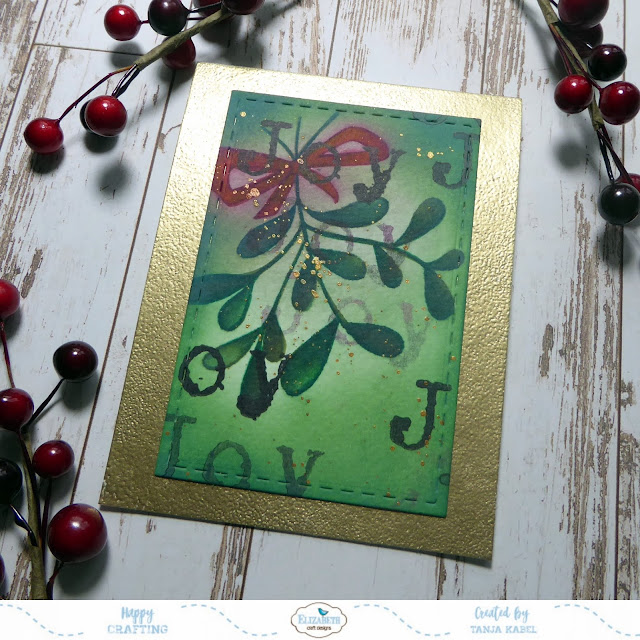
I created this Christmas Card using one of the wonderful Charlene van der Vorst stamp sets from Elizabeth Craft Designs:

  • cut out a stitched panel from watercolor cardstock using one of the Elizabeth Craft Designs Stitched Rectangles 
  • stamp the mistletoe from the Elizabeth Craft Designs Oh the Joy of Christmas set with Ink on 3 Fadeout Ink  and color the image with ZIG Clean Color Real Brush Pens
  • ink up the background with Distress Ink Pine Needles and a Blending Brush
  • add some splatters with Finetec Mica Watercolors Inca Gold
  • stamp the sentiment from the same set with Versafine Clair Nocturne - use first, second and even third generation stamping
  • cover the edges of the cardbase with Versamark and heat-emboss them with WOW! Metallic Gold Rich embossing powder


Have a christmasy day.

Hugs,


Friday, August 23, 2019

Bloom Tag

Hi there,

not only Joset but also Charlene has a new release over on Elizabeth Craft Designs - you should really check out the shop for those new wonderful stamp sets:

  • cut out the smaller tag from the Elizabeth Craft Designs Planner Essentials 2 die set from watercolor paper
  • stamp one of the beautiful flowers from the Elizabeth Craft Designs Garden Flowers set with Ink on 3 Fadeout Ink 
  • color the image with Mijello Mission Gold watercolors
  • add same dark green and white splatters
  • add details with a white gel pen and a black fineliner
  • stamp the sentiment from the Elizabeth Craft Designs Field of Flowers set with Versfaine Clair Nocturne 
  • dye a piece of seam binding with some leftover watercolor and thread it through the hole of the tag


Thanks for stopping by today.

Hugs,


Sunday, March 10, 2019

Stamp Connection #47

Hi there,

connected through our love for card making, blogging and being from Germany we (Cornelia from Stempel Spass and I) decided to create a monthly project within predefined requirements. We are going to show you the result every 2nd Sunday of the month and this is our 47th transatlantic get-together!

Our requirement for this meet-up was:
"Easter with Embossing Folder and Die Cuts"

  • stamp the bunny, the sheep, an egg and some flowers from the Clearly Besotted Stamps Spring Plushies set with Ink on 3 Fadeout Ink - use the masking technique
  • color the images with Derwent Inktense pencils and a damp watercolor brush
  • frame the image with an Avery Elle Wonky Scalloped Frame cut from patterned paper from the Doodlebug Design Easter Express 6x6 paper pad
  • create a background on smooth white cardstock with a plaid embossing folder
  • stamp the sentiment from the same set with Versamark onto a sentiment strip cut from orange cardstock and heat-emboss it with WOW! Bright White Super Fine embossing powder
  • adhere the panel to an orange cardbase


Now make sure to hop over to see Cornelia's Creation.

Thanks for stopping by. We hope to see you again at the ...


Hugs,