Showing posts with label Poppy Stamps. Show all posts

Thursday, May 1, 2025

Vroom, Vroom - Part 1

Hi there,

I created this fun masculine card for Mennys Bastelshop using the Mama Elephant We Ride stamp set:

  • stamp one of the adorable images from the Mama Elephant We Ride set with no-line coloring ink onto a panel of watercolor paper cut with one of the Tattered Lace Torn Edge Rectangles
  • color the image and the background with Derwent Inktense pencils and a waterbrush
  • add highlights with a white gel pen
  • cut another panel and ink up all the edges with Distress Ink Pumice Stone
  • stamp the sentiment from the same set with Distress Oxide Ink Pumice Stone
  • add My Favorite Things Scribbles and Poppy Stamps Stitched Buttons cut from blue and grey colored cardstock as final embellishments - sew the buttons on with some thread

Thanks for stopping by today.

Hugs,


Monday, October 28, 2024

Wishing on Butterflies

Hi there,

I created this card using the Karten-Kunst Das rockts Wünsch Dir was die set:

  • cut out the Karten-Kunst Das rockt Wünsch Dir was from grey cardstock and DIY striped cardstock
  • create a background using the Karten-Kunst Blooming Plants set and Distress Oxide Ink Pumice Stone
  • ink up the edges of the panel with Distress Ink Pumice Stone
  • add some Poppy Stamps Bunches o' Butterflies cut from pink glitter paper as final embellishments

Thanks for stopping by.

Hugs,


Monday, August 26, 2024

Deepest Sympathy

Hi there,

I created this Condolence Card for the Karten-Kunst Blog inspired by the amazing projects of the wonderful Gisette:

  • cut out grass cardstock and tissue paper squares with the help of the Karten-Kunst Card Designer Squares
  • cut out a little butterfly from the Poppy Stamps Bunches o' Butterflies die set and a Karten-Kunst Branch Wreath
  • cover these elements with Versamark and heat-emboss them with WOW! Perissa embossing powder
  • stamp the sentiment from the Karten-Kunst Aus der Schreibmaschine set with Versamark and heat-emboss it with WOW! Polished Gold Super Fine embossing powder
  • stamp some Karten-Kunst Blooming Plants into the background with Altenew Crisp Ink Morning Frost

Thanks for stopping by.

Hugs,


Tuesday, July 19, 2022

Life is Good

Hi there,

my daughter and I spent some quality time together and created two lovely cards using the adorable  Anjas Basteltraum Strandausflug stamp set:

  • stamp one of the raccoons and the beach towel from the Anjas Basteltraum Strandausflug set with Lawn Fawn Jet Black - use the masking technique
  • color the image with Spectrum Noir Triblend Markers, add extra shading with Faber-Castell Polychromos pencils and highlights with a white gel pen
  • create a background on a smooth white panel with the help of Distress Ink (Tea Dye, Salty Ocean)
  • use white acrylic paint for the ocean spray
  • add some splatters with watered-down Distress Ink Tea Tye and white gouache
  • add some white Poppy Stamps Whittle Clouds
  • the sentiment is from the Lawn Fawn Life is Good set 
  • stamp it with Versamark onto a kraft sentiment strip and heat-emboss it with WOW! Bright Super Fine embossing powder
  • add a strip of patterned paper to the left and right of the panel before adhering it to a cardbase


And here is the card Emily created with that same Anjas Basteltraum Strandausflug stamp set. She is so very talented. 


Thanks for stopping by.

Hugs,


Tuesday, October 15, 2019

Happy Fall Y'All!

Hi there,

I created this halloweeny fall card for Gerda Steiner Designs:

  • stamp the owl from the Gerda Steiner Designs Where is the Candy? set with Lawn Fawn Crunchy Leaf
  • color the image with Delta, Touch Twin Brush and Copic Markers and add extra shading with Faber-Castell Polychromos pencils
  • cut out a stitched panel from kraft cardstock and cut out the Poppy Stamps Leafy Breeze
  • layer a piece of glitter paper behind the openings
  • stamp some small leaves from the Gerda Steiner Designs Happy Fall set with Versamark and heat-emboss them with WOW! Rose Glintz embossing powder
  • stamp the sentiment from the Gerda Steiner Designs Fall in Love set with Versamark and heat-emboss it with WOW! Bright White Super Fine embossing powder
  • ink up the edges of the panel and the sentiment strip with Distress Oxide Ink Vintage Photo
  • assemble the card


Have a wonderful day.

Hugs,


Monday, November 13, 2017

Merry Christmas Bunny

Hi there,

today, I am using a super adorable new stamp set from the Karten-Kunst Shop called "Viecher im Winter" (Winter Critters):

  • stamp the sweet little bunny from the Karten-Kunst Viecher im Winter set with Versafine Onyx Black and color the image with Derwent Drawing pencils
  • add highlights with a white gel pen and Glossy Accents to its nose
  • cut out a stitched rectangle from confetti white cardstock and cut the sentiment from the Karten Kunst Kreistexte Ein frohes Weihnachtsfest from that panel as well
  • cut the sentiment again but this time from blue grey cardstock 
  • layer a piece of acetate behind the panel and puzzle the white little pieces back into the gaps to create that wonderful inlaid look
  • I used Multi Medium Matte here
  • add some snowflakes to the acetate window using Nuvo Crystal Drops Gloss White - and let them dry thoroughly
  • before adhering the panel to a white cardbase we need to create that multi-layered background
  • add color to a white piece of cardstock with Distress Oxide Ink Salty Ocean and mist it with pearlized water
  • cut out the Poppy Stamps House in the Woods from confetti white cardstock and cut away the little house for we want to use the bunny as out focal point
  • cut a little hill shape from confetti white cardstock for the bunny to sleep on

I hope you got inspired.

Yours,


Saturday, January 7, 2017

Happy Mail Owl

Hi there,

today, I would like to share another creation using an image from the Gerda Steiner Designs December-January Digital-Stamp-Bundle:

  • color the Gerda Steiner Designs Owl Letter image which is available as part of the December-January Digital-Stamp-Bundle with Delta, Touch Twin Brush and Copic Markers
  • add highlights with a white gel pen
  • cut out two stitched panels from watercolor paper
  • use one of those panels as a background and add color with Distress Ink (Weathered Wood) and a Mini Ink Blending Tool
  • spritz that background with Pearlized Water for more texture
  • cut the Poppy Stamps House in the Woods from the other panel and color the trees with watered-down Distress Ink (Iced Spruce)
  • stamp the sentiment from the Create a Smile Happy Mail set with Versafine (Vinatge Sepia) - I used my Mini MISTI to get a crisp impression on the textured surface
  • adhere the adorable little owl with foam tape 

I hope you have a wonderful day.

Yours,


Monday, December 26, 2016

Merry Christmas Sleeping Deer

Hi there,

I created this cute little Christmas Scene for the Karten-Kunst Blog:

  • cut out two stitched panels from watercolor paper 
  • cut out the Poppy Stamps House in the Woods from one of them - I cut away the house because I didn't need it for my scene
  • add a little shading to the trees using watered-down Distress Ink (Hickory Smoke)
  • create a background on the other panel with Distress Inks (Tumbled Glass, Shaded Lilac, Broken China) and a Mini Ink Blending Tool 
  • mist it the finished background panel with Pearlized Water
  • stamp some snowflakes from the Memory Box Snowglobe Wishes set with Delicata (Silvery Shimmer) and add some dots with a white gel pen
  • color the adorable little sleeping deer from the same stamp set with Delta, Touch Twin Brush and Copic Markers 
  • add the sentiment with Versafine (Onyx Black)

Have a very Merry Christmas.

Yours,


Sunday, December 18, 2016

Stamp Connection #20

Hi there,

connected through our love for card making, blogging and being from Germany we (Cornelia from Stempel Spass and I) decided to create a monthly project within predefined requirements. We are going to show you the result every 3rd Sunday of the month and this is our 20th transatlantic get-together!

Our requirements for this meet-up were:
"winter + not a card"

  • cut out the Lori Whitlock Scalloped Flap Treat Box from patterned paper from the Crate Paper Bundled up Collection
  • cut a window-opening into the front of the box and cover it with a piece of acetate from the inside
  • create a background on a piece of watercolor paper using Distress Inks (Broken China, Salty Ocean), add splatters with Pearlized Water and white Kuretake Gansai Tambi watercolor
  • pop up a stitched hillside cut with one of the Mama Elephant Landscape Trio dies from white cardstock with the help of one of the Mama Elephant Pop up Trio dies
  • now it's time for my favorite part: creating the little scene
  • stamp the two trees and the gift from the Poppy Stamps Christmas Delights set and one of the sweet little bunnies from the Memory Box Bunny Wishes set onto a piece of Perfect Colouring Paper with Memento (Tuxedo Black)
  • color the images with Delta and Touch Twin Brush Markers
  • adhere the elements with double-sided adhesive
  • add Liquid Applique (White) around the window-opening

Now make sure to hop over to see Cornelia's Creation.

Thanks for stopping by. We hope to see you again at the ...


Yours,


Wednesday, November 30, 2016

Wishing you Joy

Hi there,

why don't you join us for our Make your Mark Challenge over at Addicted to Stamps and More?


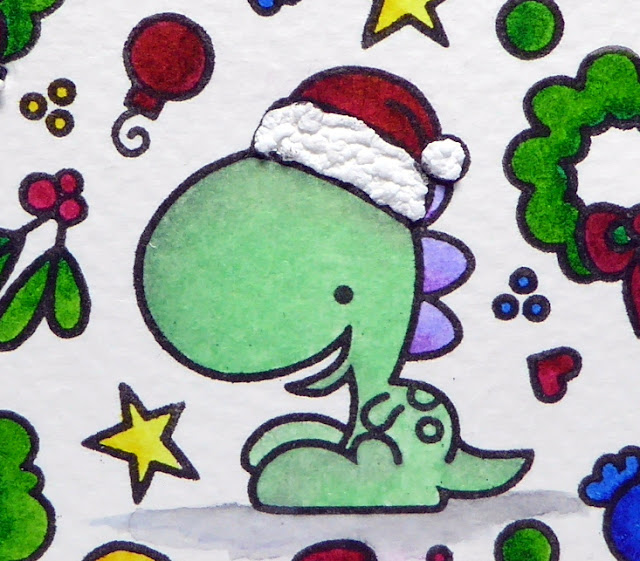
  • stamp the Santa Hat from the Paper Smooches Chubby Chum Pals set with Versafine (Onyx Black) onto a stitched panel cut from watercolor paper and mask it 
  • stamp the super adorable dragon from the Paper Smooches Party Posse set with the same black ink
  • create a background using little images from the Paper Smooches Sugar Rush, Hang ups and Promenade stamp sets
  • color all the images with ZIG Clean Color Real Brush Pens and a damp watercolor brush
  • cut out the Poppy Stamps Swirled Joy from the colorful background and four times from black cardstock
  • puzzle one black diecut into the panel and layer the other black die cuts on top of that
  • adhere the sentiment cut from the background slightly off-set
  • mat the panel onto black cardstock and use the Perfect Layers Mini Tool to create a thin black border around the panel
  • add some Radiant Neon Amplify (White) to the rim of the Santa Hat and its pompon

Here are close-ups of the cute little dragon and the sentiment:


I can't wait to see your creations in the gallery.

Yours,


Monday, November 21, 2016

Adventszeit Bunny

Hi there,

I would like to show you a watercolor Christmas Tag over on the Karten-Kunst Blog:

  • cut out a stitched tag form watercolor paper
  • stamp one of the adorable little bunnies from the Memory Box Bunny Wishes set with Versafine (Onyx Black) and mask it off
  • stamp the poinsettia and two leaves from the Poppy Stamps Poinsettia Peace set with Versamark and heat-emboss it with Judi Kins Egyptian Gold embossing powder
  • color the images and the background with Jaxon Aquarelle watercolors
  • stamp the sentiment from the Karten-Kunst Capri Weihnachtspost with Versafine (Onyx Black) and heat-emboss it with clear embossing powder
  • dye a piece of seam binding with Distress Ink (Mowed Lawn) and thread it through the hole of the tag


I hope you got inspired.

Yours,


Monday, November 14, 2016

Nikolaustag

Hi there,

I would like to share a Pop-up Christmas Card with you over at the Karten-Kunst Blog:

  • stamp the bunny, the cap and the little present from the Memory Box Holiday Bunnies set and the big present, the bag and the tree from the Poppy Stamps Christmas Delights set with Memento (Tuxedo Black)
  • color the images with Delta and Touch Twin Brush Markers
  • cut the Memory Box Country Landscape from grey cardstock - color the cardbase behind the windows with an Alcohol Marker
  • ink up the edges of the top of the card with Distress Ink (Tumbled Glass)
  • stamp some stars from the Memory Box Holiday Bunnies with Delicata (Golden Glitz)
  • prepare a pop-up panel from white cardstock - I used three of the Lawn Fawn Everyday Pop-ups and the My Favourite Things Stitched Snow Drifts to give a finished look to the edges
  • adhere the images to the pop-ups with liquid glue - this will give you a little wiggle room

And this is how the card looks from the outside:

  • cut a piece of patterned paper from the Maja Design Vintage Winter 6x6 paper pad into shape with one of the My Favourite Things Stitched Basic Edges
  • ink up the edges of the patterened paper piece and the cardbase with Distress Ink (Antique Linen)
  • stamp the sentiment from the Karten-Kunst Capri Weihanchtspost set with Versafine (Vintage Sepia)
  • add some splatters with Heidi Swapp Color Shine (Gold)

I hope you got inspired.

Yours,


Sunday, November 6, 2016

Poinsettia Candle Holder

Hi there,

I would like to show you this fun Alcohol Ink Technique for this month's Happy Little Stampers Mixed Media Challenge:


I can't wait to see your creations.

Yours,


Wednesday, August 31, 2016

Fun Hedgehog

Hi there,

today, I would like to show you this fun creation using the brand new Gerda Steiner Designs Cheerful Hedgehogs stamp set:

  • cut out a circle using one of the My Favorite Things Stitched Wonky Circle STAX dies from Confetti White cardstock
  • color the little hedgehog and the leaves from the Gerda Steiner Designs Cheerful Hedgehogs stamp set with Lyra Rembrandt Polycolor Pencils and Zest-it
  • cut out the Poppy Stamps Leafy Breeze from Neenah Desert Storm kraft cardstock and layer some orange glitter cardstock behind the cutout
  • stamp the first part of the sentiment from the Gerda Steiner Designs Monster stamp set with Versafine (Vintage Sepia) onto a stitched banner and add the second part of the sentiment with a Dymo Label Maker
  • add a strip of dark brown cardstock and orange glitter paper to the right side of the panel before adhering it to the cardbase

Allsorts Challenge #378 - Use at least two Dies

Craft your Passion Challenge #327 - Anything goes

Send a Smile 4 Kids Challenge - Anything goes

Sweet Stampin' Challenge - No Designer Paper

Simon says Stamp Monday Challenge - It's a Stitch up

Have a colorful day.

Yours,


Wednesday, August 17, 2016

Heart Bear

Hi there,

today, I would like to show you a card I made with this adorable Digital Stamp from Gerda Steiner Designs:

  • color the adorable little Gerda Steiner Desings Heart Bear with Delta and Touch Twin Brush Markers
  • add Spectrum Noir Clear Sparkle to the heart and some details with a white gel pen
  • cut out four hearts from the Pink Paislee Pen Pals 6x6 paper pad using one of the Poppy Stamps Stitched Heart Trio dies
  • use pink thread to sew them onto a stitched watercolor paper panel
  • create a background for the little bear with the help of Distress Re-Inkers (Tumbled Glass, Pumice Stone) and a waterbrush
  • stamp the sentiment from the Mama Elephant In my Heart stamp set with Versafine (Smokey Gray) - I used my MISTI just to make sure I don't screw this up :o)
  • add a strip of shiny pink cardstock to the left side of the panel before adhering it to a white cardbase
 

Alphabet Challenge - L for Love

Craftyhazelnut's Patterned Paper August Challenge

CAS-ual Friday Challenge #154 - Time to Color


Come and get it Challenge - Punches or Dies

Inkspirational Challenge #115 - Patterned Paper


A Bit More Time to Craft Challenge #26 - Anything goes

613 Avenue Create Challenge #188 - Anything goes


Thanks for stopping by.

Yours,


Friday, December 25, 2015

Love Fairy

http://thecottagemarket.com/2015/11/free-christmas-printable-may-your-days-be-merry-and-bright-8x10-print.html
This is one of the presents my daughter Emily (5) got for Christmas this year. I created it with a new lovely image from A Day for Daisies:


Here is a close-up of the sweet little fairy:


I would like to share my project at the following challenges:

613 Avenue Create Challenge #155 - Anything goes

Crafty Creations Challenge #305 - Anything goes

Craftyhazelnut's Patterned Paper December Challenge

Inkspirational Challenge #98 - Bah Humbug!


Little Red Wagon Challenge #321 - Sparkle and Shine

Cute Card Thurday Challenge #405 - Anything goes

Simon Says Stamp Wednesday Challenge - Simon says make it sparkle

I hope that you got inspired.

Yours,