Showing posts with label Distress Marker. Show all posts

Saturday, December 28, 2019

Season's Greeting Slider Card

Hi there,

I created this Christmas Slider Card using lots of Lawn Fawn goodies:

  • cut out the all the elements for a slider card from watercolor paper using the Lawn Fawn Double Slider Surprise die set
  • add color to the background using Distress Oxide Inks (Blueprint Sketch, Chipped Sapphire)
  • use watered-down white gouache to create snowfall splatters
  • build a scene using the Mama Elephant Snow Capped Mountains and the Lawn Fawn Road Border and white, light grey and dark grey cardstock
  • add shading to the mountains with Distress Ink Pumice Stone
  • stamp the little car from the Lawn Fawn Home for the Holidays set and some houses, a lantern and a tree from the Lawn Fawn Winter Village set with Versafine Onyx Black onto watercolor paper
  • color the images with Clean Color Real Brush Pens, Distress Markers and a damp watercolor brush
  • adhere patterned paper from the Pinkfresh Studio December Days 6x6 paper pad to the cardbase 
  • stamp the sentiment from the Lawn Fawn Home for the Holidays set with Versafine Onyx Black 
  • add little hearts die cut from red glitter cardstock with the help of the Mama Elephant Confetti die
  • heat-emboss the little garland onto the tree using Versamark and WOW! Metallic Gold Rich Pale embossing powder
  • punch a little hole into the slider panel and add silver thread


I hope you got inspired.

Hugs,


Thursday, January 24, 2019

Let it Snow Fox

Hi there.

I created this snowy watercolor card for the Stamping-Fairies Facebook Group:

  • create this adorable little scene using several of the Art Impressions Watercolor stamp sets, Distress Markers and a damp watercolor brush
  • add some sparkle with Pearlized Water
  • stamp the sentiment from the Lawn Fawn Winter Big Scripty Words with Delicata Silvery Shimmer
  • cover the cardbase with patterned paper from the Maja Design Vintage Winter 6x6 paper pad before adhering the watercolor panel on top


Thanks for stopping by.

Hugs,


Tuesday, December 4, 2018

Warm Hands, Warm Hearts

Hi there,

we are starting a new TAGplorations Challenge over on the STAMPlorations Blog and this time it's all about Christmas and the optional twist is Glitter:

  • cut out one of the CUTplorations Manila Tags from watercolor cardstock
  • stamp the cup and the santa hat from the STAMPlorations Big Christmas Cups set and the sentiment from the STAMPlorations Warm Hands, Warm Hearts set with Versafine Clair Morning Mist
  • color the image with Zig Clean Color Real Brush Pens, Distress Markers and a damp watercolor brush
  • add some splatters with Mister Hueys Gold and dye a piece of torn seam binding with the leftover spray before threading it through the hole of the tag


And here is the version of my daughter Emily (8):


Have a wonderful Christmas Time.

Hugs,


Wednesday, February 28, 2018

Sending you Hugs Bunny

Hi there,

I would like to show you another of my Art Impressions watercolor projects as inspiration for this month's Happy Little Stampers Watercolor Challenge:


  • stamp the little scene with the help of some Art Impressions Watercolor stamps, Distress Markers and ZIG Clean Color Real Brush Pens - use a damp brush to add that typical look
  • cut out a torn rectangle around the scene
  • create a background on a tag cut from watercolor paper using Distress Ink (Pumice Stone)
  • stamp the sentiment from the My Favorite Things Somebunny set with Versafine (Smokey Gray)
  • ink up the edges of the tag and the watercolor panel with Distress Ink (Pumice Stone)
  • thread some purple and natural twine through the hole of the tag

Have a wonderful day.

Yours,


Wednesday, November 29, 2017

Peace Love Joy

Hi there,

it's time for a new Photo Inspiration Challenge over on the Addicted to Stamps and More Blog:


  • create a watercolor wreath using Art Impressions Watercolor stamps, Distress Marker, ZIG Clean Color Real Brush Pens and a damp watercolor brush
  • ink up the edges of the watercolor panel with Distress Ink (Frayed Burlap)
  • cut out the CUTplorations Peace Love Joy from woodgrain patterned paper and mount it onto a second die cut from kraft cardstock for more dimension and stability
  • adhere the panel to a kraft cardbase 

Thanks for stopping by.

Yours,


Tuesday, August 22, 2017

Hello Kitten

Hi there,

today, I would like to show you this sweet little Cat Card over on the Gerda Steiner Designs Blog:

  • color the kitten from the Gerda Steiner Designs Kitten in Flowerpot image which is available as part of the Gerda Steiner Designs Spring Digital Stamp Bundle with ZIG Clean Color Real Brush Pens, Distress Markers and a damp watercolor brush
  • use one of the My Favorite Things Polaroids dies to create two little frames from patterned paper from the Pebbles Front Porch 6x6 paper pad
  • add the sentiment cut with the help of a die from the Lawn Fawn Magic Color Slider set from kraft cardstock
  • in order to add more interest to the white cardbase, adhere two strips of patterned paper cut into a wave shape using the My Favorite Things Stitched Snow Drifts die set onto the left side of the cardbase

Hope to see you again soon.

Yours,


Tuesday, August 15, 2017

Strawberry Mouse

Hi there,

I would like to show you how to create this quick and easy greeting card over on the Gerda Steiner Designs Blog:

  • color the Gerda Steiner Designs Strawberry Mouse with ZIG Clean Color Real Brush Pens, Distress Markers and a damp watercolor Brush
  • use one of the Avery Elle Wonky Stitches dies to cut put a stitched panel from watercolor paper
  • create a quick watercolor background using Kuretake Gansai Tambi watercolors
  • stamp the sentiment from the Paper Smooches Sugar Rush set with Versafine (Onyx Black)
  • use kraft cardstock as a base

Thanks for stopping by.

Yours,


Tuesday, August 8, 2017

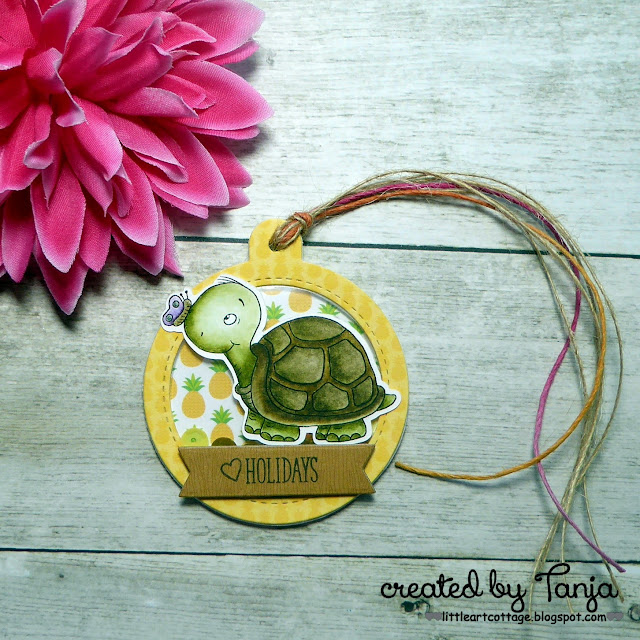
Holiday Turtle

Hi there,

I created this Holiday Tag using the super cute Gerda Steiner Designs Hello Friend Turtle image:


  • color the Gerda Steiner Designs Hello Friend Turtle with ZIG Clean Color Real Brush Pens, Distress Markers and a damp watercolor brush
  • use the My Favorite Things Tag Builder Blueprints 6 die set to cut out a shaker tag - you need a base, a foam layer, a frame and an acetate piece ... the patterned paper is from the Doodlebug Design Fun in the Sun 6x6 paper pad
  • add some Doodlebug Design Sequins before closing the shaker element with double-sided adhesive
  • stamp the sentiment from the Clearly Besotted Stamps Many Mini Messages with Versafine (Onyx Black) onto a sentiment strip cut with a die from the My Favorite Things Tag Builder Blueprints 5 set and add a little heart from the Gerda Steiner Designs Happy Hoppy stamp set
  • as a final step thread three strings of twine through the hole of the tag

I hope you got inspired.

Yours,


Sunday, July 16, 2017

Stamp Connection #27

Hi there,

connected through our love for card making, blogging and being from Germany we (Cornelia from Stempel Spass and I) decided to create a monthly project within predefined requirements. We are going to show you the result every 3rd Sunday of the month and this is our 27th transatlantic get-together!

Our requirement for this meet-up was:
"Christmas in July" 


  • stamp two of the adorable snowmen from the Gerda Steiner Designs Snowman Friends set with Versafine (Smokey Gray) and color the images and the background with Distress Markers, ZIG Clean Color Real Brush Pens, Wink of Stella Clear Glitter and a damp watercolor brush
  • apply some Distress Ink (Tumbled Glass) through the Memory Box Tiny Snowflakes stencil 
  • stamp the sentiment from the Clearly Besotted Stamps Many Mini Messages set with Versafine (Smokey Gray)
  • dye a piece of seam binding with Distress Ink (Tumbled Glass) and thread it through the hole of the tag


Now make sure to hop over to see Cornelia's Creation.

Thanks for stopping by. We hope to see you again at the ...


Yours,


Thursday, June 29, 2017

Thanks Butterfly

Hi there,

I would like to share another project using the wonderful Skipping Stones Design Let it be stamp set over on the Skipping Stones Design Blog:


  • create a soft rainbow watercolor background using Distress Markers (Festive Berries, Ripe Persimmon, Fossilized Amber, Peacock Feathers, Mermaid Lagoon, Wilted Violet) and a wet watercolor brush
  • stamp the butterfly from the Skipping Stones Design Let it be set with Versafine (Smokey Gray) and color it with the same watered-down Distress Marker colors
  • add some splatters with black acrylic paint
  • cut out the CUTplorations thanks from white glitter fun foam and adhere it to the stitched watercolor panel
  • mount the panel onto a piece of grey patterned paper and use the Mini Perfect Layers Tool to create a perfect border

I especially created this card for Heather the owner of Skipping Stones Design as a huge "thank you" for her kindness and for letting the Design Team work with such wonderful designs.

Yours,


Tuesday, May 23, 2017

Elephant ATC

Hi there,

I would like to show you this fun ATC over on the Skipping Stones Design Blog:

  • in one of my previous posts I explained how I created the background for several ATCs
  • choose one of them
  • stamp the fabulous elephant from the Skipping Stones Design Elephant End set with Black India Ink onto a book page and mute the letters with some gesso
  • outline the image with a black PITT Artist Pen
  • color the image with Distress Markers (Hickory Smoke, Tattered Rose) and a damp watercolor brush
  • add some scribbly circles to the right side of the ATC with the Pico Embellisher (Electric Pink)
  • color the edges with Distress Crayon (Picked Raspberry)
  • add the sentiment using stickers

I hope you got inspired.

Yours,


Saturday, May 6, 2017

Sanddollar Canvas

Hi there,

I would like to show you this canvas that I created for our new Happy Little Stampers Mixed Media Challenge:


  • mix Liquitex Pouring Medium with three different colors of Dina Wakley Heavy Body Acrylic Paints (Ocean, Sky, Turquoise) and pour them onto a canvas - let this thick layer of paint dry overnight
  • apply Prima Marketing Modeling Paste through the ARTplorations Bloom Boldly stencil
  • mix Golden Acrylic Glazing Liquid with Golden Fluid Acrylic Paint (Payne's Gray) and add color to the raised areas, let dry for a bit and wipe it away with a baby wipe - repeat the process until you are happy with the result
  • stamp the sandollar from the Tim Holtz Nautical Blueprint set with Versafine (Smokey Gray) onto a piece of watercolor paper
  • color the image with Distress Markers
  • add Versamark to random spots on the sanddollar and heat-emboss it with Stampendous Frantage embossing enamel (Shabby Pink)
  • cut out the CUTplorations Holidays word die from sturdy white cardstock, cover the sentiment with Versamark and heat-emboss it with the same pink embossing enamel
  • adhere the sanddollar and the sentiment with Multi Medium Matte and add shading with a PITT Artist Pen (Cold Gray VI)
  • add splatters with watered-down Golden Fluid Acrylics (Titanium White, Carbon Black) and a Liquitex Splatter Brush 

Thanks for stopping by.

Yours,


Tuesday, March 28, 2017

Go Wild!

Hi there,

I would like to show you a fun Birthday Card using the brand new Gerda Steiner Designs stamp sets:

  • color the ostrich from the Gerda Steiner Designs Party Animals stamp set and the giraffe, the elephant and the car from the Gerda Steiner Designs Go wild stamp set (which will come out real soon) with ZIG Clean Color Real Brush Pens, Distress Markers and a damp watercolor brush
  • add highlights with a white gel pen
  • color the little sentiment banner with ZIG Clean Color Real Brush Markers as well and add faux stitching with a Memento Dual Marker (Gray Flannel)
  • create a background on a stitched panel cut from Strathmore Bristol Smooth Paper using Distress Ink (Mowed Lawn), Distress Oxide Inks (Peeled Paint, Cracked Pistachio) and water from your Mini Mister
  • add a strip of dark grey cardstock to the left side of the panel before adhering it to a white cardbase

I hope you got inspired.

Yours,

Tuesday, March 7, 2017

Happy Birthday Birds

Hi there,

I would like to share another creation with the Gerda Steiner Designs February/March Digital Stamp Bundle:

  • color the fun Gerda Steiner Designs Birds with Banner image which is available as part of the Gerda Steiner Designs February/March Digital Stamp Bundle with Copic, Delta, DIY and Touch Twin Brush Markers
  • add Glossy Accents to the beaks and the glasses
  • draw little random dots around the image with a Distress Marker (Cracked Pistachio)
  • ink up the edges of the focal panel with Distress Ink (Cracked Pistachio)
  • cut a notebook border using one of the CUTplorations Art Edges dies from a piece of black cardstock and layer it behind the main panel
  • create a background on a turquoise piece of cardstock with the help of Versamark and the present from the Gerda Steiner Designs Monster Fun stamp set 

I hope you got inspired.

Yours,

Tuesday, February 21, 2017

Love ya Bear

Hi there,

on this project I am using the Surprise Bonus Stamp from the Gerda Steiner Designs January/February Digital Stamp Bundle:

  • color the Gerda Steiner Designs Sitting Bear image which is available as part of the January/February Digital Stamp Bundle with Distress Markers, ZIG Clean Color Real Brush Pens and a damp watercolor brush
  • add color and splatters to a stitched panel cut from watercolor paper using Jaxon Aquarelle watercolors
  • stamp the sentiment from the Lawn Fawn Big Scripty Words set with Archival Ink (Garden Patina) and use the matching die to cut it out
  • add Pretty Pink Posh Sequins (4mm and 6mm Sparkling Clear) as final embellishments

I hope you got inspired.

Yours,


Friday, February 17, 2017

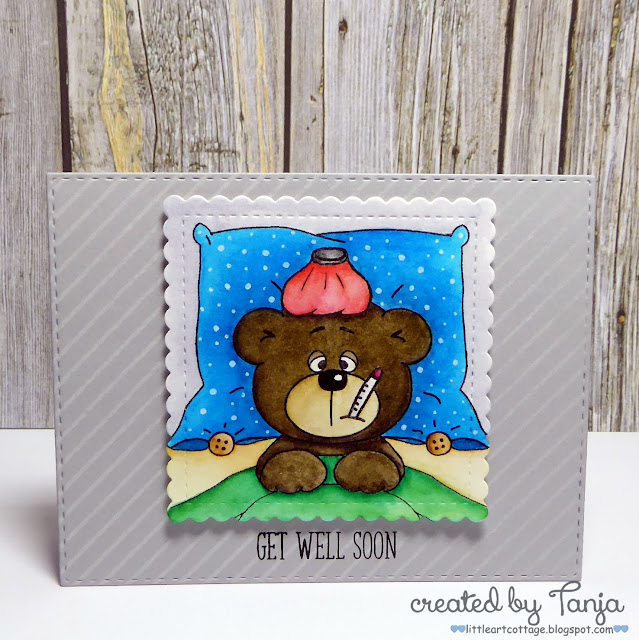
Get Well Soon Bear

Hi there,

this is my fourth project using the Gerda Steiner Designs January/February Digital Stamp Bundle:

  • color the poor little Gerda Steiner Designs Sick Bear which is available as part of the January/February Digital Stamp Bundle with Distress Markers, ZIG Clean Color Real Brush Pens and a damp watercolor brush
  • add little details with a white gel pen
  • use one of the My Favorite Things Stitched Mini Scallop Square STAX to cut around the image
  • stamp the My Favorite Things Diagonal Stripes Background with Avery Elle Pigment Ink (Silver Fox) onto a stitched panel cut from grey cardstock and stamp the sentiment from the Clearly Besotted Stamps Many Mini Messages with Versafine (Onyx Black) driectly onto that panel

I hope you got inspired.

Yours,

Wednesday, February 8, 2017

Joy Reindeer Tag

Hi there,

we are starting a new Challenge over at Addicted to Stamps and More and I would like to show you this fun Christmas Tag:

  • cut out a round tag using the My Favorite Things Tag Builder Blueprints 6 die set and patterned paper from the My Mind's Eye Sugar Plum 6x6 paper pad
  • cut out "Joy" from watercolor paper - I created my own cutfile for the ScanNCut - and the antlers from the Miss Kate Cuttables Boy Reindeer
  • color the sentiment and the antlers with Distress Markers and blend the colors with a damp watercolor brush to create an ombre effect
  • cover both pieces with three layers of clear embossing powder
  • age the tag a bit by inking up the edges with Distress Ink (Vintage Photo) and by randomly stamping the Prima Marketing Salvage District 3x4 Clear Stamp (Item: 584726) with Versafine (Vintage Sepia)
  • thread natural twine through the hole of the tag

Have a christmassy day.

Yours,


Tuesday, February 7, 2017

Hi

Hi there,

Gerda Steiner Designs has published the new January/February Digital Stamp Bundle and this is my second creation using the fabulous Cat with Balloon image:


  • color the sweet Gerda Steiner Designs Cat with Balloon image available as part of the January/February Digital Stamp Bundle with Distress Markes, ZIG Clean Color Real Brush Pens and a damp watercolor brush
  • stamp the sentiment into the blue balloon using the Concord & 9th Perfectly Penned set and Versafine (Onyx Black)
  • stamp the circle from the WPlus9 Doodle Buds set with Versamark onto a stitched panel cut from watercolor paper and heat-emboss them with WOW! Bright White Super Fine embossing powder
  • add color to the panel using Jaxon Aquarelle watercolors

Thanks for stopping by today.

Yours,


Friday, January 27, 2017

Sweet Cupcake

Hi there,

I would like to show you a new creation for the A Day for Daisies Blog:

  • color the super sweet A Day for Daisies Blossom Cupcake with Zig Clean Color Real Brush Pens, Distress Markers and a damp watercolor brush
  • cut a stitched panel from watercolor cardstock and mask off a circle
  • add color to the circle with Distress Inks (Spun Sugar, Shaded Lilac) 
  • create a wreath around that circle using small images from the Lawn Fawn Penelope's Blossoms set and Memento Luxe (Rose Bud), Versacraft (Cerulean Blue) and VersaMagic (Pretty Petunia, Aloe Vera) 
  • stamp the sentiment from the Paper Smooches Sugar Rush set with Archival Ink (Watering Can) - I used my MISTI to get a crisp impression on the textured surface of the watercolor paper
  • add a strip of pink glitter cardstock to the left side of the panel before adhering it to a white cardbase

Have a day for daisies.

Yours,