Tuesday, May 28, 2019

Herzlichen Glückwunsch - Happy Birthday

Hi there,

Gerda Steiner has released the fabulous new Frogs stamp set with English, Spanish and German sentiments and over the next three weeks I will show you my creations with the Gerda Steiner Designs German Froesche set. This joyful birthday card is my second creation:

  • create a - as I call it - controlled shaker panel with the help of smooth white cardstock, a frame die, a grass border die, a cloud border die, invisible thread, blue seed beads, double-sided foam adhesive and acetate
  • add color with Distress Oxide Ink (Salty Ocean, Lucky Clover) and a Blending Brush
  • color one of the frogs and the crown from the Gerda Steiner Designs Frogs set with Alcohol Markers - add extra shading with Faber-Castell Polychromos Pencils
  • use a white gel pen for highlights in the eyes and freckles on the cheeks
  • add the sentiment strip with a stitching detail on the left


I hope you got inspired.

Hugs,


Monday, May 27, 2019

Blütenmeer - Blossoms

Hi there,

I created this spring tag for the Karten-Kunst Blog:

  • stamp the flowers and the butterfly from the Karten-Kunst Kleine Viecher set and the sentiment from the Karten-Kunst Capri Frühlingserwachen set with Versafine Onyx Black onto a tag cut from smooth white cardstock with one of the Karten-Kunst Tags dies
  • color the images with Faber-Castell Polychromos pencils 
  • thread a piece of twine through the hole of the tag


Thanks fro stopping by.

Hugs,


Friday, May 24, 2019

STAMPlorations Clear Stickers

Hi there,

the most talented Shery from STAMPlorations has added the new Clear Stickers to the shop. Here are some creations showcasing this fabulous product:

  • stamp three mugs from the STAMPlorations What's brewing set with Versafine Vintage Sepia onto a panel of watercolor paper
  • color the images and the background with Ecoline Brush Pens and a watercolor brush
  • add the sentiment from the STAMPlorations Just Caffeinate Clear Sticker set
  • add a strip of brown foiled cardstock and of striped patterned paper to the bottom of the panel before adhering it to the cardbase


On my next project I used PanPastels on my Gelli Plate:

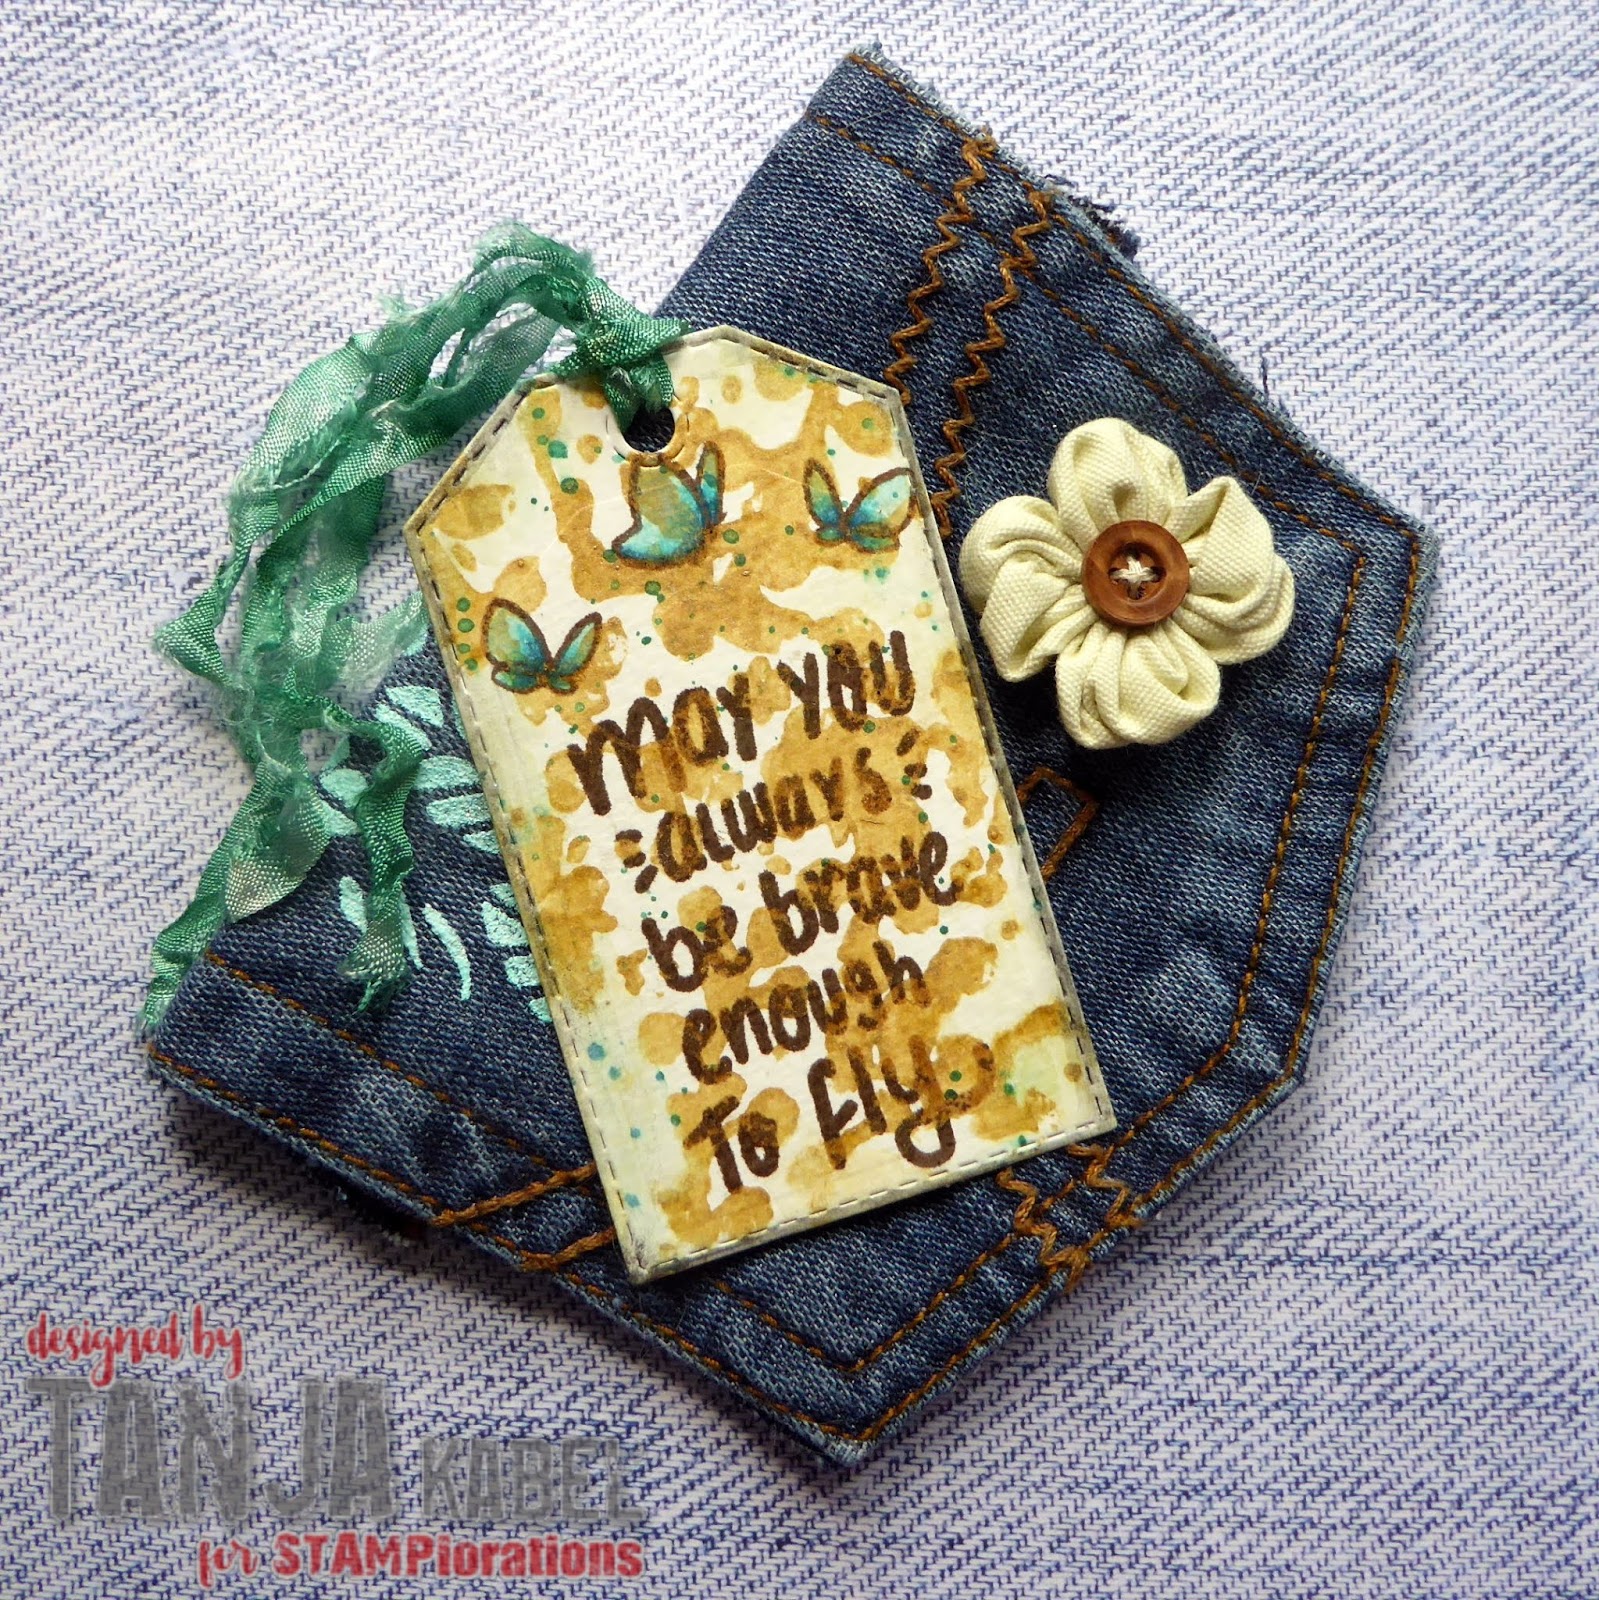
  • apply PanPastel through the ARTplorations Lattice stencil onto a Gelli Plate
  • use a brayer to coat that pastel layer with white acrylic paint and take your print
  • cut out a tag from the print using one of the CUTplorations Manila Tags
  • adhere a sticker from the STAMPlorations Free Spirit sticker set
  • add some more texture with the help of the scrip stamp from the STAMPlorations Mixed Media Elements set and Archival Ink Watering Can
  • grunge up the edges with Art Graf Aquarell-Grafit
  • dye a piece of torn seam binding with Distress Stain (Spun Sugar, Tumbled Glass, Shaded Lilac) and thread it through the hole of the tag


On my third project I used one of the STAMPlorations Coffee Time Stickers:

  • add color to a piece of watercolor paper with Distress Ink (Tea Dye, Ground Espresso) and water from a Mini Mister
  • add Pearlized Water droplets for extra shimmer
  • adhere a sticker from the STAMPlorations Coffee Time sticker set
  • use the ARTplorations Dots 'n' Beans stencil, Distress Ink Ground Espresso and a Mini Ink Blending Tool to create a background on a kraft cardbase


For my last project I used some pretty packaging to create an ATC:

  • cover a piece of ATC-sized Packaging with white gesso
  • grunge up the edges with Art Graf Aquarell-Grafit
  • adhere a sticker from the STAMPlorations Free Spirit sticker set
  • add some more texture using the dots from the STAMPlorations Mixed Media Grunge set and Archival Ink Watering Cam
  • as final embellishments add some of the Nuvo Dream Frops Love Potion


I hope you love this new product line as much as I do.

Hugs,


Relax with some Ice Cream

Hi there,

I created this vibrant watercolor project for Elizabeth Craft Designs:

  • cut out a stitched panel from watercolor paper using one of the Elizabeth Craft Designs Stitched Rectangles
  • stamp the ice cream and the adorable little sun from the Elizabeth Craft Designs Sun & Surf set and the sentiment from the Elizabeth Craft Designs Beach Sentiments set with Versamark and heat-emboss it with WOW! Bright White Super Fine embossing powder
  • color the background with Schmincke Horadam watercolors
  • color the images with Prismacolor Colored Pencils
  • add some patterned paper from the ModaScrap Color of Puppies Boy 6x6 paper pad behind the panel before adhering it to the cardbase


Have a sunny day.

Hugs,


Thursday, May 23, 2019

Miss you

Hi there,

I created this sweet Miss You Card for the Stamping-Fairies Blog:

  • stamp the little girl with the owl and the teddy bear from the Neat & Tangled Better Together set with My Favorite Things Extreme Black Ink
  • color the images with Delta, Touch Twin Brush and Copic Markers and add highlights with a glass dip pen and white gouache
  • cut out a wonky stitched panel from watercolor paper and create a background with the help of watered-down Distress Re-Inker Broken China, Distress Oxide Ink Dusty Concord and the Tim Holtz Layering Stencil Argyle
  • stamp the sentiment from the same set with Versafine Onyx Black
  • stamp three more hearts with Distress Oxide Ink Worn Lipstick
  • add highlights to the letters and hearts with a glass dip pen and white gouache
  • adhere some Pretty Pink Posh Sparkling Clear Sequins as final embellishments
  • add some sparkle to the bow with Wink of Stella Clear Glitter and some shine and dimension to the heart with Nuvo Crystal Glaze


Have a wonderful day.

Hugs,


Wednesday, May 22, 2019

Be brave enough to fly

Hi there,

today is Day Three of the STAMPlorations Things with Wings Blog Hop and this is my creation:

  • cut a CUTplorations Stitched Tag from watercolor paper
  • apply Distress Stain Tarnished Brass through the ARTplorations Fairytale Forest stencil
  • stamp the sentiment and three butterflies from the STAMPlorations Brave One set with Versafine Vintage Sepia
  • color the butterflies with Derwent Coloursoft pencils
  • dye a piece of torn seam binding with Distress Stain Evergreen Bough and thread it through the hole of the tag
  • grunge up the edges of the tag with Art Graf Aquarell-Grafit


For a chance to win, please write a comment for this post, the other designers’ posts and for the STAMPlorations blog post and/or link up your own Things with Wings project.

  • 5 winners will receive a $10 gift code - randomly drawn from all comments left on the blog and participating designers blogs
  • 3 winners will receive a $15 gift certificate - randomly drawn from all Things with Wings linky party entries

Commenting and linking up end on Tuesday, June 4, with winners announced on June 10 in the May winners post.

All throughout May, products in the THINGS WITH WINGS section will be 15% off instantly + with the Code STAMPGIRLTANJA can get up to 35% off.

Enjoy the rest of the hop.

Hugs,


Tuesday, May 21, 2019

Küsschen - Kisses

Hi there,

Gerda Steiner has released the fabulous new Frogs stamp set with English, Spanish and German sentiments and over the next three weeks I will show you my creations with the Gerda Steiner Designs German Froesche set. This little frog prince is my first creation:

  • color one of the frogs and the crown from the Gerda Steiner Designs Frogs set with Alcohol Markers - add extra shading with Faber-Castell Polychromos Pencils
  • use a white gel pen for highlights in the eyes and freckles on the cheeks
  • add Nuvo Aqua Shimmer Midas Touch for extra shimmer on the crown
  • color the sentiment strip with Distress Oxide Ink Lucky Clover
  • create a background on a stitched rectangular panel of smooth white cardstock using Distress Oxide Ink Salty Ocean, the Create a Smile Focal Point stencil and a Blending Brush
  • as final embellishment adhere three little Droplets Pool Hearts from Little Things from Lucy's Cards


Have a wonderful day.

Hugs,


Monday, May 20, 2019

Milka's To Bee or not to Bee Blog Hop

Hi there,

today I am joining Milka's To Bee or not to Bee Blog Hop and this is my creation using the Gerda Steiner Designs Happy Hoppy, Hello Spring and Bee Strong stamp sets:

  • cut out a CUTplorations Stitched Tag from smooth white cardstock
  • stamp a little scene using the bee from the Gerda Steiner Designs Happy Hoppy set, the grass and the flower from the Gerda Steiner Designs Hello spring set and the sentiment from the Gerda Steiner Designs Bee Strong and the Gerda Steiner Designs Happy Hoppy and Versafine Onyx Black
  • color the images with Derwent Coloursoft pencils
  • add a cloud background with the help of the My Favorite Things Cloud Stencil, a Blending Brush and Distress Oxide Ink Tumbled Glass
  • add Nuvo Glitter Drops White Blizzard to the wings of the bee
  • add a piece of twine through the hole of the tag


Have a wonderful day.

Hugs,


Blooming Fuchsias

Hi there,

I would like to show you how to create this spring card over on the Elizabeth Craft Designs Blog:


Hugs,


Friday, May 17, 2019

Blessed

Hi there,

I created this Tag as a reminder for this month's STAMPlorations Mixed Media Challenge. So don't forget to upload your projects:

  • cover a pre-cut kraft tag with white gesso
  • apply Prima Marketing Modeling Paste through the ARTplorations Clustered Hearts stencil
  • add color using Distress Stains (Evergreen Bough, Shaded Lilac, Cracked Pistachio) and water from your Mister Bottle
  • grunge up the edges with Art Graf Aquarell-Grafit and a wet watercolor brush
  • add some turquoise foil here and there
  • adhere sari silk ribbon, burlap and one of the CUTplorations Bloomdala Bliss: Festive flowers cut from Tonic Luna Silver pearlescent cardstock
  • the sentiment id from the Tim Holtz Big Chat sticker set
  • thread another piece of torn sari silk ribbon through the hole of the tag


I hope you got inspired.

Hugs,


Butterfly Kisses

Hi there,

I created this pastel watercolor project for Elizabeth Craft Designs:

  • cut out a stitched panel from watercolor paper using one of the Elizabeth Craft Designs Stitched Rectangles
  • stamp one of the butterflies from the Elizabeth Craft Designs Bugs & Butterflies set with Versamark, heat-emboss it with WOW! Bright White Super Fine embossing powder and mask it off
  • stamp the grid pattern from the Elizabeth Craft Designs Patterns 1 set twice with Versamark and heat-emboss them with WOW! Bright White embossing powder as well
  • color the background and the image with Schmincke Horadam watercolors
  • add some purple splatters
  • stamp the sentiment from the Elizabeth Craft Designs Spring Sentiments set with Versafine Clair Morning Mist
  • add a strip of grey cardstock and of pink glitter paper to the left side of the panel before adhering it to the cardbase


Have a wonderful day.

Hugs,