Showing posts with label Glitter Paper. Show all posts

Monday, January 26, 2026

New Spring - Part 1

Hi there,

I created this Spring Card for the Karten-Kunst Blog:

  • cover a cardbase with patterned paper
  • create the sentiment using the Karten-Kunst Mega Happy stamp set, Versafine Vintage Sepia, grass cardstock, the Karten-Kunst Joy Alphabet, vellum and Distress Ink Gathered Twigs
  • add some Karten-Kunst Confetti flowers cut from iridescent glitter paper

Hope to see you again next week for another spring card.

Hugs,


Thursday, January 8, 2026

Happy New Year

Hi there,

it's time for our Inspiration Week over at Mennys Bastelshop and this week our topic is "Menny's Stamps". I used the Mennys Bastelshop Winter Wonderland stamp set on my project:

  • stamp the snowman from the Mennys Bastelshop Winter Wonderland set with Distress Oxide Ink Lost Shadow
  • color the image and the background with Frau von Bommel watercolors
  • ink up the edges with Distress Ink Stormy Sky
  • stamp the sentiment from the Karten-Kunst Weihnachten Modern set with Versafine Clair Morning Mist
  • add stars with the Molotow Liquid Chrome pen and snowflakes with a white gel pen and white gouache
  • add strips of colored cardstock and glitter paper to the left and right side of the panel before adhering it to a cardbase

Have a wonderful New Year.

Hugs,


Thursday, December 18, 2025

Joyful Wishes

Hi there,

I created this Christmas card for Mennys Bastelshop using the Impronte d'Autore Peace, Joy and Hope stamp set:

  • stamp one of the fairies from the Impronte d'Autore Peace, Joy and Hope set with Gina K. Designs Obsidian
  • color the image with Ohuhu Markers, add extra shading with Faber-Castell Polychromos pencils and highlights with a white gel pen
  • create a background on kraft cardstock with the help of the PaperNova Design Winter Stories Collection Trees set, Versamark, WOW! Bright White Super Fine embossing powder and Delicata Silvery Shimmer
  • stamp the sentiment from the Lawn Fawn Joy to the Woods set with Versamark onto a piece of vellum and heat-emboss it with Ranger Aqua Tinsel embossing powder
  • add strips of glitter paper to the left and right side of the panel before adhering it to a cardbase


Have a wonderful Christmas Time.

Hugs,


Thursday, December 11, 2025

Winter Hugs

Hi there,

I created this sweet Christmas Card for Mennys Bastelshop using the My Favorite Things Gnome for the Holidays stamp set:

  • stamp the cute little house from the My Favorite Things Gnome for the Holidays set with Distress Oxide Ink Lost Shadow onto a piece of watercolor paper
  • color the image and the background with Frau von Bommel watercolors
  • add extra shading with Faber-Castell Polychromos pencils and highlights with a white gel pen
  • create a background from colored cardstock with the help of the Sizzix Tim Holtz Simple Plaid die set
  • add the sentiment cut using the Spellbinders Tinsel Time Sentiments die set, vellum and glitter paper

Have a wonderful Christmas Time.

Hugs,


Thursday, December 4, 2025

1 Set - 2 Cards with Mama Elephant's Little Elephant Agenda

Hi there,

it's time for the Inspiration Week over at Mennys Bastelshop and this week our topic is "1 Set - 2 Cards". I used the Mama Elephant Little Elephant Agenda stamp set on my projects:


  • stamp the image from the Mama Elephant Little Elephant Agenda set with Gina K. Designs Obsidian
  • color the image with Spectrum Noir Triblend Markers, add extra shading with Faber-Castell Polychromos pencils and highlights with a white gel pen
  • cut out a Lawn Fawn Mini Picture Frame from woodgrain cardstock and a little bow from blue glitter paper
  • create a background with patterned paper
  • stamp the sentiment from the Lawn Fawn Whoosh, Kites! set with Versafine Clair Medieval Blue
  • stamp the images from the Mama Elephant Little Elephant Agenda set with Gina K. Designs Obsidian
  • color the images with Spectrum Noir Triblend Markers, add extra shading with Faber-Castell Polychromos pencils and highlights with a white gel pen
  • create a background using grass cardstock, an embossing folder and glitter paper
  • cut out four little rectangles from dark blue cardstock and add hills cut from grass cardstock
  • ink up the hills and the background panel with Distress Ink Gathered Twigs
  • stamp the sentiment from the Mama Elephant Celebrating You set with Versamark and heat-emboss it with WOW! Metallic Gold Rich Pale embossing powder

I hope you got inspired.

Hugs,


Tuesday, October 7, 2025

Happy Birthday Flowers

Hi there,

I created this sweet card for Anjas Basteltraum using the Anjas Basteltraum Spring Flowers stamp set:

  • stamp the field of flowers from the Anjas Basteltraum Spring Flowers set with Gina K. Designs Obsidian
  • color the image with Spectrum Noir Triblend Markers, add extra shading with Faber-Castell Polychromos pencils and highlights with a white gel pen
  • stamp the sentiment from the Anjas Basteltraum Glückwünsche set with that same black ink
  • add some hearts from the AB Kleine Post Sprüche set with Versamark and heat-emboss them with Ranger Distress Embossing Glaze Kitsch Flamingo
  • add strips of glitter paper to the left and right side of the panel before adhering it to a cardbase

Thanks for stopping by.

Hugs,


Thursday, July 31, 2025

Be Kind to Yourself

Hi there,

I created this sweet card for Mennys Bastelshop using the Gerda Steiner Designs Hello Sunshine stamp set:

  • stamp the bear with the sign from the Gerda Steiner Designs Hello Sunshine set with Gina K. Designs Obsidian
  • color the image with Ohuhu Markers, add extra shading with Faber-Castell Polychromos pencils and highlights with a white gel pen
  • stamp the sentiment from the same set with Versafine Clair Portobello
  • create a background on watercolor paper using watercolors
  • add strips of glitter paper to the left and right side of the panel before adhering it to a cardbase

Have a wonderful day.

Hugs,


Monday, April 14, 2025

Color Blocking 4 - Happy Easter

Hi there,

this time I would like to show you an Easter Card in my Color Blocking Series for the Karten-Kunst Blog:

  • stamp a background on a white card panel using Distress Oxide Ink Pumice Stone, the egg from the Karten-Kunst Mini Frames Spring and the heart from the Karten-Kunst Kränze und Kreise set
  • create two background strips with the help of Distress Oxide Ink Pumice Stone and the Karten-Kunst Script Background stamp
  • place those strips above and below a strip of pink glitter paper
  • cut out the Karten-Kunst Das rockt Frohe Ostern from vellum and DIY striped cardstock 

Thanks for stopping by.

Hugs,


Saturday, February 8, 2025

Alcohol Ink Week

Hi there,

it's Alcohol Ink Week over at the Karten-Kunst Blog 


and this is my creation:

  • create a background on Lanavanguard using Alcohol Inks (Shell Pink, Aqua) and turquoise Deco Foil
  • cut out a panel using one of the Karten-Kunst Stitched Rectangles DIN A6
  • adhere the panel to a turquoise cardbase
  • cut out a 15 from turquoise cardstock and silver glitter paper using the Karten-Kunst Lucky Numbers die set
  • add more texture to the numbers by stamping the Karten-Kunst Blooming Plants with Versamark and heat-embossing them with WOW! Polished Silver Super Fine embossing powder
  • stamp the sub-sentiment from the Karten-Kunst Aus der Schreibmaschine set with Versamark and heat-emboss it with that same silver embossing powder
  • ink up the bottom part of the numbers and the left and right side of the sub-sentiment strip with Distress Ink Peacock Feathers

I hope you got inspired.

Hugs,


Sunday, January 12, 2025

Winter Dreams

Hi there,

I created this Winter Card for the Karten-Kunst Blog:

  • create some irregular watercolor shapes with Schmincke Horadam watercolors 
  • stamp the trees from the Karten-Kunst Abstrakte Tannen set and the sentiment from the Karten-Kunst Capri Weihnachtspost set with Versafine Onyx Black
  • ink up the edges of the watercolor panel with Distress Ink Seedless Preserves
  • add some silver splatters
  • cut out some stars with the help of the Karten-Kunst Stars in a Row set from silver glitter paper and add them as final embellishments

I hope you got inspired.

Hugs,


Monday, November 18, 2024

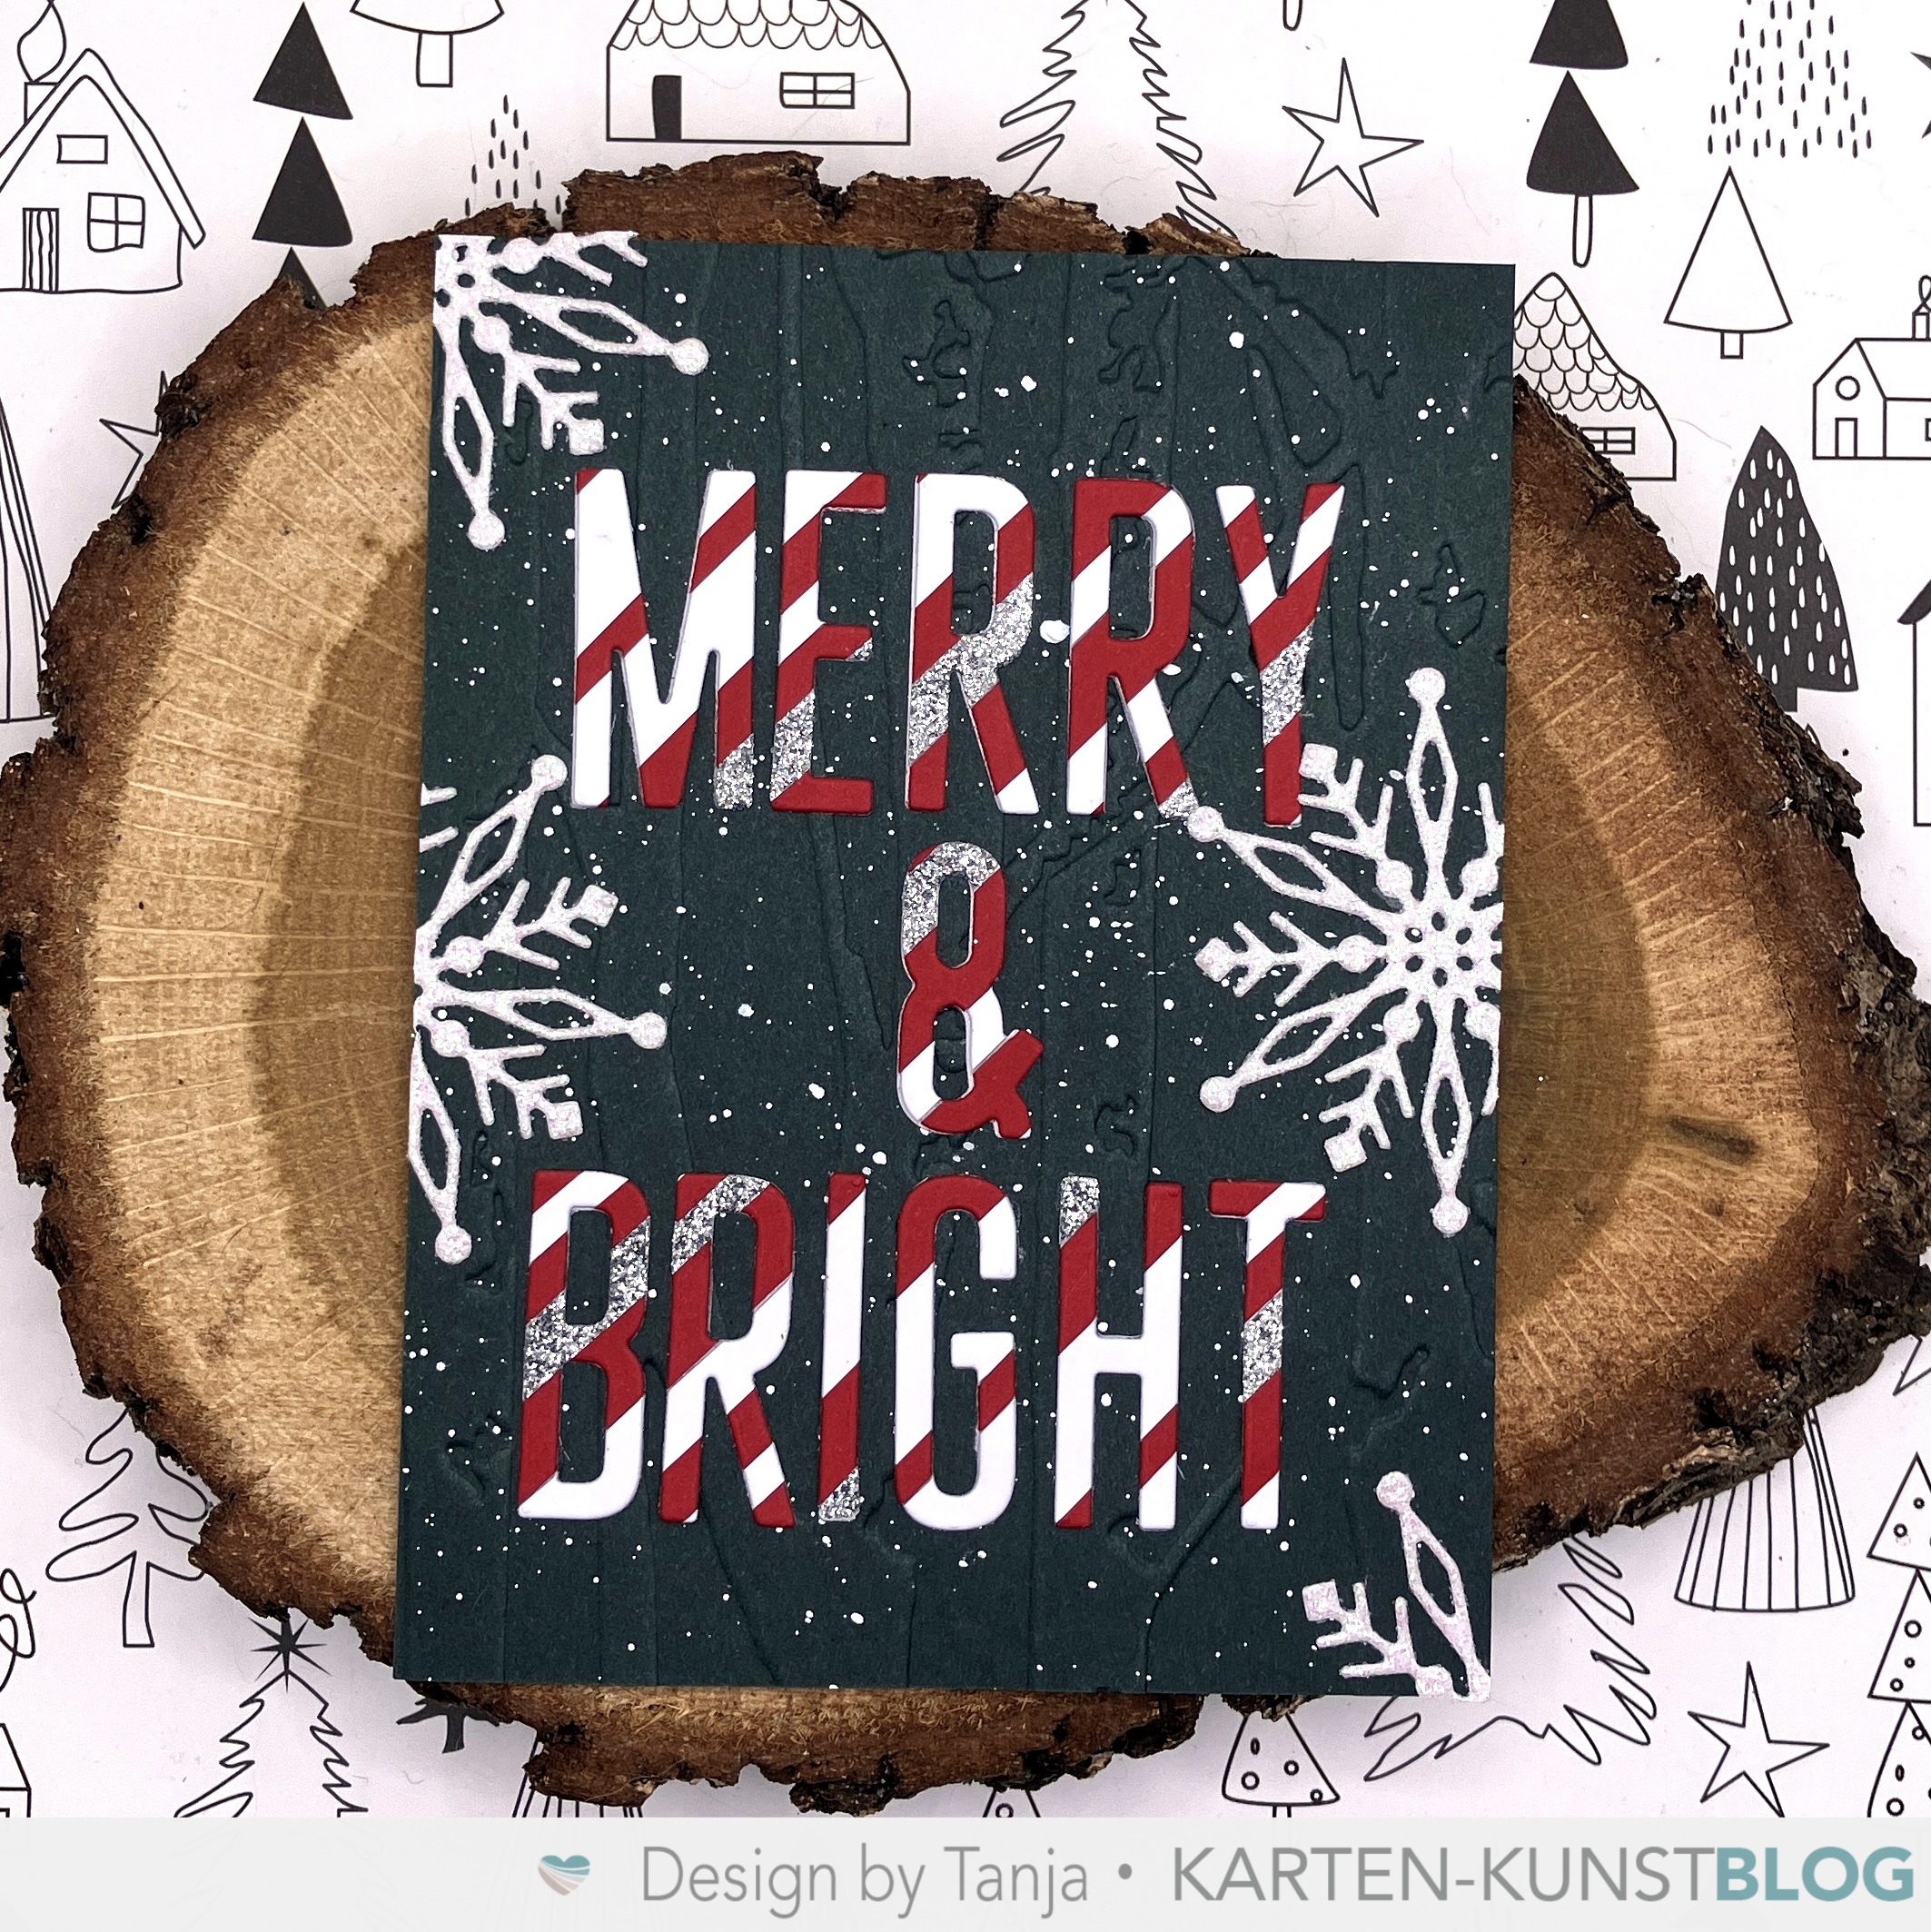
Merry & Bright

Hi there,

I created this Classic Christmas Card for the Karten-Kunst Blog:

  • create a background using dark green cardstock, an embossing folder and watered-down white gouache
  • cut out the sentiment from DIY striped cardstock using the Karten-Kunst Joy Alphabet and the Karten-Kunst Joy Alphabet Add-On die sets
  • add some Karten-Kunst Mini Snowflakes 2 cut from white glitter paper as final embellishments

Have a wonderful day.

Hugs,


Thursday, November 7, 2024

Happy Fall Wreath

Hi there,

I created this sweet Fall Card for Menny's Bastelshop and this week our inspirational topic is "Wreaths/Kränze":

  • stamp one of the foxes, the wreath and some mushrooms from the Gerda Steiner Designs Foxes set with Lawn Fawn Crunchy Leaf
  • color the image with Spectrum Noir Triblend Markers, add extra shading with Faber-Castell Polychromos pencils and highlights with a white gel pen
  • cut out "Happy Fall" from kraft cardstock using the Lil' Inker Designs Mixed & Stitched Alphabet and ink up the bottom portion with Distress Ink Gathered Twigs
  • run a panel of grass cardstock through your Big Shot in an embossing folder and ink it up with that same brown Distress Ink used on the letters
  • add strips of gold glitter paper to the left and right side of the panel before adhering it to a cardbase

I hope you got inspired.

Hugs,


Monday, October 28, 2024

Wishing on Butterflies

Hi there,

I created this card using the Karten-Kunst Das rockts Wünsch Dir was die set:

  • cut out the Karten-Kunst Das rockt Wünsch Dir was from grey cardstock and DIY striped cardstock
  • create a background using the Karten-Kunst Blooming Plants set and Distress Oxide Ink Pumice Stone
  • ink up the edges of the panel with Distress Ink Pumice Stone
  • add some Poppy Stamps Bunches o' Butterflies cut from pink glitter paper as final embellishments

Thanks for stopping by.

Hugs,


Monday, May 13, 2024

Love You Clouds

Hi there,

I created this Love You Card for the Karten-Kunst Blog:

  • cut out some Karten-Kunst Clouds from white glitter paper
  • cut out one of the Karten-Kunst Stitched Rectangles DIN A6 from watercolor cardstock 
  • create a background using Distress Oxide Ink (Spun Sugar, Shaded Lilac), white pigment ink and the Karten-Kunst Script Background
  • add some splatters with Milky Way White Shimmer Spray
  • cut out the sentiment using the Karten-Kunst Joy Alphabet
  • ink up the bottom part of the letters with Versamark and heat-emboss them with WOW! Neutral Ultra Shimmer embossing powder

I hope you got inspired.

Hugs,


Thursday, April 25, 2024

XOXO

Hi there,

here is another card for Mennys Bastelshop on which I used an image from the super sweet My Favorite Things Squish Friends stamp set:

  • stamp the dog and the cat from the My Favorite Things Squish Friends set with Gina K. Designs Obsidian
  • color the image with Spectrum Noir Triblend Markers, add extra shading with Faber-Castell Polychromos pencils and highlights with a white gel pen
  • create a background using Masking Tape, Distress Oxide Ink (Salvaged Patina, Peacock Feathers) and the Spellbinders Embossing Folder Flower Frenzy
  • cut out the Lawn Fawn Scripty XOXO from Neenah Desert Storm kraft cardstock and ink up the bottom portion of the sentiment with Distress Ink Scorched Timber
  • add a strip of glitter paper to the left and right side of the panel before adhering it to a cardbase

Thanks for stopping by.

Hugs,


Thursday, January 18, 2024

Don't Flurry Be Happy

Hi there,

I created this cute Snow Card using one of the images from the Paperie Ink Sleigh All Day stamp set for Mennys Bastelshop:

  • stamp one of the images from the Paperie Ink Sleigh All Day set with Gina K. Designs Obsidian
  • color the image with Spectrum Noir Triblend Markers, add extra shading with Faber-Castell Polychromos pencils and highlights with a white gel pen
  • cut out the Memory Box Aurora Snowflake from turquoise glitter paper
  • stamp the sentiment from the same set with Versamark and heat-emboss it with WOW! Polished Silver Super Fine embossing powder
  • add splatters of watered-down turquoise watercolor

Thanks for stopping by.

Hugs, 


Monday, January 8, 2024

Happy New Year

Hi there,

I created this New Year Card for the Karten-Kunst Blog:

  • stamp the outline from the Karten-Kunst Mega Happy set with Lawn Fawn Jet Black
  • stamp the firework from the Karten-Kunst Feuerwerk set with Versamark and heat-emboss it with WOW! Mermaid Tails embossing glitter
  • color the outline with Spectrum Noir Triblend Markers
  • add some splatters with watered-down Distress Ink Peacock Feathers
  • add a strip of glitter paper to the left and right side of the panel before adhering it to a cardbase

I wish you a wonderful and creative New Year.

Hugs,


Monday, November 13, 2023

Merry Christmas Landscape

Hi there,

I created this little landscape for the Karten-Kunst Blog:

  • cut out a Karten-Kunst 1/8 Inch Circle and a hill shape from white cardstock 
  • add color to the background circle with Distress Ink Chipped Sapphire and Black Soot
  • use watered-down white gouache for some snowflakes
  • stamp one of the Karten-Kunst Abstrakte Tannen with Distress Oxide Ink Rustic Wilderness and color it with Spectrum Noir Triblend Markers
  • cut out some stars from golden glitter paper with the help of the Karten-Kunst Confetti die set
  • stamp the sentiment from the Karten-Kunst Aus der Schreibmaschine 2 set with Versamark onto a strip of dark blue cardstock and heat-emboss it with WOW! Bright White Super Fine embossing powder
  • cover a cardbase with patterned paper and ink up the edges with Distress Ink Chipped Sapphire

Thanks for stopping by.

Hugs,


Monday, October 16, 2023

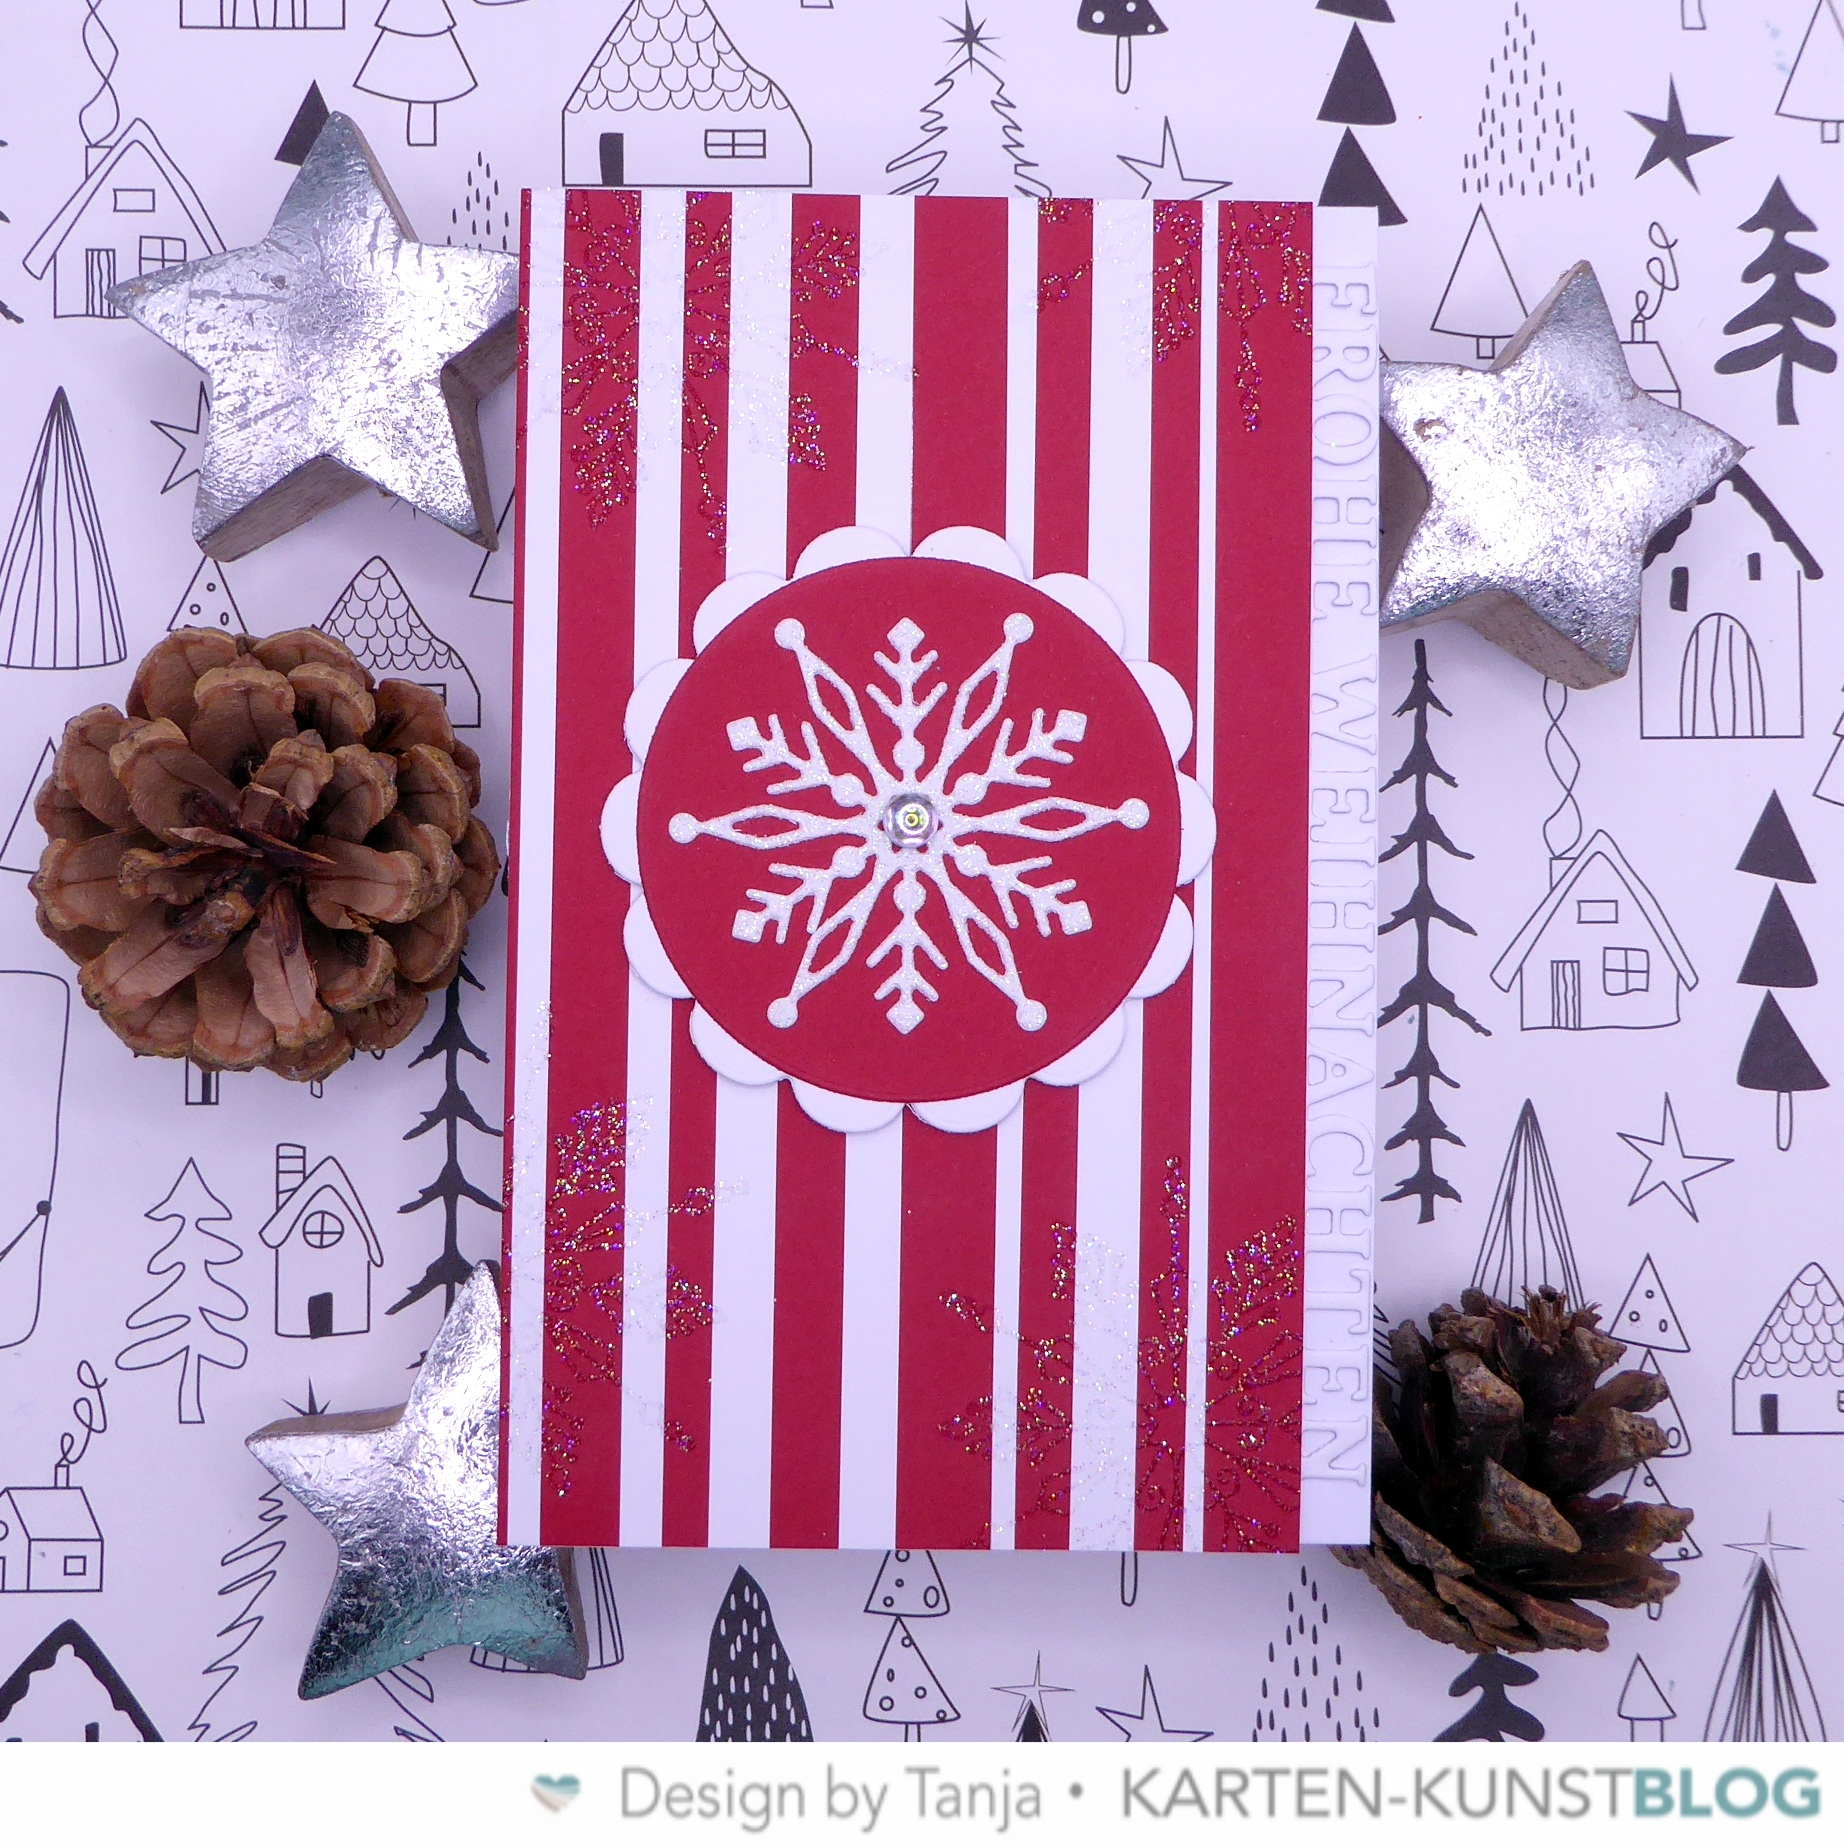
Candy-Striped Christmas

Hi there,

on this classic Christmas project I used the Karten-Kunst Randtexte Frohe Weihnachten die set:

  • create a red and white striped card panel with the help of some colored cardstock
  • stamp some snowflakes from the Karten-Kunst Zauberhafte Schneeflocken set with Versamark and heat-emboss them with WOW! Neutral Ultra Shimmer embossing glitter
  • cut out the Karten-Kunst Randtexte Frohe Weihnachten from the right side of that panel 
  • cut out a Karten-Kunst 1/4 Inch Scalloped Circle from white cardstock and a Karten-Kunst 1/8 Inch Circle from red cardstock
  • layer the Karten-Kunst Mini Snowflake 2 cut from glitter paper on top
  • use an iridescent droplet as final embellishment

Have a wonderful day.

Hugs,


Thursday, August 3, 2023

I love you, little Mouse!

Hi there,

I created this sweet tag for Mennys Bastelshop:

  • cut out a tag from white cardstock using the Sunny Studio Stamps Mini Mat & Tag 3 die set
  • create a plaid pattern in the background
  • cut out a white panel and a little heart from pink glitter paper using that same die set
  • stamp one of the mice from the Lawn Fawn Sew very Mice set with Gina K. Obsidian
  • color the image with Spectrum Noir Triblend Markers, add extra shading with Faber-Castell Polychromos pencils and highlights with a white gel pen
  • stamp the sentiment from the same set with Distress Oxide Ink Spun Sugar and Picked Raspberry for an ombre finish
  • ink up the edges of the focal panel with Distress Ink Hickory Smoke
  • thread two strands of twine through the hole of the tag

I hope you got inspired.

Hugs,