Thursday, October 31, 2019

You are Pandastic

Hi there,

this project showcases the brand new Elizabeth Craft Designs Panda Bear set:

  • cut out all the elements for the sweet little Elizabeth Craft Designs Panda Bear from Elizabeth Craft Designs white Soft Finish Cardstock
  • the beautiful umbrella is from the Elizabeth Craft Designs Asian Accessories set
  • color all the elements with Delta, Touch Twin Brush and Copic Markers and add highlights with a white gel pen
  • create a background on a stitched panel of smooth white cardstock with Distress Ink (Old Paper, Bundled Sage, Peeled Paint) and add texture with some water droplets
  • cut out a hill shape using a die from the Elizabeth Craft Designs Adventure Edges 2 set and add color with Distress Ink Antique Linen and splatters with watered-down Distress Ink Gathered Twigs
  • stamp the sentiment from the Elizabeth Craft Designs Bear Hugs set with Versafine Clair Nocturne


Have a pandastic day.

Hugs,


Tuesday, October 29, 2019

BOO!

Hi there,

I created this spooky card for Gerda Steiner Designs:

  • stamp the bat and the spider from the Gerda Steiner Designs Bats set and one of the ghosts from the Gerda Steiner Designs Ghosts set with Lawn Fawn Jet Black
  • color the images with Delta, Touch Twin Brush and Copic Markers and add extra shading with Faber-Castell Polychromos pencils
  • create a background on a stitched panel cut from smooth white cardstock with the help of Distress Oxide Inks (Wilted Violet, Black Soot) and a Blending Brush
  • add some splatters for more texture
  • stamp the spider webs from the Gerda Steiner Designs Bats set with Versamark and heat-emboss them with WOW! Singing in the Rain embossing powder
  • stamp the sentiment from the Gerda Steiner Designs Ghosts set onto a piece of torn vellum with Versamark and heat-emboss it with black glitter embossing powder
  • add a strip of purple glitter paper to the top and the bottom of the panel before adhering it to a cardbase


Have a wonderful day.

Hugs,


Monday, October 28, 2019

Happy Birthday Flowers

Hi there,

I created this flowery Happy Birthday Card for the Karten-Kunst Blog:

  • stamp some flowers from the Karten-Kunst Blümchen-Meer set with Distress Oxide Inks onto a rectangular panel cut from watercolor paper (Tumbled Glass, Salty Ocean, Bundled Sage, Dried Marigold, Hickory Smoke)
  • mist the panel with some water and add some splatters
  • cut out the outline from the Karten-Kunst Nyala Script Happy Birthday from vellum and color it with a green Alcohol Marker - cut the sentiment from black cardstock and lay it on top
  • add a strip of patterned paper to the top and the bottom of the panel before adhering it to a cardbase


Thanks for stopping by.

Hugs,


Sunday, October 27, 2019

Fall is here

Hi there,

today, I would like to show you my little no-line coloring fall giraffe:

  • stamp the adorable little giraffe from the Neat & Tangled Wild Ones set with Memento Desert Sand and color it with Delta, Touch Twin Brush and Copic Markers - add extra depth and shading with Faber-Castell Polychromos pencils
  • cut out a stitched scalloped panel from Perfect Colouring Paper
  • stamp the kite from the Gerda Steiner Designs Happy Fall set and the tree and the leaves from the Gerda Steiner Designs Fall in Love set and color these images as well
  • cut a hill shape from green cardstock and add shading with Distress Ink Forest Moss
  • cut some clouds from vellum and color their backs with Alcohol Markers
  • stamp the sentiment from the Gerda Steiner Designs Fall in Love set with Versafine Vintage Sepia onto a little stitched banner
  • mount the panel onto a piece of burlap before adhering it to a cardbase

I hope you got inspired.

Hugs,


Friday, October 25, 2019

Sweeter than Honey

Hi there,

I created this sweet project using the brand new Elizabeth Craft Designs Honey Bear die set:

  • cut out all the elements for the adorable Elizabeth Craft Designs Honey Bear and the three little bees from Elizabeth Craft Designs white Soft Finish Cardstock
  • color the elements with Delta, Touch Twin Brush and Copic Markers and add extra shading with Distress Ink (Brushed Corduroy, Pine Needles) and highlights with a white gel pen
  • stamp the sentiment from the Elizabeth Craft Designs Bear Hugs set with Distress Oxide Ink Rusty Hinge, offset the stamp a little and stamp it again with Versafine Vintage Sepia
  • for the background on a piece of smooth white cardstock cut with the help of one of the Elizabeth Craft Designs Stitched Rectangles apply Distress Oxide Ink Wild Honey through the Clearly Besotted Stamps Honeycomb Crunch stencil and add some splatters with watered-down Distress Ink Rusty Hinge
  • add two strips of brown glitter paper to the left and the right of the panel before adhering it to a cardbase


Have a sweet day.

Hugs,


Thursday, October 24, 2019

Sparkly Halloween

Hi there,

I created this sparkly Halloween Card for the Stamping-Fairies Blog:


Thanks for stopping by.

Hugs,


Tuesday, October 22, 2019

Fall House

Hi there,

I created a step-by-step tutorial for this cute Fall House over on the Elizabeth Craft Designs Blog:


Have fun creating.

Hugs,


Monday, October 21, 2019

Things with Wings - Be amazing

Hi there,

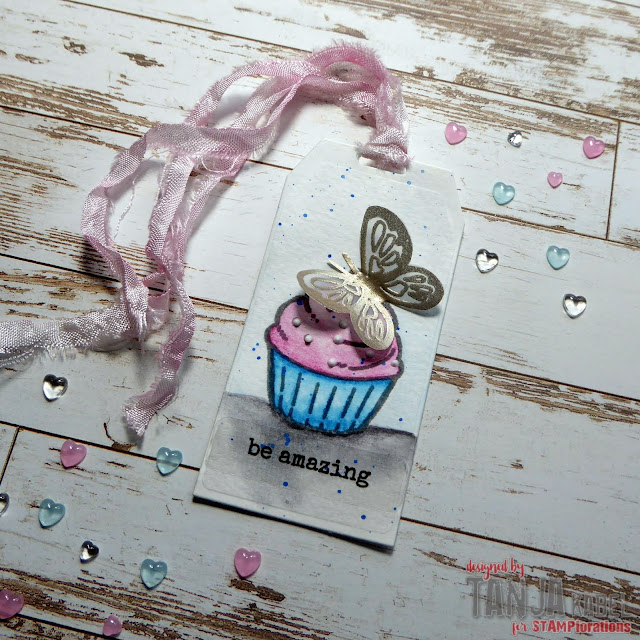
this is my first Things with Wings Special Feature Project Post for STAMPlorations and I created these two tags for you:

  • cut out one of the CUTplorations Manila Tags from watercolor paper
  • apply Glitter Paint through the ARTplorations Lattice stencil
  • while this is drying stamp three butterflies and the beautiful rose from the STAMPlorations Brave One set with My Favorite Things Extreme Black Ink
  • color the images with Delta, Touch Twin Brush and Copic Marker and add extra shading with Faber-Castell Polychromos pencils
  • spray the tag with Heidi Swapp Color Shine Tinsel spray
  • dye a piece of seam binding with Distress Ink Dusty Concord and thread it through the hole of the tag

  • cut out a CUTplorations Manila Tag from watercolor paper
  • stamp the large cupcake from the STAMPlorations Happy Everything set
  • stamp the butterfly from the same set with Versamark and heat-emboss it with WOW! Platinum embossing powder
  • color the image and the background with Derwent Inktense pencils and a damp watercolor brush
  • add Nuvo Crystal Drops Gloss White to the sprinkles
  • the sentiment is from the STAMPlorations Hey Sunshine sticker set
  • dye a piece of seam binding with Distress Ink Spun Sugar and thread it through the hole of the tag

Thanks for stopping by.

Hugs,


Sunday, October 20, 2019

Thanksgiving Place Card

Hi there,

today you will find all kinds of Thanksgiving Table Decorations over on the Elizabeth Craft Designs Blog:

  • create a background on a place card using Distress Ink Crushed Olive and some water droplets for more texture
  • cut out a pumpkin using the Elisabeth Craft Designs Pumpkin die set
  • color the elements with Alcohol Markers and add shading with Distress Oxide Ink Ground Espresso
  • shape the leaves with the Elisabeth Craft Designs All Metal Tool Set
  • cut out the letters with the help of the Elisabeth Craft Designs Blackboard Alphabet
  • color the letters with Alcohol Markers and add shading with Distress Ink Ground Espresso
  • assemble the place card using clear double-sided adhesive and hot glue

Happy Thanksgiving.

Hugs,


Friday, October 18, 2019

Your Day will be filled with ...

Hi there,

I created this fun Halloween Reveal Wheel using lots of Lawn Fawn goodies:

  • stamp the adorable little Lawn Fawn Fortune Teller Tabby with Lawn Fawn River Rock and cut it out with the matching dies
  • color the image with Delta, Touch Twin Brush and Copic Markers and add extra shading with Faber-Castell Polychromos pencils
  • cut out the Lawn Fawn Reveal Wheel from watercolor paper
  • add color to the background with Distress Oxide Inks (Tumbled Glass, Faded Jeans) - create some texture with splatters
  • stamp some stars from the Lawn Fawn Spooky Village set and heat-emboss them with WOW! Glow in the Dark embossing powder
  • add a floor with patterned paper from the Graphic 45 An eerie Tale 6x6 paper pad
  • add some shine to the black panel with Sheer Shimmer Spritz Spray Sparkle
  • the little treats on the wheel are from the Lawn Fawn Spooctacular set - stamped with Versafine Smokey Gray and colored with Mijello Mission Gold watercolors


Have a wonderful day.

Hugs,


Thursday, October 17, 2019

Spooktacular Friend

HI there,

I would like to show you this cute Halloween card over on the Stamping-Fairies Blog:


Have a wonderful day.

Hugs,


Tuesday, October 15, 2019

Happy Fall Y'All!

Hi there,

I created this halloweeny fall card for Gerda Steiner Designs:

  • stamp the owl from the Gerda Steiner Designs Where is the Candy? set with Lawn Fawn Crunchy Leaf
  • color the image with Delta, Touch Twin Brush and Copic Markers and add extra shading with Faber-Castell Polychromos pencils
  • cut out a stitched panel from kraft cardstock and cut out the Poppy Stamps Leafy Breeze
  • layer a piece of glitter paper behind the openings
  • stamp some small leaves from the Gerda Steiner Designs Happy Fall set with Versamark and heat-emboss them with WOW! Rose Glintz embossing powder
  • stamp the sentiment from the Gerda Steiner Designs Fall in Love set with Versamark and heat-emboss it with WOW! Bright White Super Fine embossing powder
  • ink up the edges of the panel and the sentiment strip with Distress Oxide Ink Vintage Photo
  • assemble the card


Have a wonderful day.

Hugs,


Born to fly

Hi there,

this is a reminder to join this month's STAMPlorations Stencil Challenge. I used one of Shery's wonderful face stencils as focal image of my card:

  • apply Distress Oxide Ink Black Soot through the STAMPlorations Gorgeous stencil with the help of a Mini Ink Blending Tool
  • stamp some birds from the STAMPlorations Trendy Birds 2 set with that same black ink
  • stamp the sentiment from the same stamp set with Versafine Clair Nocturne - use the stamp until the ink fades out
  • add some splatters with watered-down ink from the Hero Arts Neon Pink Ink Dauber


Have a wonderful day.

Hugs,


Monday, October 14, 2019

Herzlichen Glückwunsch zum Geburtstag - Happy Birthday

Hi there,

and here is another Birthday Card created with the new Karten-Kunst Lucky Numbers die set:


  • cut out all the elements from the Karten-Kunst Lucky Numbers die set from a white card panel
  • color the larger pieces in rainbow colors with the help of Delta, Touch Twin Brush and Copic Markers
  • cut out the numbers again from silver glitter paper 
  • puzzle the rainbow numbers and the glittery outlines back together again
  • adhere the panel to a light grey cardbase
  • stamp the sentiment from the Karten-Kunst Labelwriter zum Geburtstag with Versafine Clair Nocturne 


Sunday, October 13, 2019

Stamp Connection #53

Hi there,

connected through our love for card making, blogging and being from Germany we (Cornelia from Stempel Spass and I) decided to create a monthly project within predefined requirements. We are going to show you the result every 2nd Sunday of the month and this is our 53rd transatlantic get-together!

Our requirement for this meet-up was: "Halloween"

I created this cute scene using the Clearly Besotted Stamps Train of Terror stamp set:
  • stamp the little train using the Clearly Besotted Stamps Train of Terror set and Versafine Vintage Sepia
  • color the images with Faber-Castell Polychromos pencils
  • cover a white panel with Masking Tape and only leave a strip to color with Distress Oxide Inks (Wilted Violet, Mowed Lawn, Black Soot) and a Blending Brush
  • stamp some trees from the Lawn Fawn Spooky Village set with Versafine Onyx Black and use a black marker to color them in
  • add some splatters with water and Lawn Fawn Liquid Stardust
  • stamp the sentiment and some bats from the same set
  • add a strip of patterned paper from the Graphic 45 An Eerie Tale 6x6 pad to the top and bottom of the panel before adhering it to a cardbase


Now make sure to hop over to see Cornelia's Creation.

Thanks for stopping by. We hope to see you again at the ...


Hugs,