
there is a Mini Release Blog Hop over on the STAMPlorations Blog and I got the chance to work with the fabulous new Lacy Edges and Borders die set.

My first project is a Coffee Tag/Bookmark:
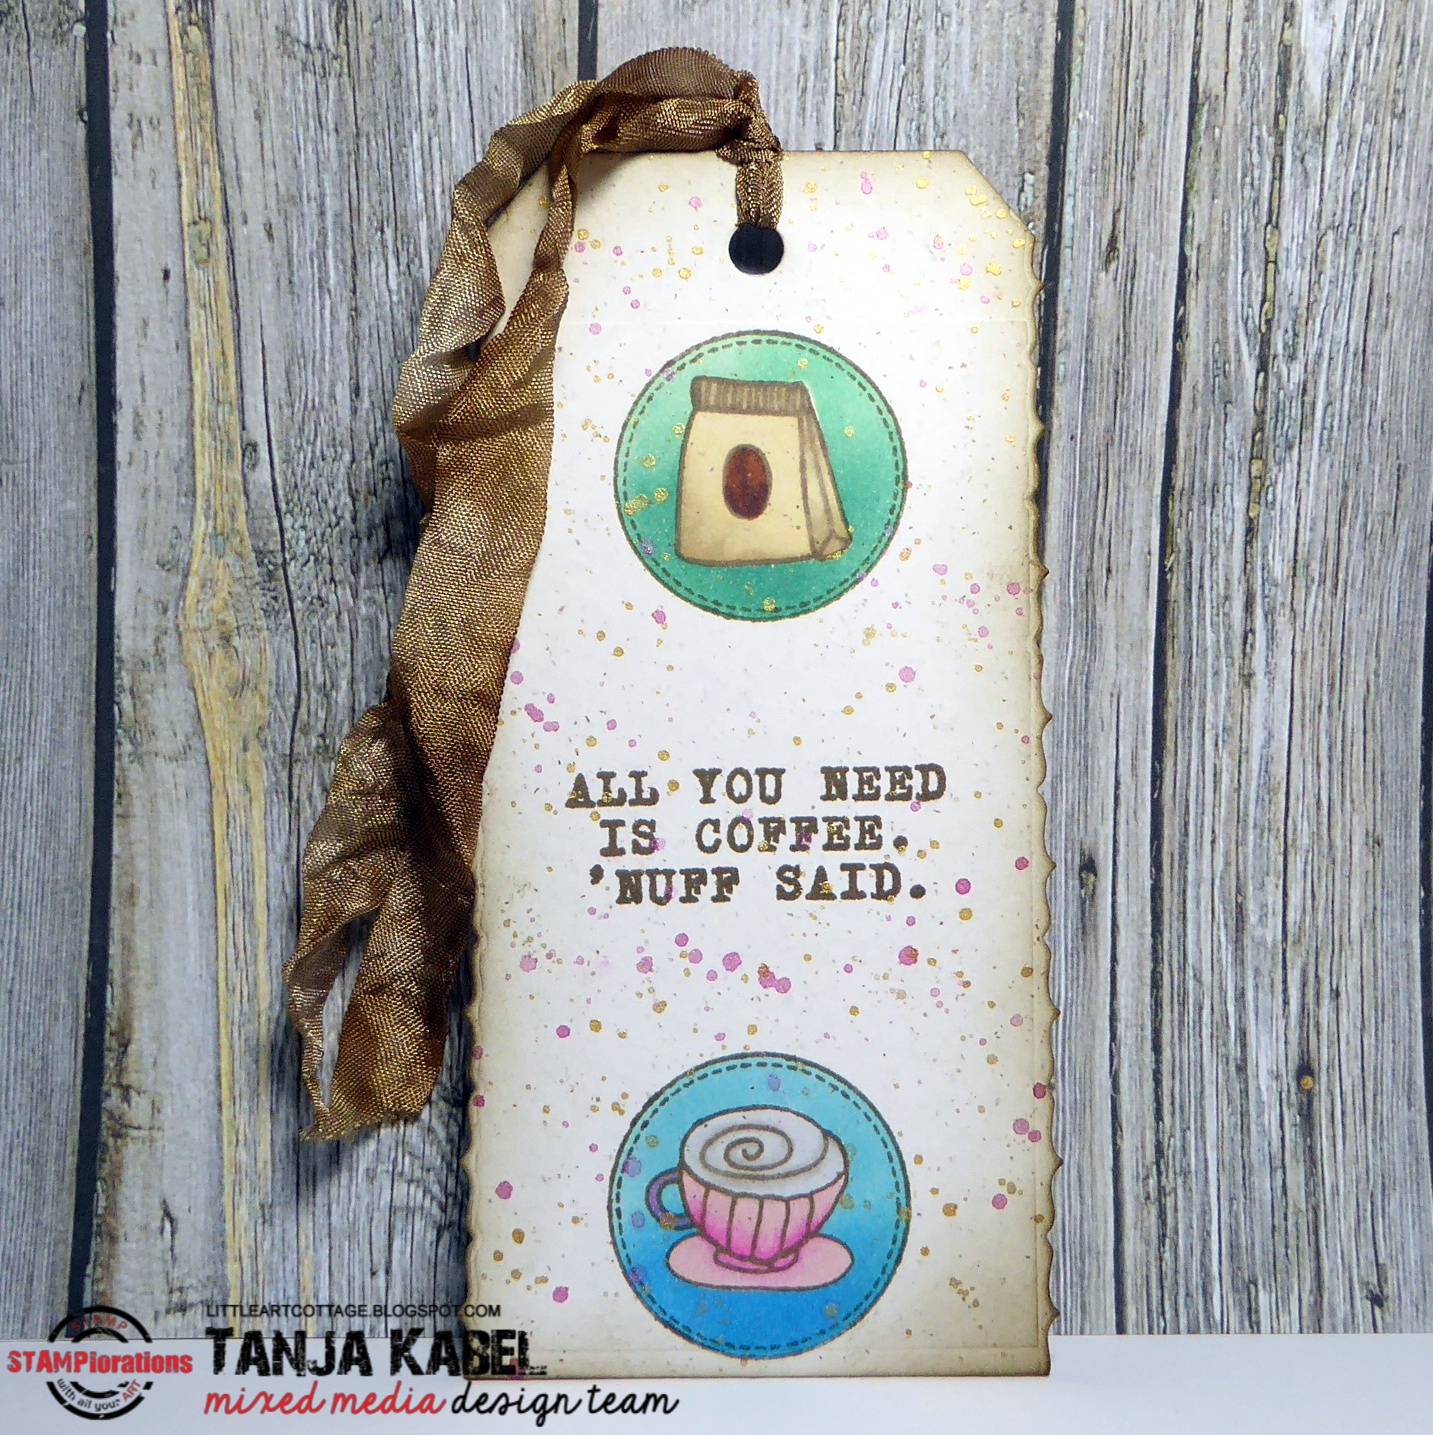
- cut out a tag from Gmund Beer Paper
- use one of the versatile CUTplorations Lacy Edges and Borders dies on both sides of the tag
- stamp the circle and two cute little coffee icons from the STAMPlorations Coffee Petites set with Versafine (Vintage Sepia)
- add the sentiment from the STAMPlorations All you need is Coffee set with that same brown ink
- mask off the coffee icons and the space around the circles and add an ombre background using Distress Inks (Cracked Pistachio, Evergreen Bough, Tumbled Glass, Salty Ocean) and a Mini Ink Blending Tool
- remove the masks and add some splatters with the Prima Marketing Metallic Accents
- color the images with Copic, Delta and Touch Twin Brush Markers
- ink up the edges of the tag and dye a piece of seam binding with Distress Ink (Ground Espresso)
- thread the seam binding through the hole of the tag to finish it
My second project is a vibrant Mixed Media Card:

- create a background on a piece of watercolor paper using watered-down Distress Re-Inkers (Picket Fence, Worn Lipstick, Picked Raspberry)
- use one of the brand new CUTplorations Lacy Edges and Borders dies on the right side of the panel
- mix some DecoArt Media Crackle Paste with Distress Re-Inker (Wilted Violet) and apply it through on of the hearts of the ARTplorations Zen Hearts stencil
- let the crackle paste dry thoroughly
- ink up the edges of the panel and the raised areas with Distress Ink (Black Soot)
- cut out the CUTplorations Happy word die from black cardstock and cover the sentiment with Spectrum Noir Clear Glitter
- use a sticker for the second part of the sentiment and a label from the Dymo Label Maker for the third part
- stamp the script from the STAMPlorations Mixed Media Elements set with Delicata (Silvery Shimmer) for more texture
- add splatters with black gouache
- add a strip of silver glitter paper to the right side of the panel before adhering it to a cardbase
Don't forget to leave comments for there a prizes to be won:
1 winner of a $15 gift certificate and 1 winner of her choice of either the Lacy Edges or Winter & Spring Stitched Landscape dies.
Commenting closes on Tuesday, February 21st.
Winners will be announced on March 10th.
Yours,


Beautiful Tag and I love the card with crackled paint..Awesome.
ReplyDeleteLove that heart. It will be used
ReplyDeleteso much during the year. The tag
is fun.
thanks for sharing.
Love these dies and love your fabulous interpretations!
ReplyDeleteChrissie xx
The die-cut borders immediately add something to the tag or card. Makes them unique, love it!
ReplyDeleteFun first card with a great sentiment and Wow on your card! Lots of fabulous texture and loving the grungy look x
ReplyDeleteBeautiful creations. Love all the texture.
ReplyDeletecheers
preety
gorgeous projects. Thank you for sharing how versatile these dies can be - using them on the edges of the tag is so clever:)
ReplyDeleteHow clever to use your die on the edges of your tag and card. Does your card ever POP with your bright colors and lots of textures. TFS Tanja. Hugs...
ReplyDeleteVery creative! Love the use of the dies on the sides of the cards!
ReplyDeleteLove your coffee tag and your card! Love those edge dies!
ReplyDeleteWhat a fun way to give an artsy edge to your tags! I love texture on your hot pink card with the stenciling.
ReplyDeleteStunning crackle effect and love the way you design both the cards!
ReplyDeleteWonderful coffee tag and lovely card, great texture.
ReplyDeleteVery pretty with the lacy borders.
ReplyDeleteWow! Such a stunning tag!!! Amazing card too!!!
ReplyDeleteLove your grungy tag. These make lovely edges. Hugz
ReplyDeleteThese are all wonderful! Great job!
ReplyDeleteFabulous tag and card with the new edge die set. LOVE them!
ReplyDeleteFab projects, Tanya! I love the wavy edge on the tag.
ReplyDeleteGorgeous projects! Love the vintage feel to the cute tag.
ReplyDeleteAnd love mixed media, so love your pretty card.
Wow, great effect with the Crackle paste dyed... a technique I forget about!
ReplyDeletestunning projects!
ReplyDeleteSuper technique and inspiration for using this gorgeous set.
ReplyDeleteMarjeta
Absolutely fabulous tag and card! xxx
ReplyDelete