Showing posts with label Radiant Neon Amplify. Show all posts

Monday, September 24, 2018

Christmas CUTplorations REDUX

Hi there,

we are having the Christmas CUTplorations REDUX Blog Hop over on the STAMPlorations Blog and these are my creations.


On my first project I used the CUTplorations Let it snow phrase die:

  • stamp one of the houses from the STAMPlorations Houses set and the little fence from the STAMPlorations Houses Extras set with Versafine Clair Morning Mist onto a watercolor panel
  • color the scene with Altenew Watercolors
  • cut out the CUTplorations Let it snow phrase die twice from sturdy white cardstock and layer both pieces on top of each other
  • add dimensional snow using the Tsukineko Radiant Neon Amplify White


And on my second project I used the CUTplorations Stitched Winter Landscape die:

  • create a sky background using a panel of watercolor paper, a Mini Ink Blending Tool and Distress Oxide Ink (Tumbled Glass, Broken China)
  • mist the background with Pearlized Water for a subtle snow effect
  • cut out the CUTplorations Stitched Winter Landscape from smooth white carstock and color the trees and the house with Copic, Touch Twin Brush and Delta Markers
  • stamp the snowman from the STAMPlorations Winter Chill set with Memento Tuxedo Black and color the image with Alcohol Markers as well
  • stamp the sentiment from the same set with the same black ink
  • add highlights with a white gel pen


Enjoy the rest of the hop.

Hugs,


Friday, January 6, 2017

I love Winter Snowman

Hi there,

welcome to our first Happy Little Stampers Mixed Media Challenge in 2017 - this time we would like to see some layers on your project:


  • stamp the adorable Whipper Snapper Designs Sawyer twice with Memento (Tuxedo Black)
  • color the images with Delta, Touch Twin Brush and Copic Markers
  • cut out the hat and the mittens and add them on top of the other image
  • add white Radiant Neon Amplify on the snowy areas on his hat and nose
  • cut out the Lil' Inker Designs Instant Camera frame three times - once from watercolor paper, once from patterned paper from the My Mind's Eye Wood 6x6 paper pad and a third time from patterned paper from the Crate Paper Snow & Cocoa 6x6 paper pad
  • layer the patterend paper frames on top of each other and create a background on the negative of the watercolor frame with Distress Inks (Broken China, Peacock Feathers) and Pearlized Water
  • layer torn strips of patterend paper from the Crate Paper Snow & Cocoa 6x6 paper pad and vellum to create a backdrop for the frame on a white cardbase
  • create a sentment using the Dymo Label Maker and add a white glitter heart cut with the help of the Mama Elephant Confetti die

I hope you got inspired.

Yours,

Wednesday, November 30, 2016

Wishing you Joy

Hi there,

why don't you join us for our Make your Mark Challenge over at Addicted to Stamps and More?


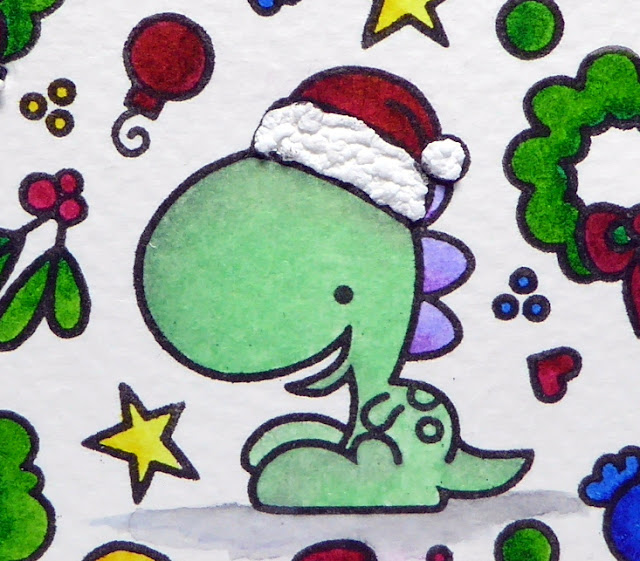
  • stamp the Santa Hat from the Paper Smooches Chubby Chum Pals set with Versafine (Onyx Black) onto a stitched panel cut from watercolor paper and mask it 
  • stamp the super adorable dragon from the Paper Smooches Party Posse set with the same black ink
  • create a background using little images from the Paper Smooches Sugar Rush, Hang ups and Promenade stamp sets
  • color all the images with ZIG Clean Color Real Brush Pens and a damp watercolor brush
  • cut out the Poppy Stamps Swirled Joy from the colorful background and four times from black cardstock
  • puzzle one black diecut into the panel and layer the other black die cuts on top of that
  • adhere the sentiment cut from the background slightly off-set
  • mat the panel onto black cardstock and use the Perfect Layers Mini Tool to create a thin black border around the panel
  • add some Radiant Neon Amplify (White) to the rim of the Santa Hat and its pompon

Here are close-ups of the cute little dragon and the sentiment:


I can't wait to see your creations in the gallery.

Yours,


Tuesday, November 29, 2016

Meowy Christmas

Hi there,

today, I would like to show you this adorable Cat Christmas Card over on the Skipping Stones Design Blog:


Have a wonderful day.

Yours,


Saturday, February 27, 2016