Showing posts with label Washi Tape. Show all posts

Monday, February 26, 2024

Dearest Wishes

Hi there,

I used the brand new Karten-Kunst Delicate Plants stamp set to create this card:

  • mask the sides of the smooth white panel with masking or washi tape
  • add color with Distress Oxide Ink Spun Sugar
  • stamp one of the flowers from the Karten-Kunst Delicate Plants set with Versafine Onyx Black
  • add a sentiment from the Karten-Kunst Aus der Schreibmaschine 3 set with that same black ink
  • adhere the panel to a grey cardbase

Thanks for stopping by.

Hugs,


Monday, November 14, 2022

Gnome Postcard

Hi there,

I created this sweet postcard for the Karten-Kunst Blog:

  • stamp one of the gnomes from the Karten-Kunst Wichtelgrüße set with Lawn Fawn Jet Black
  • color the image with Spectrum Noir Triblend Markers, add extra shading with Faber-Castell Polychromos pencils and highlights with a white gel pen
  • create a postcard using kraft cardstock, a white gel pen, a ruler and a brown fineliner
  • add a washi postage stamp
  • stamp the sentiment from the same set and some hearts from Karten-Kunst Abstrakte Tannen set with Versamark and heat-emboss them with WOW! Bright White Super Fine embossing powder
  • add some faux stitching and some dots with a white gel pen
  • adhere the kraft panel to a cardbase covered with patterned paper


I hope you got inspired.

Hugs,


Tuesday, November 8, 2022

Coffee Hedgehog Tag

Hi there,

I created this sweet hedgehog tag using the Gerda Steiner Designs Coffee Hedgehog stamp set:

  • cut out a Clearly Besotted Stamps Rounded Tag from smooth white cardstock
  • add a strip of washi tape to the bottom of the tag
  • stamp the hedgehog and the coffee mug from the Gerda Steiner Designs Coffee Hedgehog set with Lawn Fawn Crunchy Leaf - use the masking technique
  • color the image with Spectrum Noir Triblend Markers, add extra shading with Faber-Castell Polychromos pencils and highlights with a white gel pen
  • ink up the edges of the tag with some orange ink left in your blending brush and thread two strands of twine through the hole of the tag


Thanks for stopping by.

Hugs,


Wednesday, June 30, 2021

STAMPlorations 8th Birthday

Hi there,

we are celebrating STAMPlorations 8th Birthday over on the STAMPlorations Blog:


  • cut out one of the CUTplorations Manila Tags from watercolor paper
  • apply Distress Oxide Ink (Mermaid Lagoon, Dusty Purple) through the ARTplorations Design Blox #7 stencil
  • cut out the CUTplorations Art Border Die #3 from the left side of the tag
  • add some water droplets for more texture
  • stamp the sentiments from the STAMPlorations Hello You set with Versafine Clair Nocturne
  • adhere some torn washi tape to the tag and use a mini stapler to create some more texture
  • dye a piece of torn seam binding with Distress Ink (mermaid Lagoon, Dusty Concord) and thread it through the hole of the tag


  • stamp the STAMPlorations Blossom Sprays #6 and the sentiment from the STAMPlorations So Loved set with Lawn Fawn Jet Black
  • color the image with Spectrum Noir Triblend Markers and add extra shading with Faber-Castell Polychromos pencils 
  • add a strip of teal cardstock and of patterned paper to the left side of the panel before adhering it to a cardbase


There are fantastic prizes to be won if you join us:

  • one (1) winner of a $75 prize code randomly drawn from current store mailing list subscribers
  • one (1) winner of a $25 prize code randomly drawn from comments left on the birthday hop posts
  • one (1) winner of her choice of birthday bundle randomly drawn from the birthday linky
  • several surprise prizes in the form of prize codes and products

The event ends on July 8th, 2021 and the winners will be announced on July 10th, 2021.

I hope you got inspired.

Hugs,


Thursday, May 16, 2019

Thank you for Holding my Hand

Hi there,

I created this sweet tag with a Washi Tape background for the Stamping-Fairies Blog:

  • stamp a little scene using images from the My Favorite Things Snuggle Bunnies set with Versafine Onyx Black - use the Masking Technique
  • color the bunny and the bear with Inktense Pencils and a damp watercolor brush
  • cut out a stitched tag from smooth white cardstock
  • add washi tape to the bottom left and the top right corner
  • thread a piece of matching twine through the hole of the tag


I hope you got inspired.

Hugs,


Friday, April 26, 2019

Hello Sunshine

Hi there,

I created this rainbow spring card for Elizabeth Craft Designs:

  • stamp the sentiment from the Elizabeth Craft Designs Spring Sentiments set and the pattern from the Elizabeth Craft Designs Patterns 2 set with Versafine Clair Nocturne
  • color the petals with colors from the Derwent Inktense Paint Pan Set
  • embellish the panel with different colors of Nuvo Crystal Drops
  • add a strip of washi tape to the top and bottom of the cardbase before adhering the panel


Have a colorful day.

Hugs,


Tuesday, October 2, 2018

Blessed

Hi there,

we are starting a new TAGplorations Challenge over on the STAMPlorations Blog and this month it is All about Fall and the Optional Twist is Red, Gold and Orange:


  • cut out a CUTplorations Stitched Tag from kraft cardstock
  • apply Prima Marketing Modeling Paste through the ARTplorations Autumn Falling stencil and let this dry thoroughly
  • add color with watered-down orange and red acrylic paint
  • add some gold speckles with Distress Stain Tarnished Brass
  • dye a piece of torn seam binding with the leftover stain on your craft mat
  • back the tag up with a second tag cut with the same die
  • use hot glue to adhere a strip of burlap, sari silk ribbon, some berries and an acorn
  • cut out the CUTplorations Blessed word die from wood backed up with some washi tape and adhere it on top of the fabric


Have a wonderful day.

Hugs,


Monday, June 11, 2018

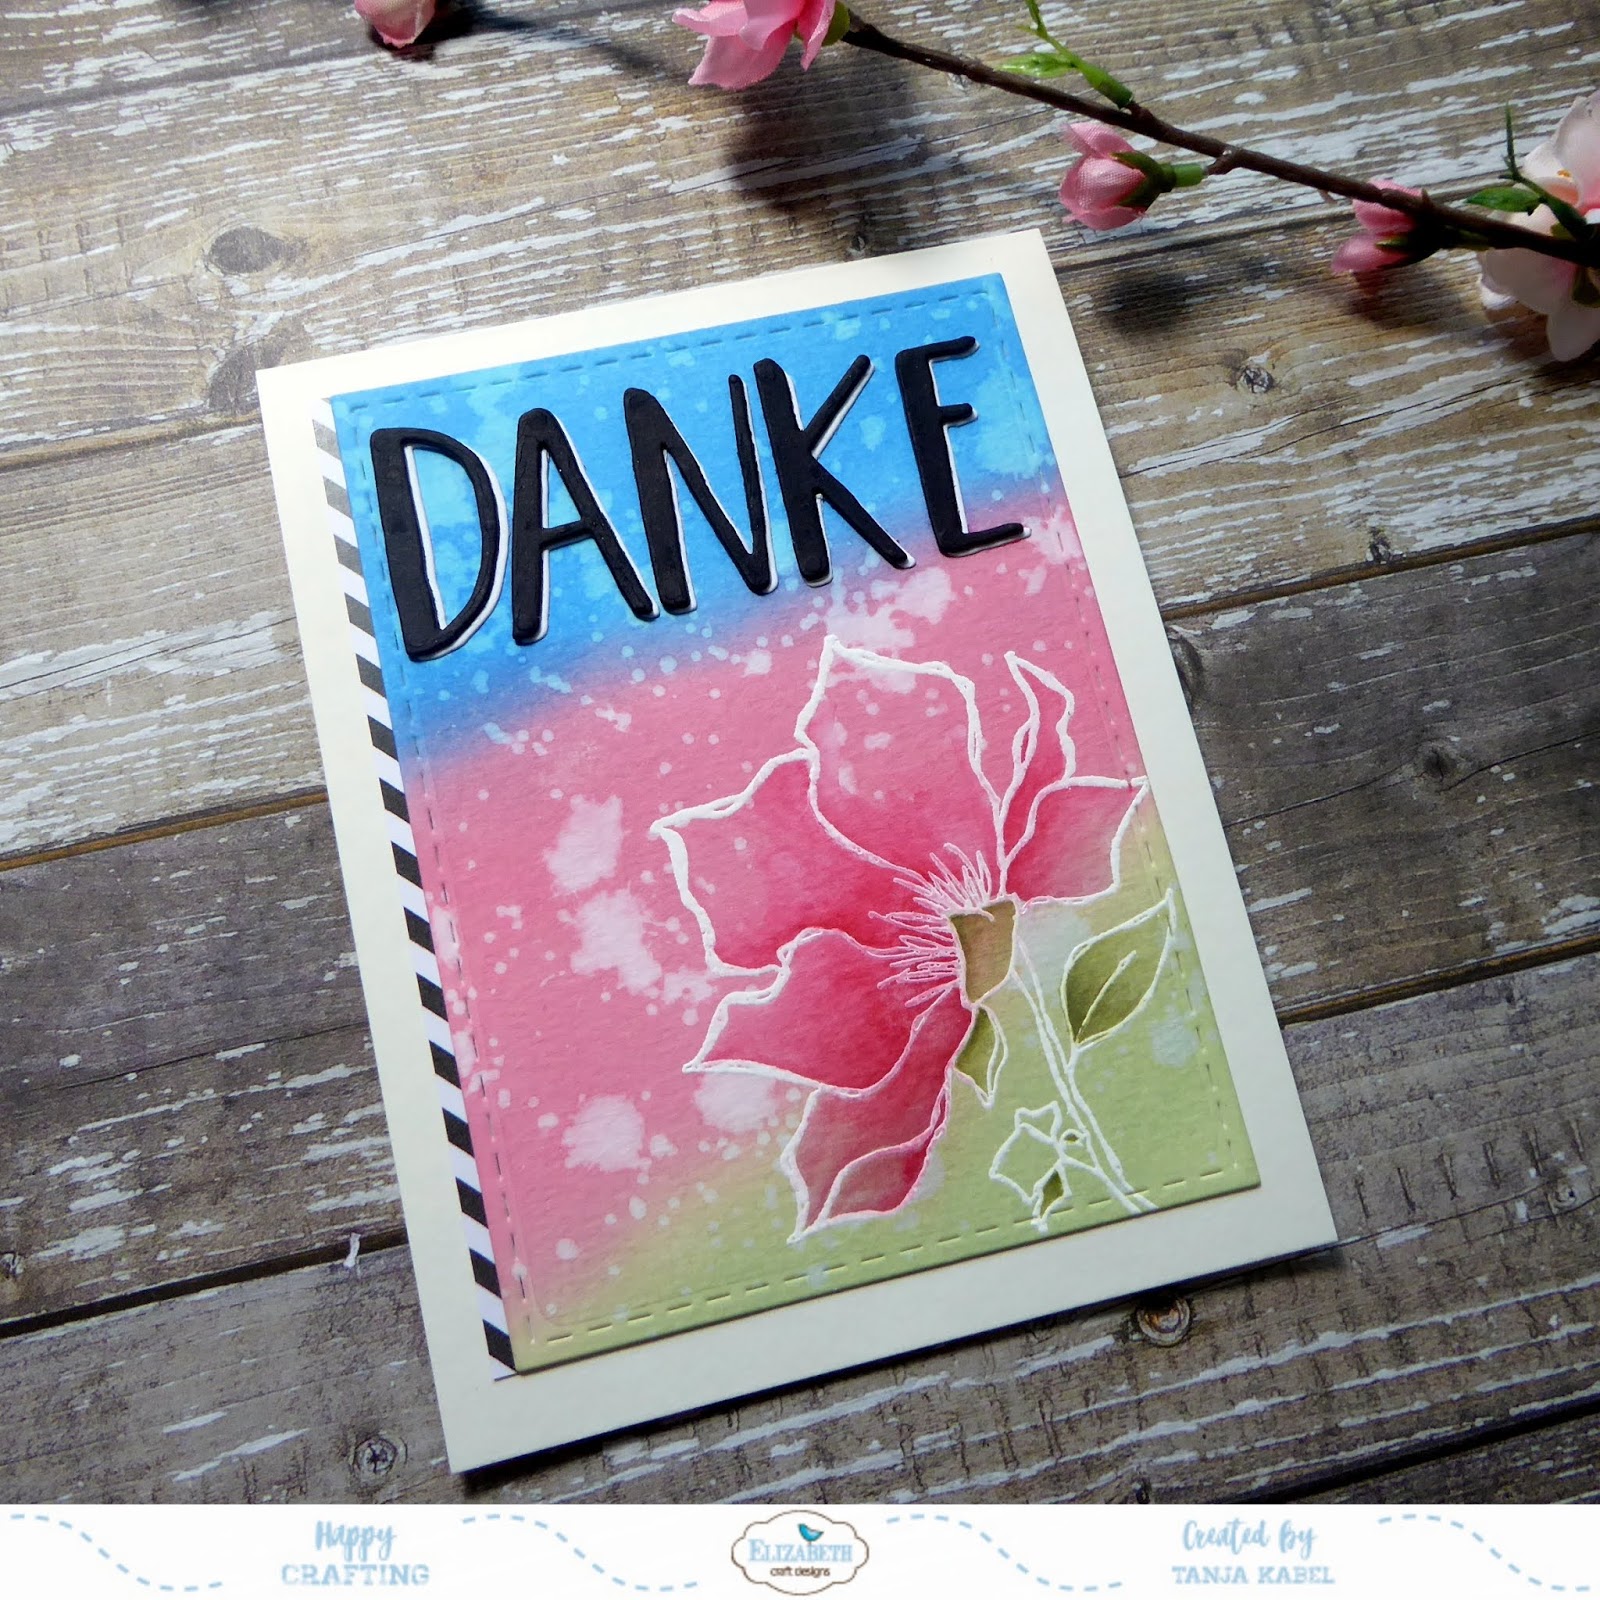
Thank you

Hi there,

I created this thank you card using some wonderful products from Elizabeth Craft Designs:

  • cut out a stitched panel from watercolor paper using one of the Elizabeth Craft Designs Stitched Rectangles 
  • stamp the large flower from the Elizabeth Craft Designs Spring Blooms set with Versamark and heat-emboss it with Hero Arts white embossing powder
  • add color to the background with Distress Oxide Inks (Bundled Sage, Worn Lipstick, Salty Ocean) and a Mini Ink Blending Tool - drop on some water for more texture
  • add more depth and color to the flower with the help of Faber-Castell Albrecht-Dürer pencils and a damp watercolor brush
  • cut out the word "Danke" (thank you) with the fabulous new Elizabeth Craft Designs Blackboard Alphabet once from black and a second time from white cardstock - layer the letters on top of each other leaving a slight offset
  • add a strip of black and white washi tape to the left side of the watercolor panel before adhering it to the cardbase

I hope you got inspired.

Hugs,


Tuesday, May 9, 2017

A Letter for you

Hi there,

on this card I used the Surprise Bonus Image from the Gerda Steiner Designs Spring Stamp Bundle:

  • color the Bunny with Letter image which is available as part of the Gerda Steiner Designs Spring Digital Stamp Bundle with ZIG Clean Color Real Brush Pens and a damp watercolor brush
  • add highlights to the eyes with a white gel pen
  • cut out a panel from watercolor paper using one of the Tim Holtz Stitched Rectangles dies
  • stamp the flowers and the envelopes from the Unity Stamp Company Hashtag Kit with Versafine (Onyx Black) 
  • add color to the background with Distress Oxide Inks (Worn Lipstick, Broken China)
  • use some stripes of thin Washi Tape to add interest and to create a base for the bunny to stand on
  • adhere the panel to a kraft cardbase

Have a colorful day.

Yours,


Wednesday, February 22, 2017

Welcome little Bunny

Hi there,

we are starting a Photo Inspiration Challenge over at Addicted to Stamps and More:


  • stamp one of the adorable bunnies from the Lili of the Valley Bunny Wishes Trio set with Memento (Tuxedo Black) and color the image with Faber-Castell Polychromos Pencils and Zest-it
  • add shimmer to the balloon and the tiny hearts with the Spectrum Noir Clear Glitter Pen
  • score a grid pattern into a strip of watercolor paper and add color with Distress Inks (Hickory Smoke, Cracked Pistachio) and a Mini Ink Blending Tool
  • mist the strip with Pearlized Water
  • cut out a stitched panel from grey cardstock and adhere a piece of washi tape across it
  • stamp the sentiment from Avery Elle Storybook with Versafine (Smokey Gray)
  • add some clouds cut from vellum with the help of the Leabilities Farm dies

Have a wonderful day.

Yours,


Sunday, November 6, 2016

Christmas Washi Tape

Hi there,

it's time for another Stencil Sunday and the start of a new Mixed Media Challenge over on the STAMPlorations Blog and I created my own custom-made Christmas Washi Tape:

  • cover the backside of  a piece of plain tissue wrap with Stick-it Adhesive - leave the backing on until you really want to use the tape
  • cut the tissue wrap into six 2 cm wide strips
  • I created three pairs - a grey, a brown/vintage and a black one

Here is a close-up of the grey Washi Tape:


This is the brown/vintage version of the Washi Tape:


And this is the black pair of the Washi Tape:


This Washi Tape will be great for wrapping your presents or for the use on Christmas Mixed Media Projects. I can't wait to use it.


I hope you got inpsired.

Yours,