Showing posts with label Wood. Show all posts

Thursday, September 25, 2025

Succulents

Hi there,

I created this plant lover card for Mennys Bastelshop using the Mama Elephant Little Succulent Agenda stamp set:

  • stamp three succulents from the Mama Elephant Little Succulent Agenda set with Gina K. Designs Obsidian
  • color the images with Ohuhu Markers, add extra shading with Faber-Castell Polychromos pencils and highlights with a white gel pen
  • add strips of colored cardstock and plywood
  • add more strips of colored cardstock to the bottom portion of the card and three little hearts to the upper portion
  • stamp the sentiment from the My Favorite Things Beauty of Spring set with Versafine Clair Fallen leaves onto a strip of white cardstock

Have a wonderful day.

Hugs,


Thursday, November 9, 2023

Let's build a Snowman!

Hi there,

it's Inspiration Week over at Mennys Bastelshop and this week the topic is "Creative without Paper/Kreativ ohne Papier":

  • cover the top of a wood slice with white gesso
  • stamp the images from the Mama Elephant Snow Friends set with Distress Oxide Ink Hickory Smoke and color them with Schmincke Horadam watercolors
  • stamp some snowflakes from the Lawn Fawn Yeti or Not set with Distress Oxide Ink (Salvaged Patina, Tumbled Glass)
  • use hot glue to add a loop of twine to the back of the tag

Have a creative day.

Hugs,


Monday, December 13, 2021

Christmas Skyline

Hi there,

join me over on the Karten-Kunst Blog for this Christmas Project:

  • create a background on a piece of smooth white cardstock using Distress Oxide Ink (Milled Lavender, Chipped Sapphire)
  • stamp the Karten-Kunst Skyline Winter Village with Versafine Clair Nocturne
  • add some splatters with white gouache
  • stamp the sentiment from the Karten-Kunst Mega Weihnachten with Versamark and heat-emboss it with Ranger Liquid Platinum embossing powder
  • add a strip of woodgrain paper to the top and bottom of the panel before adhering it to a cardbase


I hope you got inspired.

Hugs,


Monday, November 29, 2021

Christmas Mail

Hi there,

today, I am starting to share my Christmas Creations over at the Karten-Kunst Blog:


  • cut out the Karten-Kunst Ash Leaf from green foiled cardstock and its outline from red glitter paper
  • stamp the sentiment from the Karten-Kunst Weihnachten modern set with Versamark and heat-emboss it with WOW! Bright White Super Fine embossing powder
  • add splatters of white gouache to a rectangular panel cut from kraft cardstock and woodgrain cardstock to the left and right side of the panel before adhering it to a cardbase
  • stamp a sentiment from the Karten-Kunst Spruch-Kombinationen Weihnachten to the inside of the card


Thanks for stopping by.

Hugs,


Monday, September 13, 2021

Ahoi Ship's Wheel

Hi there,

I created this maritime card for the Karten-Kunst Blog:

  • cut out the Karten-Kunst - Mini Ship's Wheel from woodgrain cardstock and ink up the edges with Distress Ink Ground Espresso
  • cut out the Karten-Kunst Riesiges Ahoi from white cardstock and ink up one part with Distress Oxide Ink Salty Ocean
  • create a background on a piece of smooth white cardstock using Distress Oxide Ink Salty Ocean, a wave stencil and a Mini Ink Blending Tool
  • add sequins and Nuvo Vintage Drops Bonnie Blue as final embellishments


Thanks for stopping by.

Hugs,


Monday, October 26, 2020

For You Owl Tag

Hi there,

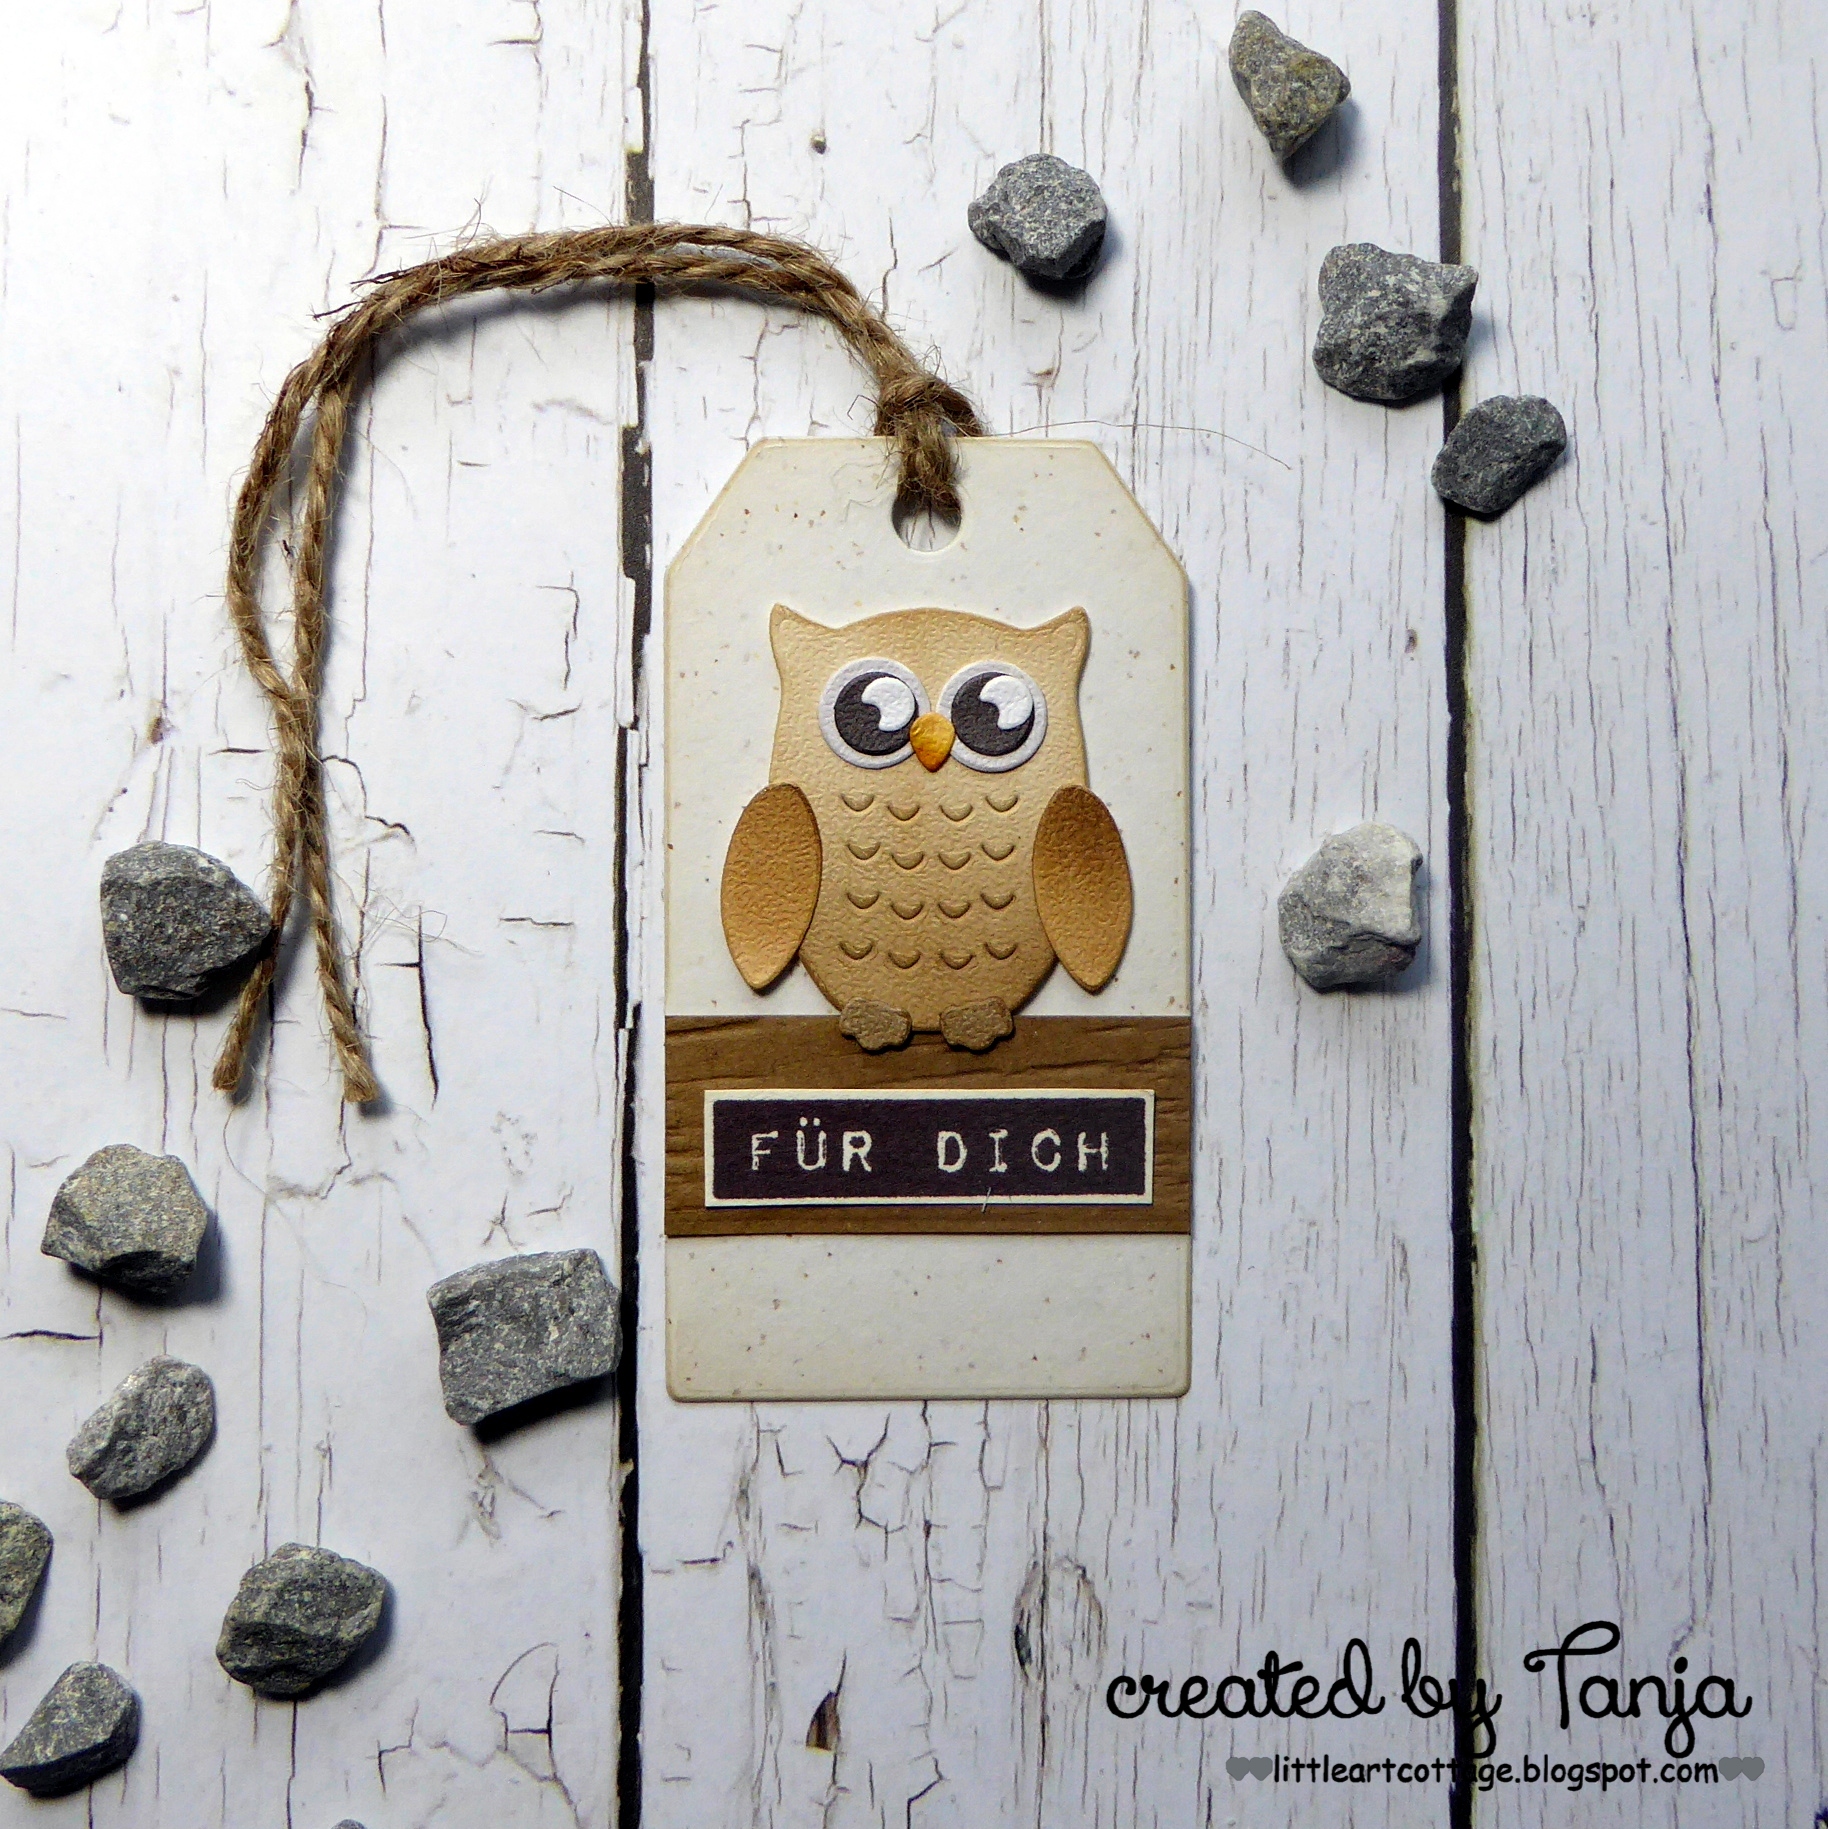
I created this cute Owl Tag for the Karten-Kunst Blog:

  • cut out all the elements of the Karten-Kunst Mini Owl from Elizabeth Craft Designs Soft Finish Cardstock
  • color all the elements with Spectrum Noir Triblend Markers
  • cut out a Karten-Kunst Tag and ink up the edges with Distress Ink Gathered Twigs
  • add a strip of woodgrain paper
  • stamp the sentiment from the Karten-Kunst Labelwriter zum Geburtstag with Versafine Clair Pinecone and adhere it on top of the woodgrain paper
  • add some twine through the hole of the tag


Have a wonderful day.

Hugs,

Sunday, January 6, 2019

Flower Horse

Hi there,

we are starting a new Mixed Media Challenge over on the STAMPlorations Blog and this time I would like to show you this little horse that I decorated for my daughters room:

  • cover a wooden horse with white gesso
  • add color with Distress Paint Cracked Pistachio
  • apply Texture Paste through the ARTplorations Old Rose Print Mini stencil
  • color the roses with watered-down Lindy's Stamp Gang Magicals Salt Water Taffy
  • add splatters with watered-down Distress Paint Shaded Lilac
  • use little black enamel dots as eyes


I can't wait to see your creations in the gallery. 

Hugs,


Friday, December 7, 2018

Wooden Christmas Ornament

Hi there,

I created this wooden Christmas Ornament for Elizabeth Craft Designs:

  • stamp the adorable bear from the Elizabeth Craft Designs Winter Animals set with Versafine Clair Pinecone onto a wooden disk
  • color the image with Faber-Castell Polychromos pencils
  • add Nuvo Crystal Drops Ebony Black to the eyes and Nuvo Crystal Drops Caramel Cream to the sweater
  • glue a piece of twine to the back of the disk using hot glue


I hope you got inspired.

Hugs,


Sunday, December 2, 2018

O Christmas Tree ...

Hi there,

we are starting a new Mixed Media Challenge over on the STAMPlorations Blog and this is my very christmasy creation:

  • color a wooden tree with teal acrylic paint
  • apply Prima Marketing Platinum Crackle Paste through the ARTplorations Oh my Stars! stencil and Texture Paste through the ARTplorations Holly Background stencil
  • let this dry thoroughly - I actually left it over night
  • add shading with Distress Ink Hickory Smoke and a Mini Ink Blending Tool
  • color the holly leaves and berries with Derwent Inktense Pencils and a damp watercolor brush
  • add snowflake splatters with watered-down white acrylic paint
  • now you can stick little fairy lights through the holes and have a wonderful Christmas decoration

I can't wait to see your creations in the gallery.

Hugs,


Tuesday, October 2, 2018

Blessed

Hi there,

we are starting a new TAGplorations Challenge over on the STAMPlorations Blog and this month it is All about Fall and the Optional Twist is Red, Gold and Orange:


  • cut out a CUTplorations Stitched Tag from kraft cardstock
  • apply Prima Marketing Modeling Paste through the ARTplorations Autumn Falling stencil and let this dry thoroughly
  • add color with watered-down orange and red acrylic paint
  • add some gold speckles with Distress Stain Tarnished Brass
  • dye a piece of torn seam binding with the leftover stain on your craft mat
  • back the tag up with a second tag cut with the same die
  • use hot glue to adhere a strip of burlap, sari silk ribbon, some berries and an acorn
  • cut out the CUTplorations Blessed word die from wood backed up with some washi tape and adhere it on top of the fabric


Have a wonderful day.

Hugs,


Tuesday, September 18, 2018

Be Merry Hot Chocolate

Hi there,

we are starting a new challenge over on the Elizabeth Craft Designs Blog and this time the topic is Classic Christmas:

  • cut out the Elizabeth Craft Designs Hot Chocolate cup from watercolor cardstock and all the other elements from white Soft Finish Cardstock
  • color the cup with Paper Artsy Fresco Finish Paint Dolly Mix and add shading with Distress Oxide Ink Dusty Purple
  • color the other elements with Delta, Touch Twin Brush and Copic Markers
  • use the Elizabeth Craft Designs Snowflake Border to cut a stencil from a piece of leftover cardstock
  • mix some Elizabeth Craft Designs Ice Teal Glitter with Gel Medium and apply it through the stencil onto the cup - let this dry thoroughly
  • create your own patterned paper by using the stamps from the Elizabeth Craft Designs Clasic Christmas Sentiments set and Versafine Clair Morning Mist
  • stamp another sentiment from the same stamp set onto the cup
  • adhere some birch bark to the cardbase and put the cup on top
  • add some splatters with watered-down white acrylic paint


The question for this month for the chance to win a $20 gift vouch is:
What Elizabeth Craft Designs die or stamp set would you select if making a Christmas card.

I hope you got inspired.

Hugs,


Monday, April 2, 2018

Tulip Basket

Hi there,

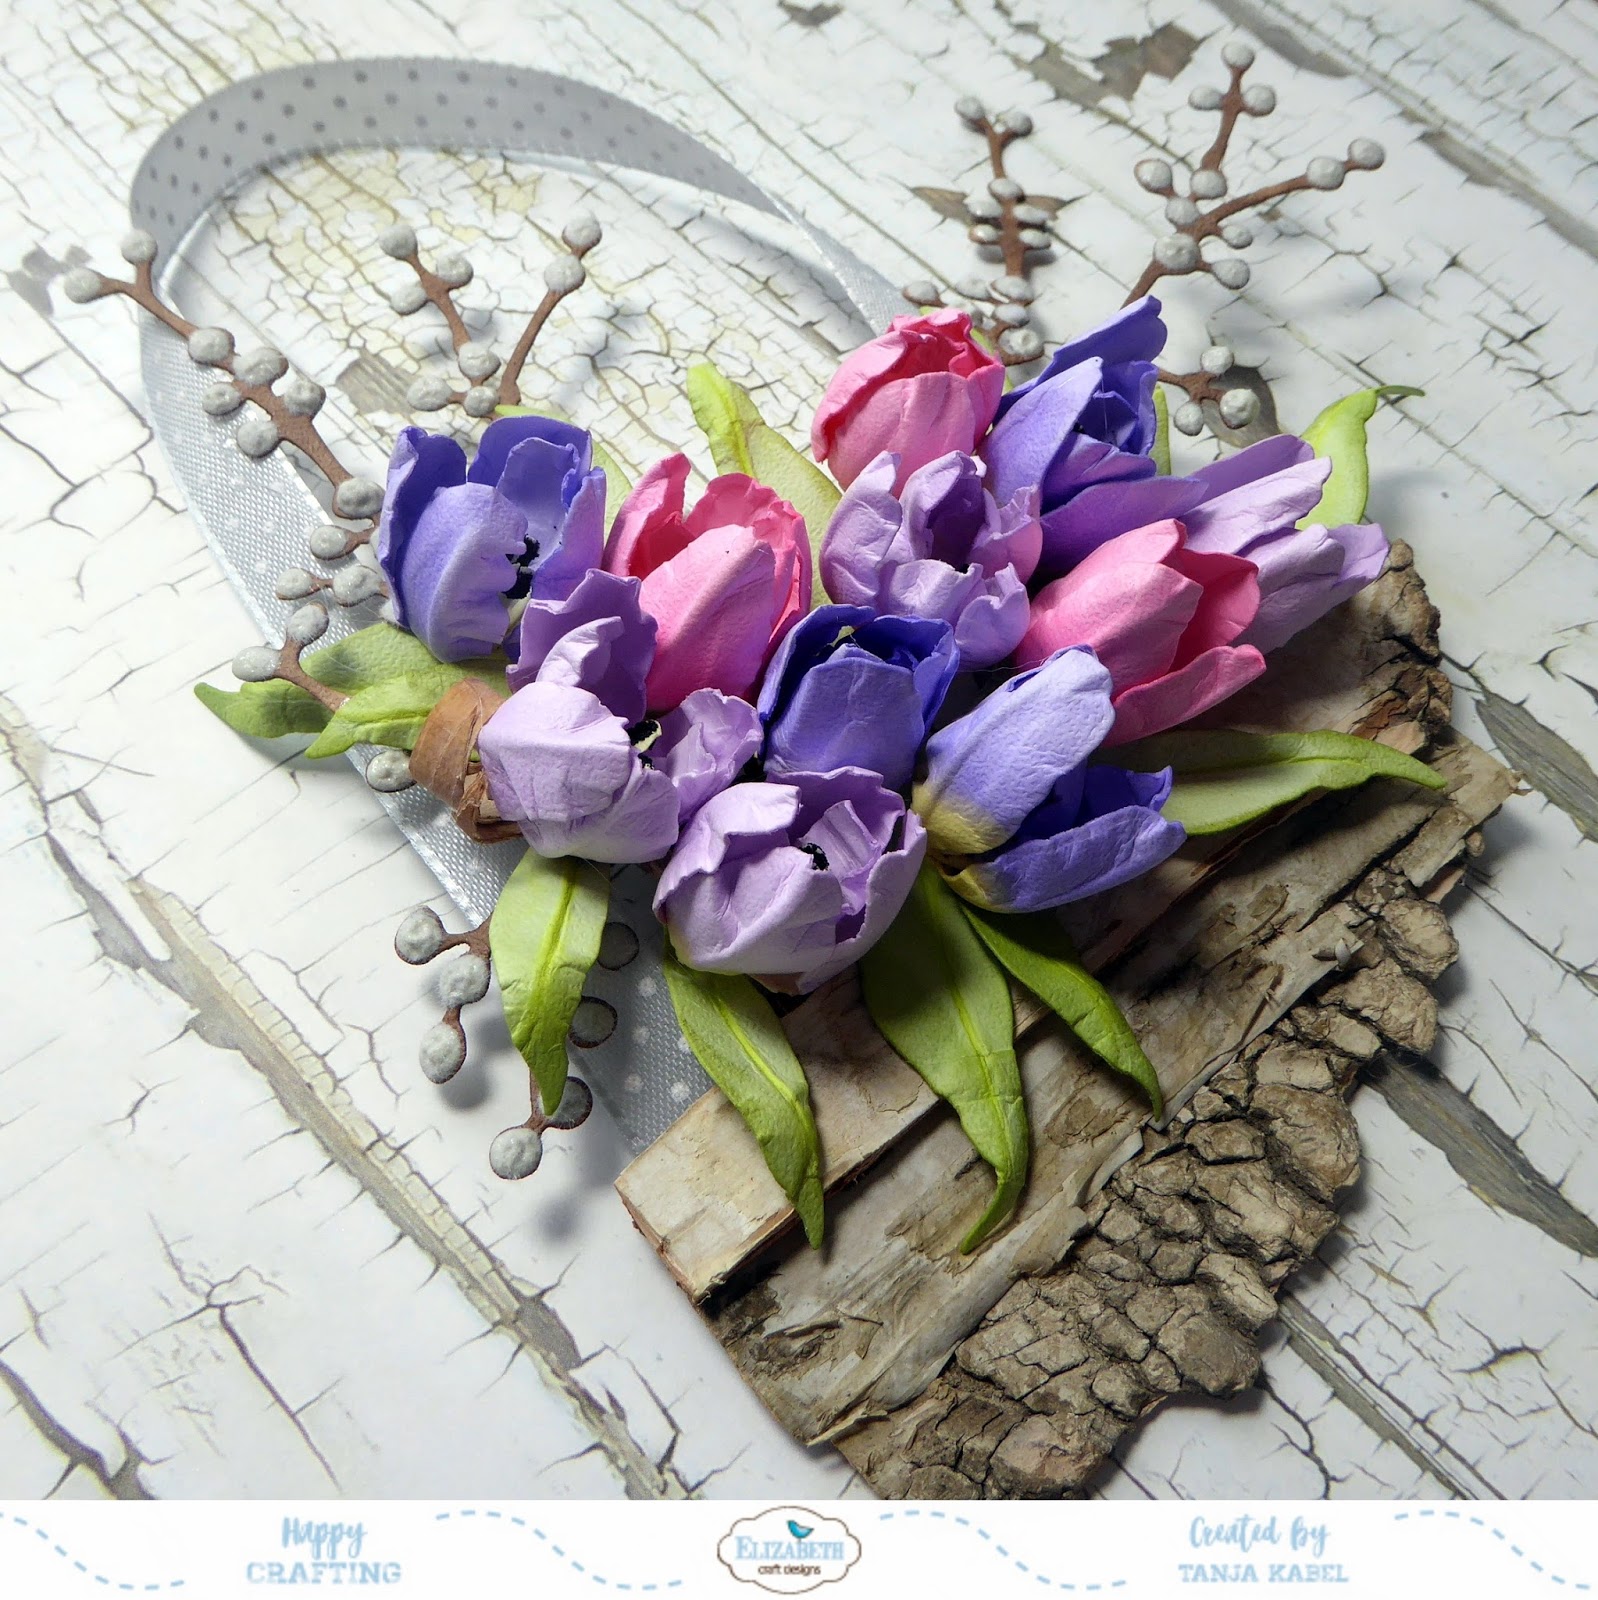
I would like to show you this Spring Tulip Basket that I created for Elizabeth Craft Designs:

  • create 11 tulips and some leaves using the Elizabeth Craft Designs Garden Notes Tulip 2 dies and Elizabeth Craft Designs white Soft Finish Cardstock
  • add color with Delta, Touch Twin Brush and Copic Markers and shading with Distress Ink (Peeled Paint) and PanPastels
  • shape all the elements using the wonderful Elizabeth Craft Designs Susan's Garden Tool Set
  • since I didn't have black Prills I used black embossing powder instead
  • cut out two of the Elizabeth Craft Designs Berry Sprays from Elizabeth Craft Designs white Soft Finish Cardstock
  • use Nuvo Crystal Drops Oyster Grey and white flocking powder to create pussy willow
  • form a basket from birch bark and add a piece of grey ribbon


I hope you got inspired.

Hugs,


Wednesday, November 29, 2017

Peace Love Joy

Hi there,

it's time for a new Photo Inspiration Challenge over on the Addicted to Stamps and More Blog:


  • create a watercolor wreath using Art Impressions Watercolor stamps, Distress Marker, ZIG Clean Color Real Brush Pens and a damp watercolor brush
  • ink up the edges of the watercolor panel with Distress Ink (Frayed Burlap)
  • cut out the CUTplorations Peace Love Joy from woodgrain patterned paper and mount it onto a second die cut from kraft cardstock for more dimension and stability
  • adhere the panel to a kraft cardbase 

Thanks for stopping by.

Yours,


Sunday, October 1, 2017

A Glimpse of Heaven

Hi there,

it is time for another Stencil Sunday and the start of a new Mixed Media Challenge over on the STAMPlorations Blog.

  • I created some new ATC backgrounds and I explain the process in this previous post
  • apply Distress Ink Walnut Stain through the ARTplorations Tribal Weave stencil
  • stamp some of the STAMPlorations Trendy Leaves with Distress Oxide Ink Walnut Stain
  • add water droplets for more texture
  • color the edges with a brown Stabilo All pencil and activate the color with a wet watercolor brush
  • adhere purple linen ribbon with hot glue
  • stamp the script from the STAMPlorations Mixed Media Elements set with Delicata Golden Glitz and add golden splatters with Finetec Mica Watercolors
  • add a wooden leaf and wrap some natural twine around the ATC - glue a little bow on top
  • add a sentiment from the Ideaology Clippings sticker set

I hope you got inspired.

Yours,