Friday, December 30, 2016

Art Journal Covers

Hi there,

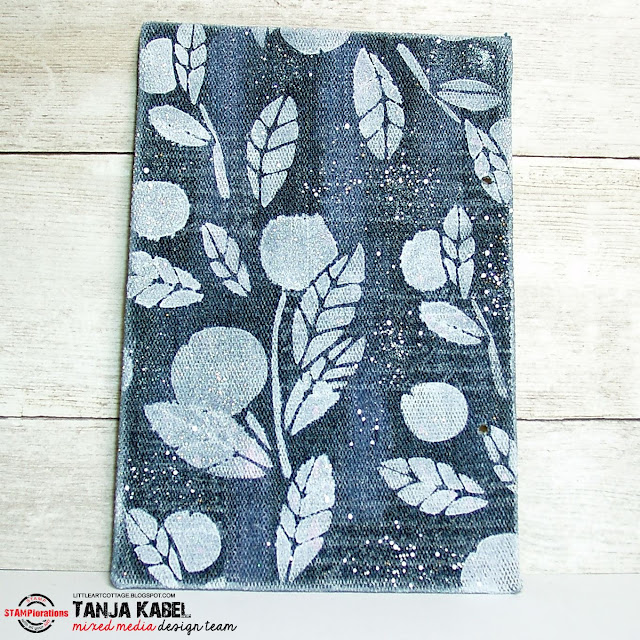
I have another Step-by-Step Tutorial for you over on the STAMPlorations Blog. Do you remember all those Art Journal Pages I created? I made some covers for them:


Thanks for stopping by.

Yours,


Thursday, December 29, 2016

Christmas Gifts

Hi there,

for this adorable Christmas Card I combined two Digital Images from Gerda Steiner Designs:

  • color the Gerda Steiner Designs Naughty Puppy and the Kitten in Giftbag image with ZIG Clean Color Real Brush Pens, Distress Markers and a damp watercolor brush
  • add highlights with a white gel pen
  • stamp the sentiment from the Mama Elephant Jolly and Merry set with Versafine (Vintage Sepia) and add little dots, circles and stars from that same stamp set with Delicata (Golden Glitz)
  • adhere the stitched panel to a kraft cardbase

Thanks for stopping by.

Yours,


Wednesday, December 28, 2016

Snowglobe Tag

Hi there,

when I first saw the Tim Holtz Snowglobe Die Set I knew that I had to have it. Here is my creation using it for the Stamping-Fairies Blog:

  • cut out all the elements of the Tim Holtz Snowglobe die set from watercolor paper, Distress Cardstock, Kraft-Core Nostalgic cardstock and golden glitter cardstock
  • add shadows to all the little pieces with Distress Ink (Hickory Smoke) and a Mini Ink Blending Tool
  • create a background on the watercolor panel with Distress Inks (Faded Jeans, Chipped Sapphire, Black Soot)
  • spitz the background panel with Sheer Shimmer Spritz Sparkle and add splatters with white watercolor paint
  • punch out a little star at the top to turn it into a tag and thread twine through this star-shaped hole

Thanks for stopping by.

Yours,


Monday, December 26, 2016

Merry Christmas Sleeping Deer

Hi there,

I created this cute little Christmas Scene for the Karten-Kunst Blog:

  • cut out two stitched panels from watercolor paper 
  • cut out the Poppy Stamps House in the Woods from one of them - I cut away the house because I didn't need it for my scene
  • add a little shading to the trees using watered-down Distress Ink (Hickory Smoke)
  • create a background on the other panel with Distress Inks (Tumbled Glass, Shaded Lilac, Broken China) and a Mini Ink Blending Tool 
  • mist it the finished background panel with Pearlized Water
  • stamp some snowflakes from the Memory Box Snowglobe Wishes set with Delicata (Silvery Shimmer) and add some dots with a white gel pen
  • color the adorable little sleeping deer from the same stamp set with Delta, Touch Twin Brush and Copic Markers 
  • add the sentiment with Versafine (Onyx Black)

Have a very Merry Christmas.

Yours,


Friday, December 23, 2016

Christmas Pixie

Hi there,

I would like to show you this classic yet modern Christmas Card over on the A Day for Daisies Blog:

  • color the A Day for Daisies Christmas Pixy Two image with ZIG Clean Color Real Brush Pens, Distress Markers and a damp watercolor brush
  • add some Wink of Stella Clear Glitter to the ornament and some white Liquid Applique to the ends of her scarf and the pompons on her shoes
  • in the background I did some - as I call it - collage stamping using the STAMPlorations Joyful set, the WPlus9 Little Bits set and Versafine (Onyx Black)
  • add a strip of yellow foiled cardstock and a thin strip of black cardstock to the right side of the panel before adhering it to a white cardbase

Have a day for daisies.

Yours,


Thursday, December 22, 2016

Oh Joy Kitty

Hi there,

here is another creation using an image from the Gerda Steiner Designs December-January Digital-Stamp-Bundle:

  • color the Gerda Steiner Designs Cat with Heart image which is available as part of the December-January Digital-Stamp-Bundle with Delta, Touch Twin Brush and Copic Markers
  • add highlights with a white gel pen
  • cut out a stitched panel from watercolor paper and stamp the IndigoBlu Triple Parcel image with Versafine (Onyx Black) - I used my Mini Misti to get a crisp impression on this textured surface
  • color the presents and the background with Daniel Smith Watercolors
  • stamp the sentiment from the Lawn Fawn Winter Big Scripty Words set with Altenew Crips Ink (Ruby Red) and cut it out with the matching die
  • add Glossy Accents to the heart for extra dimension

Thanks for stopping by.

Yours,


Wednesday, December 21, 2016

Fairy Advent Calendar Tag

Hi there,

I created this lovely Advent Calendar Tag for the Stamping-Fairies Blog:


  • cut out two tags using the My Favorite Things Tag Builder Blueprints 4 die set - one from sturdy smooth white cardstock and one from patterened paper from the My Favorite Things Painted Prints Smitten 6x6 paper pad
  • cut a window into the striped tag with the help of one of the My Favorite Things Interactive Window STAX
  • add the number 24 and a star cut from silver glitter cardstock using the My Favorite Things Little Numbers dies and the My Favorite Things Tag Builder Blueprints 4 die set to the top of the little door
  • stamp a little scene with the help of the Lawn Fawn Frosty Fairy Friends and Memento (Tuxedo Black) on the inside of the tag - I stamped the magic wand first and masked it off before staming the little fairy
  • color the images with Delta and Touch Twin Brush Markers
  • layer the tags on top of each other with foam tape in between
  • thread silver and natural twine through the holes of the tags as final embellishment

I hope you got inspired.

Yours,


Tuesday, December 20, 2016

Merry Christmas Snowglobe

Hi there,

I would like to show you this cute Christmas Shaker Tag using the Bonus Image from the Gerda Steiner Designs November-December Digital-Stamp-Bundle:

  • color the sweet Gerda Steiner Designs Snowglobe image available as part of the November-December Digital-Stamp-Bundle with Derwent Inktense Pencils and a damp watercolor brush
  • cut two of the Paper Smooches Gift Tags 2 - once from a sturdy white base and once from patterned paper from the Crate Paper Snow & Cocoa 6x6 paper pad
  • cut out a circle window from the patterned paper tag and cover the opening with a piece of acetate
  • create a shaker element on the base tag around the colored image with the help of foam tape and fill it with Pretty Pink Posh Sequins (4mm Sparkling Clear)
  • thread teal and brown twine through the holes of the tags

There is a new Stamp Bundle available for December and January and it also includes a lovely surprise image ... don't miss it.

Have a christmassy day.

Yours,


Monday, December 19, 2016

Christmas Tag #4 - Winter Dreams

Hi there,

I created four Christmas Tags using Gerda Steiner Designs Stamps for the Karten-Kunst Blog that I will show you on Mondays. Here is the fourth and last one:

  • cut out a tag from watercolor paper
  • stamp the freezing snowman from the Gerda Steiner Designs Snowman Friends set with Versafine (Smokey Gray)
  • stamp the sentiment from the Karten-Kunst Weihnachtspost set with Versafine (Onyx Black) and heat-emboss it with WOW! Whirlpool embossing powder
  • color the image and the background with gouache and a watercolor brush
  • add white gouache splatters for a snowy look
  • thread teal and natural twine through the hole of the tag

I hope that you liked my little series.

Yours,


Sunday, December 18, 2016

Stamp Connection #20

Hi there,

connected through our love for card making, blogging and being from Germany we (Cornelia from Stempel Spass and I) decided to create a monthly project within predefined requirements. We are going to show you the result every 3rd Sunday of the month and this is our 20th transatlantic get-together!

Our requirements for this meet-up were:
"winter + not a card"

  • cut out the Lori Whitlock Scalloped Flap Treat Box from patterned paper from the Crate Paper Bundled up Collection
  • cut a window-opening into the front of the box and cover it with a piece of acetate from the inside
  • create a background on a piece of watercolor paper using Distress Inks (Broken China, Salty Ocean), add splatters with Pearlized Water and white Kuretake Gansai Tambi watercolor
  • pop up a stitched hillside cut with one of the Mama Elephant Landscape Trio dies from white cardstock with the help of one of the Mama Elephant Pop up Trio dies
  • now it's time for my favorite part: creating the little scene
  • stamp the two trees and the gift from the Poppy Stamps Christmas Delights set and one of the sweet little bunnies from the Memory Box Bunny Wishes set onto a piece of Perfect Colouring Paper with Memento (Tuxedo Black)
  • color the images with Delta and Touch Twin Brush Markers
  • adhere the elements with double-sided adhesive
  • add Liquid Applique (White) around the window-opening

Now make sure to hop over to see Cornelia's Creation.

Thanks for stopping by. We hope to see you again at the ...


Yours,


Saturday, December 17, 2016

Beautiful Flowers Tag

Hi there,

this is DAY 4 of the ARTplorations Stencil Blog Hop over on the STAMPlorations Blog:

  • cut out a tag with the help of one of the CUTplorations Luggage Tags from watercolor cardstock
  • apply Prima Marketing Modeling Paste through the ARTplorations Two Blooms stencil and let it dry thoroughly
  • color the background with Dylusions Paints (Vibrant Turquoise, London Blue)
  • ink up the edges of the tag with Distress Ink (Black Soot) and a Mini Ink Blending Tool
  • add some splatters using watered-down black and white gouache 
  • add the sentiment using a sticker
  • thread mint and blue twine through the hole of the tag


I hope you got inspired.

Yours,


Friday, December 16, 2016

Merry Christmas Penguins

Hi there,

I would like to show you a fun Christmas card over at the A Day for Daisies Blog:

  • print out the A Day for Daisies Penguin Flight image on Sheena Douglass White Stamping Card
  • cut out a stitched panel using the Memory Box Stitched Rectangle Layers
  • cut out the first part of the sentiment "Merry" with the help of the Clearly Besotted Stamps Merry Christmas Die Collection and red glitter cardstock and the second part of the sentiment "Christmas" using a Dymo Label Maker
  • color the image with Delta and Touch Twin Brush Markers
  • draw a shadow around the image with grey markers and add a line with a white gel pen around the image in order to make it stand out even more
  • add highlights to the balloons using that same white gel pen
  • adhere the sentiments using Multi Medium Matte for the die cut and foam adhesive for the label
  • continue the stitches of the panel on top of the label with a white gel pen
  • stamp one of the Clearly Besotted Stamps Diagonal Stripes with Distress Ink (Peacock Feathers) directly onto a white cardbase
  • add a strip of black cardstock to the left side of the panel before adhering it to the cardbase using double-sided adhesive
  • add Pretty Pink Posh 4mm and 6mm Sparkling Clear Sequins as final embellishments

Have a day for daisies.

Yours,


Oops! - Christmas Cat

Hi there,

this is my first creation with the new December-January Gerda Steiner Designs Digital-Stamp-Bundle. I will show you four more in the next couple of days over on the Gerda Steiner Designs Blog. So stay tuned.

  • color the Gerda Steiner Designs Meowy Christmas image which is available as part of the December-January Digital-Stamp-Bundle with Delta, Touch Twin Brush and Copic Markers
  • add highlights with a white gel pen and texture to the rim and the pompon of the Santa Hat with white Liquid Applique
  • cut out one of the My Favorite Things Stitched Mini Scallop Square STAX around the image
  • add additional texture to a stitched panel of green cardstock using the Lawn Fawn Stitched Borders and mount this onto a darker green piece of cardstock - use the Mini Perfect Layers Tool for the perfect border
  • stamp the sentiment from the Gerda Steiner Designs Happy Fall set onto a strip cut from the darker green cardstock with Versamark and heat-emboss it with WOW! Bright White Super Fine embossing powder and cut the ends of the strip into a banner-shape

Have a wonderful day.

Yours,


Thursday, December 15, 2016

Happy Birthday Polar Bear Tag

Hi there,

I created this super adorable Birthday Tag for the Stamping-Fairies Blog:

  • stamp one of the cute polar bears from the My Favorite Things Polar Bear Pals set and the present from the My Favorite Things Birthday Bears set onto Perfect Colouring Paper with My Favorite Things Hybrid Ink (Black Licorice)
  • color the images with Delta and Touch Twin Brush Markers
  • add highlights with a white gel pen
  • cut out two tags from watercolor paper with the help of the My Favorite Things Tag Builder Blueprints 4
  • cut a hill shape using one of the My Favorite Things Stitched Snow Drifts from one of those tags, cover it with Versamark and heat-emboss it with WOW! Neutral Ultra Shimmer embossing powder
  • create a background on the tag with Distress Inks (Tumbled Glass, Salty Ocean, Chipped Sapphire) and the Mini Ink Blending Tool 
  • stamp the My Favorite Things Snowfall Background with Delicata (White Shimmer) and add additional snowflakes by spritzing the background with Sheer Shimmer Spritz (Sparkle)
  • stamp the sentiment from the My Favorite Things Birthday Bears set with Versamark directly onto the tag and heat-emboss it with WOW! Bright White Super Fine embossing powder
  • adhere the hill with double-sided adhesive and the polar bear and the present with foam tape
  • thread blue and silver twine through the hole of the tag

I hope you got inspired.

Yours,

Wednesday, December 14, 2016

From Ours to Yours Tag

Hi there,

this is Day 1 of the ARTplorations Stencil Blog Hop over on the STAMPlorations Blog:

  • cut out a tag with the help of one of the CUTplorations Luggage Tags from watercolor cardstock
  • stamp some STAMPlorations Houses with Versafine (Smokey Gray) using the Masking Technique
  • color the houses and the background with Jaxon Aquarelle watercolors
  • ink up the edges of the tag with Distress Ink (Chipped Sapphire) and a Mini Ink Blending Tool
  • apply Prima Marketing Modeling Paste through the ARTplorations Dots all over stencil
  • add the sentiment using a sticker
  • thread silver and blue twine through the hole of the tag
  • use white Liquid Applique to create some snow


 I hope you enjoy the rest of the hop.

Yours,


Sending Hugs and Flowers

Hi there,

we are starting our CAS Challenge over at Addicted to Stamps and More:

  • stamp several flowers from the beautiful Happy Little Stampers Doodled Flowers stamp set with Memento (Tuxedo Black) - use the Masking Technique
  • add the sentiment from the same stamp set with the same ink
  • color the images with Delta and Touch Twin Brush Markers
  • add a light grey border around all the flowers and details with a white gel pen
  • cut out the right side of the flower border and layer a strip of patterned paper from the Avery Elle Neutral Collection behind it before adhering everything to a white cardbase

Have a wonderful day.

Yours,


Tuesday, December 13, 2016

Gift Wrapping

Hi there,

here is another fun Christmas card using a Digital Image from the Gerda Steiner Designs November-December Digital-Stamp-Bundle:

  • color the Gerda Steiner Designs Gift Wrapping image which is available as part of the November-December Digital-Stamp-Bundle with ZIG Clean Color Real Brush Pens and a damp watercolor brush
  • add highlights with a white gel pen
  • cut out the Paper Smooches Notebook Basic twice - one from red glitter cardstock and one from Neenah Desert Storm kraft cardstock
  • stamp a subtle background onto the kraft panel using Versamark and the Create a Smile Snow Flurry stamp
  • adhere the panel to a cardbase from the wonderful Gmund Beer Paper (Weizen) 
  • add a sentiment created with the Dymo Label Maker

I hope you got inspired.

Yours,


Monday, December 12, 2016

Christmas Tag #3 - Christmas Mail

Hi there,

I created four Christmas Tags using Gerda Steiner Designs Stamps for the Karten-Kunst Blog that I will show you on Mondays. Here is the third one:

  • cut out a tag from Neenah Desert Storm kraft cardstock
  • stamp the adorable little Gingerbread Man from the Gerda Steiner Designs Holiday Friends set with Versafine (Vintage Sepia) and mask it off
  • stamp the two presents from the same stamp set with the same ink using the masking technique as well
  • stamp the sentiment from the Karten-Kunst Weihnachtspost set with Versamark and heat-emboss it with WOW! Bright White Super Fine embossing powder
  • color the image with Delta and Touch Twin Brush Markers
  • add details with a white gel pen
  • add random dots around the image with a clear glitter gel pen
  • thread silver and natural twine through the hole of the tag

Thanks for stopping by.

Yours,


Sunday, December 11, 2016
Organizer

Hi there,

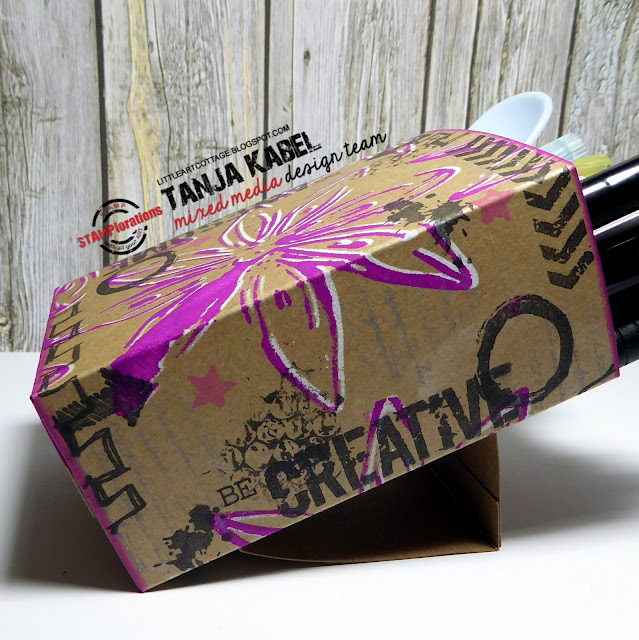
it's Stencil Sunday Time over on the STAMPlorations Blog:


Here are some more pictures:


I hope you got inspired and don't forget to join us for our Mixed Media Challenge over at the STAMPlorations Blog. The theme is always anything mixed media except a card. You must use at least one stencil (any brand) in your project. The Linky closes at the end of the month.

Yours,


Saturday, December 10, 2016

Winter Penguin Tag

Hi there,

today, I am using the adorable penguin image from the Gerda Steiner Designs November-December Digital-Stamp-Bundle to create a winter tag:

  • color the sweet Gerda Steiner Designs Penguin in Sweater image available as part of the November-December Digital-Stamp-Bundle with Prismacolor Colored Pencils and Zest-it
  • add highlights with a white gel pen
  • cut out a tag from watercolor paper using one of the My Favorite Things Tag Builder Blueprints 6 dies
  • create an ombre background with Distress Inks (Tumbled Glass, Broken China, Mermaid Lagoon)
  • mist the tag with Pearlized Water for a snowy texture and add little dots with a white paint marker
  • thread blue and natural twine through the hole of the tag

Have a wonderful day.

Yours,


Friday, December 9, 2016

Kitty Gift

Hi there,

I would like to show you this pastel Watercolor Christmas Card over on the A Day for Daisies Blog:

  • color the A Day for Daisies Kitty Gift image with ZIG Clean Color Real Brush Pens, Distress Markers and a damp watercolor brush
  • use the darker shades of the ZIG Clean Color Real Brush Pens to create a watercolor background on a stitched panel of watercolor paper
  • run this panel through your Big Shot and emboss a subtle texture with the help of the Tim Holtz Layering Stencil (Holiday Knit)
  • accentuate the raised areas with Distress Ink (Hickory Smoke) and a Mini Ink Blending Tool
  • stamp the sentiment from the Lawn Fawn Frosty Fairy Friends onto a strip of black cardstock with Versamark and heat-emboss it with WOW! Bright White Super Fine embossing powder
  • add some iridescent sequins as final embellishments 

Have a day for daisies.

Yours,