Showing posts with label Dylusions. Show all posts

Thursday, March 28, 2024

You are Great!

Hi there,

I used the My Favorite Things Squish Friends stamp set to create this adorable card for Mennys Bastelshop:

  • stamp the cat and the bunny from the My Favorite Things Squish Friends set with Gina K. Designs Obsidian
  • color the image with Spectrum Noir Triblend Markers, add extra shading with Faber-Castell Polychromos pencils and highlights with a white gel pen
  • create a background using the Heffy Doodle Layering Hearts stencils, Distress Oxide Ink (Spun Sugar, Worn Lipstick) and Dylusions Shimmer Paint White Linen
  • cut out the Create A Smile Du bist Toll from vellum and colored cardstock
  • add a strip of foiled cardstock to the left and right side of the panel before adhering it to a cardbase

I hope you got inspired.

Hugs,


Monday, March 15, 2021

Life in Bloom

Hi there,

this is just a quick reminder of this month's Stencil Challenge over on the STAMPlorations Blog:

  • add some color to a white canvas with Dylusions Paint
  • apply white embossing paste through the ARTplorations Happy Flowers and Dream Flowers stencils and let this layer dry thoroughly
  • add some color to the flowers with Distress Oxide Ink (Wilted Violet, Picked Raspberry, Fossilized Amber, Forest Moss)
  • stamp the dot pattern from the STAMPlorations Scribbly Splattery Grunge set with Versamark and heat-emboss it with some turquoise embossing powder
  • adhere a sticker from the STAMPlorations Hello Spring set to a piece of Neenah Desert Storm kraft cardstock before layering it on sari silk ribbon and burlap
  • add some scribbly acrylic paint lines as finishing touch

I hope to see your creations in the gallery.

Hugs,


Monday, March 1, 2021

Be strong

Hi there,

we are starting a new Stencil Challenge over on the STAMPlorations Blog and this is my creation:

  • add some color to a white canvas with Dylusions Paint
  • apply white embossing paste through the ARTplorations Trees stencil and let this layer dry thoroughly
  • add some shading to the trees with Derwent Inktense Pencils and a damp watercolor brush
  • stamp the dot pattern from the STAMPlorations Mixed Media Grunge set with Versafine Clair Nocturne along some parts of the border
  • color a piece of white cardstock with Distress Oxide Ink Evergreen Bough and adhere a sticker from the STAMPlorations Inspirational #1 set
  • add some splatters with watered-down Distress Paint Pumice Stone and Distress Stain Tarnished Brass
  • adhere the sentiment to a layer of linen and burlap before adding it to the canvas

I hope you got inspired.

Hugs,


Sunday, November 15, 2020

You can never have too much happy

Hi there,

my daughter and son created these beautiful Mixed Media Canvases - with just a little help -this post serves as a quick reminder for this month's Stencil Challenge over on the STAMPlorations Blog:


  • we used the STAMPlorations Rosegarden and Leaf Prints 3 stencils, embossing paste, embossing powders, acrylic paints, inks, some alphabet stamps and a sentiment strip created on a Vintage Typewriter


I just love what they created and I hope you do too.

Hugs,


Friday, October 6, 2017

Discover ATC

Hi there,

we are starting a new Mixed Media Challenge over on the Happy Little Stampers Blog and this time we would like to see some crackle on your project:


  • cut out an ATC from sturdy white cardstock with the help of the CUTplorations ATC/Tag Builder die
  • use matte medium to cover the ATC with a piece of gelli-printed tissue paper
  • add scraps of linen tape
  • cover the whole card with watered-down white gesso
  • apply Crackle Paste through the ARTplorations Leaf Prints Mini stencil and let it dry thoroughly
  • add black Stabilo All Pencil all round the edges and add water with a watercolor brush
  • apply Dylusions Paint (Calypso Teal) to the leaf shapes and spritz it with water
  • add black and white splatters
  • use hot glue in order to add cheesecloth, two torn strips of patterned paper, burlap and a sentiment sticker

Thanks for stopping by.

Yours,


Friday, September 8, 2017

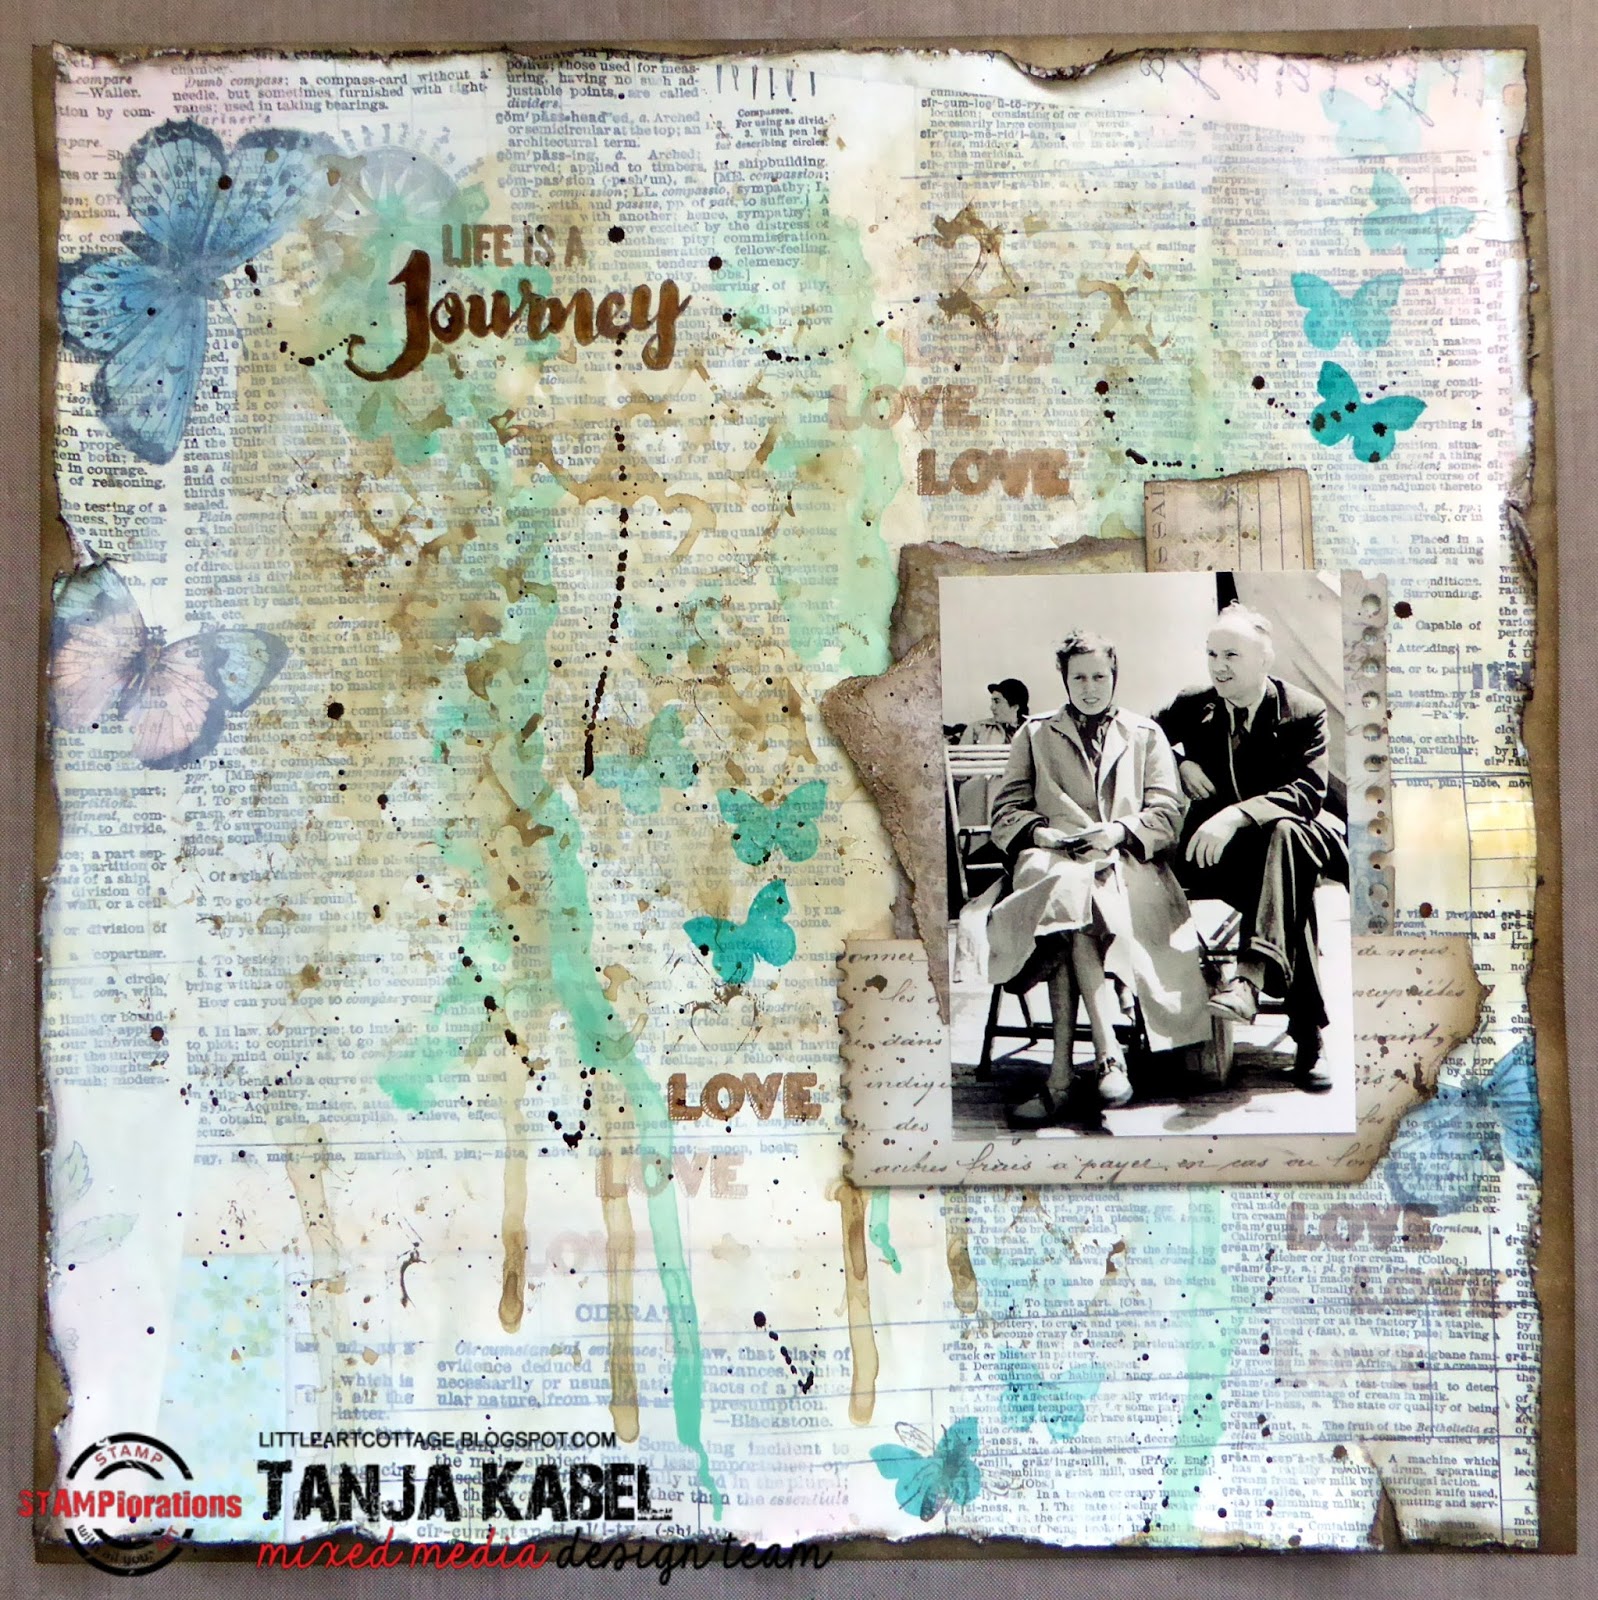
Life is a Journey Scrapbook Layout

Hi there,

I have a new step-by-step tutorial over on the STAMPlorations Blog for you and this time I would like to show you how to create this scrapbook layout.


I hope you got inspired and don't forget to join us for our Mixed Media Challenge over at the STAMPlorations Blog. The theme is always anything mixed media except a card. You must use at least one stencil (any brand) in your project. The Linky closes at the end of the month.

Yours,


Friday, July 28, 2017

Blossom Index Card

Hi there,

Our Mixed Media Moods is celebrating its one year Moodaversary and I created this Index Card inspired bei Jenn's and Dee Dee's Mood Board:


  • glue together two 3'' x 5'' index cards for an extra sturdy base
  • cover the whole card with white gesso
  • add an extra layer with heavy gesso and carve some leaf shapes into it with the back of your paintbrush
  • add some color with watered-down Dylusions Paint (Funky Fuchsia, Calypso Teal)
  • use a black Dina Wakley Scribble Stick to add some shadows around the leaves
  • add some texture to the background by stamping the Rubber Dance Vintage Hotel Receipt with Archival Ink (Watering Can)
  • add faux stitching all around the card with the help of one of the stamps from the Darkroom Door Stitched Borders set and Archival Ink (Black Soot)
  • add a sentiment sticker on top of a piece of matching used underpaper and corrugated cardboard

Have a wonderful day.

Yours,


Sunday, June 4, 2017

Altered Box

Hi there,

it is time for another Stencil Sunday and the start of the June Mixed Media Challenge over on the STAMPlorations Blog. This time I altered a round paper box and turned it into a desk organizer.

  • adhere Tissue Wrap to the whole box with gel medium and cover it with white gesso
  • add Crackle Paste at random spots and let it dry thoroughly
  • use Dylusions Paint (Vibrant Turquoise) to add color
  • apply Dylusions Paint (Black Marble) over the cracked areas and through the ARTplorations Bloom Silhouettes stencil
  • add white splatters with watered-down Dylusions Paint (White Linen)
  • use some Metallic Rub On Paste for a grungy finish

Here is another picture of the box:


I hope you got inspired.

Yours,


Sunday, March 12, 2017

Hugs Tag

Hi there,

it's Stencil Sunday Time over on the STAMPlorations Blog and I created this tag for you.

  • cut out a CUTplorations Luggage Tag from watercolor paper and cover it with gesso
  • apply Prima Marketing Modeling Paste through the ARTplorations Rows of Hearts stencil
  • add color using Dylusions Sprays (Bubblegum Pink, Funky Fuchsia)
  • add splatters with watered-down white gouache 
  • stamp the script from the STAMPlorations Mixed Media Elements set with Archival Ink (Black Soot) onto some of the raised areas
  • ink up the edges of the tag with Distress Ink (Black Soot)
  • dye some cheesecloth and a piece of seam binding with the same Dylusions Sprays used on the tag
  • cut out one of the Tattered Lace Tuck in Hearts and color them with Distress Ink (Wilted Violet, Black Soot) - mist the hearts with water to create some texture
  • cut out the CUTplorations Hugs from silver glitter cardstock
  • use the Tiny Attacher to secure the cheesecloth and the hearts and liquid glue to adhere the sentiment
  • thread the piece of seam binding through the hole of the tag

I hope you got inspired and don't forget to join us for our Mixed Media Challenge over at the STAMPlorations Blog. The theme is always anything mixed media except a card. You must use at least one stencil (any brand) in your project. The Linky closes at the end of the month.


Yours,


Sunday, February 12, 2017

Forever Love Tag

Hi there,

this is my first creation for the Love TAGplorations Hop over on the STAMPlorations Blog.


  • cut out a tag from watercolor paper using the CUTplorations ATC Tag Builder 
  • apply Prima Marketing Light Paste through the ARTplorations Zen Hearts stencil
  • cut out the CUTplorations forever word die from dark grey and light grey cardstock and layer them on top of each other - add shimmer with the Spectrum Noir Clear Glitter Pen
  • add color to the tag with Dylusions Ink Spray (Vibrant Turquoise, Calypso Teal) and dye a piece of seam binding with those same colors
  • add black splatters with Kuretake Gansai Tambi watercolor
  • ink up the raised areas and the edges of the tag with Distress Ink (Black Soot)
  • create the second part of the sentiment using a Dymo Label Maker

Enjoy the rest of the hop and don't forget to comment and link up your own Love TAGplorations projects. The Winners will be announced on March 10th.

Yours,

Thursday, February 9, 2017

Flower Hair Clip

Hi there,

I would like to show you this Mixed Media Project for big and small flower fairies over on the Stamping-Fairies Blog:

  • dye a piece of cheesecloth with Dylusions Sprays (Bubblegum Pink, Funky Fuchsia)
  • roll the cheesecloth into a strip and apply a generous amount of Prima Marketing Sculpture Medium Clear
  • create a rose and let it dry thoroughly
  • cut out two leaves from green felt using the Tim Holtz Tiny Tattered Florals
  • use the Bosch GluePen to adhere the little flower arrangement to a white hair clip

Have a wonderful day.

Yours,


Saturday, December 17, 2016

Beautiful Flowers Tag

Hi there,

this is DAY 4 of the ARTplorations Stencil Blog Hop over on the STAMPlorations Blog:

  • cut out a tag with the help of one of the CUTplorations Luggage Tags from watercolor cardstock
  • apply Prima Marketing Modeling Paste through the ARTplorations Two Blooms stencil and let it dry thoroughly
  • color the background with Dylusions Paints (Vibrant Turquoise, London Blue)
  • ink up the edges of the tag with Distress Ink (Black Soot) and a Mini Ink Blending Tool
  • add some splatters using watered-down black and white gouache 
  • add the sentiment using a sticker
  • thread mint and blue twine through the hole of the tag


I hope you got inspired.

Yours,


Sunday, December 11, 2016

Organizer

Hi there,

it's Stencil Sunday Time over on the STAMPlorations Blog:


Here are some more pictures:


I hope you got inspired and don't forget to join us for our Mixed Media Challenge over at the STAMPlorations Blog. The theme is always anything mixed media except a card. You must use at least one stencil (any brand) in your project. The Linky closes at the end of the month.

Yours,


Tuesday, December 6, 2016

Hold on to your Dreams Angel

Hi there,

we are starting a new Mixed Media Challenge over at Happy Little Stampers and this time it's "anything goes":


  • cut out a tag from watercolor paper and cover it with gesso
  • cut out a distressed harlequin pattern from Grungepaper, glue parts of it to the tag with Multi Medium Matte and cover it with gesso as well
  • create a  background using Dylusions Paints (Polished Jade, Funky Fuchsia)
  • mix Dylusions Paint (Slate Grey) with Acrylic Glazing Liquid and cover the raised areas, let it sit for a minute and wipe some of it away with a baby wipe - repeat this process until you are happy with the result
  • add shadows with a black Stabilo All Pencil
  • use a sentiment from the Ideaology Small Talk Sticker set 
  • rub on some purple foil at random spots around the edges of the tag
  • dye a piece of seam binding with Distress Ink (Peacock Feathers) and thread it through the hole of the tag
  • stamp the angel from the Carabelle Studio An Angel to Love with Versafine (Smokey Gray) and color the image with Derwent Inktense Pencils and a damp brush
  • adhere the image with the help of foam tape

I hope you got inspired.

Yours,


Thursday, November 17, 2016

Merry Christmas Reindeer Tag

Hi there,

this year I have the great honor to be a Guest Designer for Loll's Twelve Tags of Christmas Event and this is my creation:


  • cut out a tag from watercolor paper and cover it with white gesso
  • create a background using Distress Paints (Mowed Lawn, Festive Berries, Iced Spruce)
  • stamp one of the Gingham patterns from the Waltzingmouse Stamps Gingham and Co. stamp set with Memento Luxe (Rich Cocoa) and cover the tag with clear embossing powder - otherwise the ink would take quite long to dry on the painted surface
  • paint around the ARTplorations Christmas Reindeer mask with Dylusions Paint (Melted Chocolate)
  • paint only a frame around that mask with Dylusions Paint (Ground Coffee) for a stronger contrast and let this color fade into the background
  • apply golden Texture Paste through the ARTplorations Oh my Stars! Mini stencil and let it dry thoroughly
  • ink up the edges with Versamark and heat-emboss them with WOW! Metallic Rich Gold embossing powder
  • stamp the script from the STAMPlorations Mixed Media Elements set with Delicata (Golden Glitz) for even more texture
  • cut out the CUTplorations Merry Christmas phrase die from golden glitter cardstock and brown foam rubber; adhere the pieces on top of each other and use Multi Medium Matte to glue the sentiment to the bottom of the tag
  • dye a piece of seam binding with matching Distress Inks (Mowed Lawn, Festive Berries) and thread it through the hole of the tag
  • add splatters with Finetec Mica Watercolors (Inca Gold) as finishing touch

I hope you got inspired.

Yours,


Tuesday, November 15, 2016

Hello Cute Cat

Hi there,

I would like to show you this project using a super adorable cat Digital Stamp from Gerda Steiner Designs:

  • color the Gerda Steiner Designs Cat with Sign image with Delta and Touch Twin Brush Markers
  • create the Hello sentiment with the help of a Dymo Label Maker
  • adhere the cat to a piece of patterned paper from the Pebbles Special Delievery Boy 6x6 paper pad
  • round the right corners with a 1'' corner rounder and die cut a line of tiny hearts from the left side
  • cut a stitched panel from watercolor paper and cover it with white gesso
  • apply Prima Markerting Light Paste through the ARTplorations Retro Circles stencil and let it dry thoroughly
  • add color using Dylusions Ink Sprays (London Blue, Vibrant Turquoise)
  • spritz the backgroud with Pearlized Water for extra shimmer

Thanks for stopping by.

Yours,


Thursday, November 3, 2016

Kiss the Frog Tag

Hi there,

I have some fantastic news for you - from this month on I am joining the Stamping-Fairies Design Team and this is my first project:

  • stamp the adorable Whipper Snapper Designs A Kiss for Prince with Memento (Tuxedo Black) and color the image with Delta and Touch Twin Brush Markers
  • add highlights with a white gel pen
  • cut a tag from sturdy white cardstock and cover it with white gesso
  • glue down some left-over grungepaper diecuts with gel medium and apply three coats of white gesso on top
  • add some color with Dylusions Paints (Bubblegum Pink, Squeezed Orange)
  • mix some Distress Paint (Black Soot) with Acrylic Glazing Liquid and paint it over the raised areas, let it sit for a moment and wipe it away with a baby wipe - repeat the process until you are happy with the result
  • adhere the frog with gel medium and add a shadow around him with the Stabilo All Pencil
  • apply some Versamarker to the bottom left corner of the little squares and heat-emboss them with WOW! Metallic Gold Rich Super Fine embossing powder
  • sprinkle on some additional golden embossing powder in random spots and heat-set them as well - start heating the tag from underneath in order to keep the embossing powder on your tag and not everywhere in your craft room 
  • dye a piece of seam binding with Distress Inks (Wild Honey, Picked Raspberry) and thread it through the hole of the tag
  • add the sentiment from the Tim Holtz Ideaology Big Chat sticker set and doodle around the edges with a pink and black marker

Here is a close-up of the cute little frog:


Thanks for stopping by.

Yours,